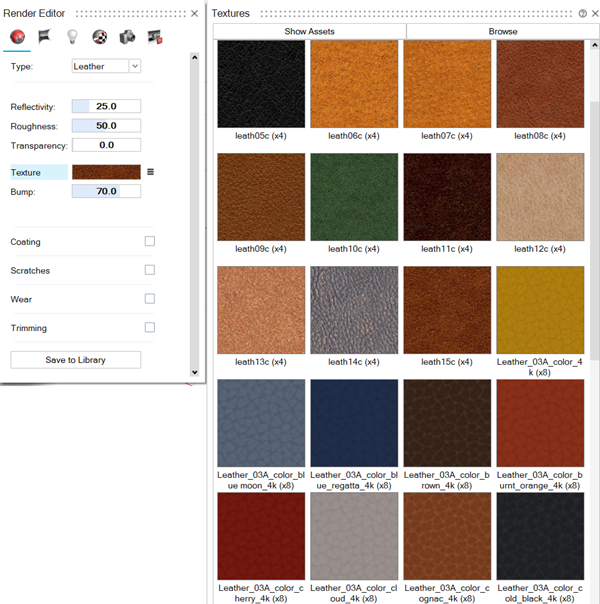
Edit and Position the Material's Texture
After you apply a material with a texture to one or more objects, you can edit, scale, and position the texture.
-
Next to Texture, select the texture preview image.
The Textures dialog box is displayed.
-
Edit, reposition, or scale the texture.
To Do this Colorize the texture - Next to the texture preview image, select
 .
. - From the context menu, select Colorize
Texture.
The Color dialog box is displayed.
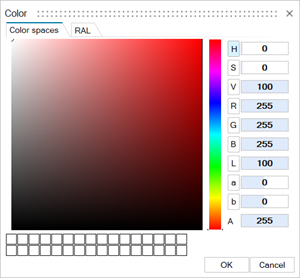
- Choose the color you would like to apply to the material, then click OK.
Adjust the texture's parameters - Next to the texture preview image, select .
- From the context menu, select Edit
Image.
A dialog box is displayed, with texture parameters.

-
Adjust the following parameters:
- Invert: Invert all the colors of the texture to their complementary colors.
-
- Gamma
- Default value: 2.2. Lower values will make the image darker while higher values will give a washed-out look.
- Saturation: Use a value from -100% to 100%.
-
- Brightness
- Use a value from ‐100% to 100% to control the tone of the texture. A brightness of ‐100% makes the image completely black.
-
- Contrast
- Higher values will give higher contrast.
- Clamp min (%) and Clamp max (%): Specify the minimum and maximum clamp of the selected texture. RGB colors normally range from 0 to 255. By setting, for example, the minimum clamp to 20%, the colors with RGB values less than around 51 will be “cut” and get this value. By increasing minimum clamp percentage, the image turns whiter, while decreasing the maximum clamp percentage results in darker image colors. By decreasing the maximum percentage and increasing the minimum at the same time, textures tend to appear grayer, as gray colors has RGV values around the middle of the 256 colors (128, 128, 128).
Remove the current texture - Next to the texture preview image, select .
- From the context menu, select Remove.
Open the texture library - Next to the texture preview image, select .
- From the context menu, select Library.
Scale the texture - Next to the texture preview image, select .
- From the context menu, select Position
Texture.
The Control Panel is displayed.
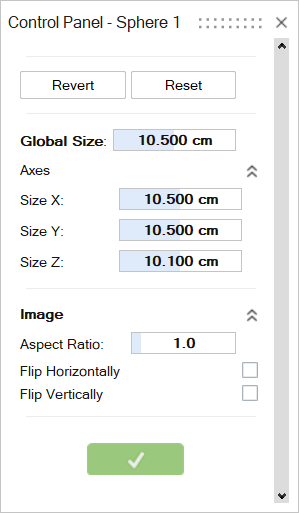
- Enter values for the following:
- Global Size
- Size X
- Size Y
- Size Z
Define the aspect ratio - Next to the texture preview image, select .
- From the context menu, select Position
Texture.
The Control Panel is displayed.
- Enter the Aspect Ratio.
Position the texture - Next to the texture preview image, select .
- From the context menu, select Position
Texture.
The Control Panel is displayed.
- Turn on Flip Horizontally or
Flip Vertically.
You can also position the texture using the manipulator that appears in the modeling window when you open the texture positioning settings.
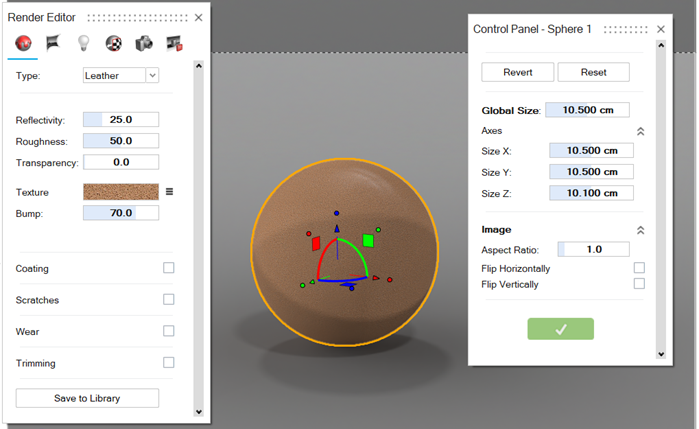
- Drag the handles of the manipulator to move the texture to the optimal position. Any settings you adjust using the manipulator are reflected in the corresponding Control Panel values.
- Click the green check mark in the Control Panel to apply your edits.
Revert the texture to undo the last edit - Next to the texture preview image, select .
- From the context menu, select Position Texture.
- The Control Panel is displayed.
- Click the Revert button.
Reset the texture to the default settings - Next to the texture preview image, select .
- From the context menu, select Position Texture.
- The Control Panel is displayed.
- Click the Reset button.
- Next to the texture preview image, select