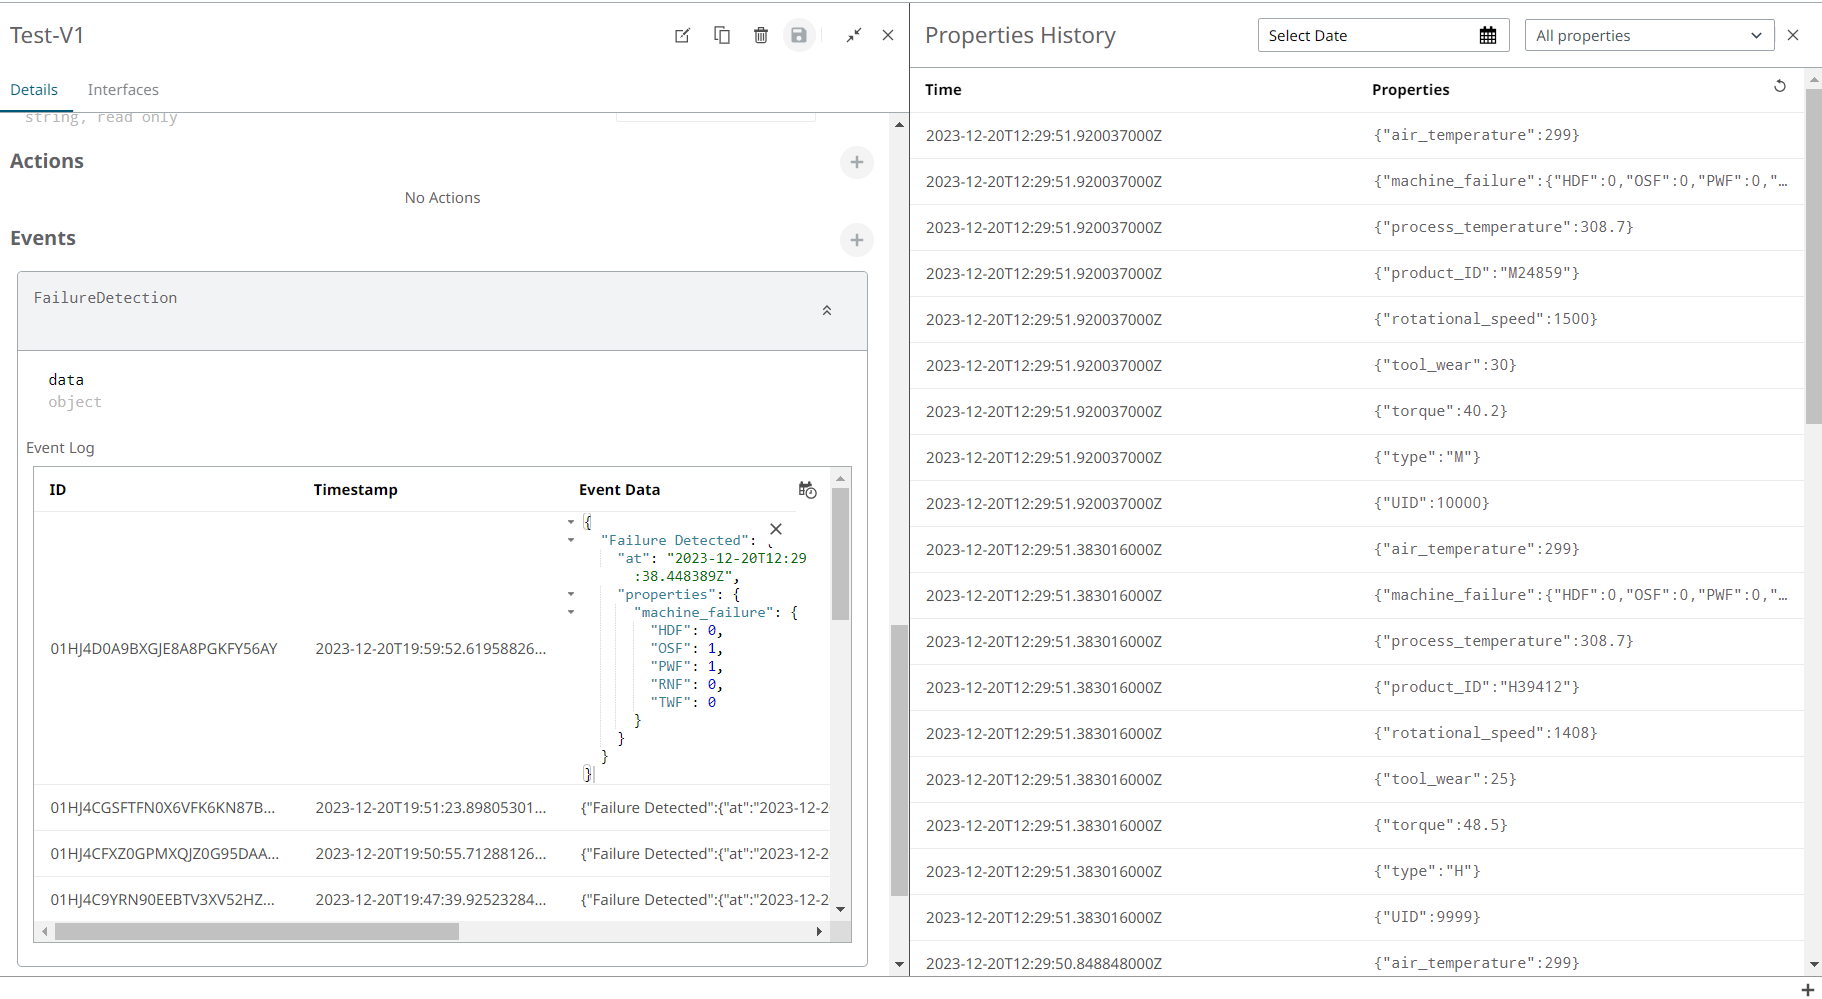
Use Events to Store Failure Data
Events main function is to monitor the changes that cause a change in a Thing's property by providing a log of all these changes emitted from the real-world entity.
To process the data you are sending from the machine and store its failure’s values to investigate later the reasons why a failure was detected, you can easily add some logic in Functions and store it in Events.
Add an Event to a Thing
Create an Event to store the failures data.
-
In the Overview panel of a Thing, click the plus icon next to Events.
The New Event dialog opens.
- Enter the Event Key value- FailureDetection - and choose object as the event data type.
- Click Create.
Create a New Function
- Under User Functions, click Functions.
- Click New Function.
- Enter the Function's name and description (optional).
- From the Template drop-down menu, choose Python.
-
Add the following code:
import json
from iots import API

space = "YourSpaceID"
thing_uid = "YourThingUID"

my_client_id = "EnterThingClientID"
my_client_secret = "EnterThingClientSecret"
my_scopes = ["thing.read","thing.create","thing.update"]

def handle(req):

  body = req.body.decode("utf-8")
  body = json.loads(body)

  with API().set_credentials(my_client_id, my_client_secret, my_scopes) as api:
    data = {
      "FailureDetection":{
        "data":{
          "Failure Detected":body
          }
        }
      }

    if any(value == 1 for value in body["properties"]["machine_failure"].values()):
      update_event = api.spaces(space).things(thing_uid").events("FailureDetection").create(data)

return {
"status_code": 200,
"body": "Done"
}
-
Make sure to edit the following variables with your values:
space | thing_uid | my_client_id |
                            my_client_secret
- Under Event Trigger, you can define the Event or Action that will initiate the execution of the function.
-
Click + Add Topic to define the MQTT endpoint that will
invoke the Function every time a new property value is received in the
thing.
Note: Customize your topic with your SpaceID and Thing UID.
spaces/EnterValue/things/EnterValue/properties-history/# - Click Save to start building your Function.
Create an MQTT Trigger
Once we have built our function, we need to define a Trigger. A Trigger is a component that is capable of invoking serverless Functions from an event source as they work as listeners to a particular endpoint for capturing messages and redirecting them to the corresponding Functions.
In this example, our Trigger will be listening to the MQTT topic to be aware of any incoming messages from the properties-history of our Thing.
- Click .
- Click New Trigger.
- In the New Event Trigger panel, enter the Trigger description (optional) and choose MQTT as type.
-
Under Config, enter the host as:
mqtt.swx.altairone.com -
Enter your MQTT username and password as it is in the Thing
Interfaces tab. Click Create Credentials
if it is the first time retrieving them.
Figure 1. 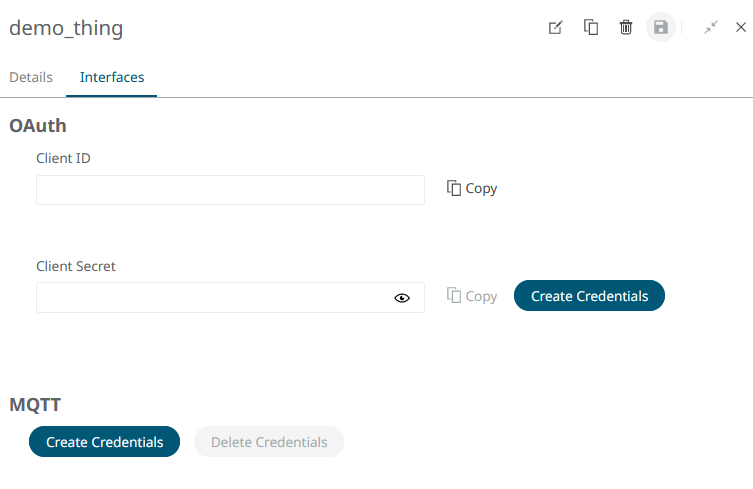
-
Under Add Topic, enter the topic endpoint, the same as the
one we defined in the Function.
Note: Customize your topic with your SpaceID and Thing UID:
spaces/EnterValue/things/EnterValue/properties-history/#Figure 2. 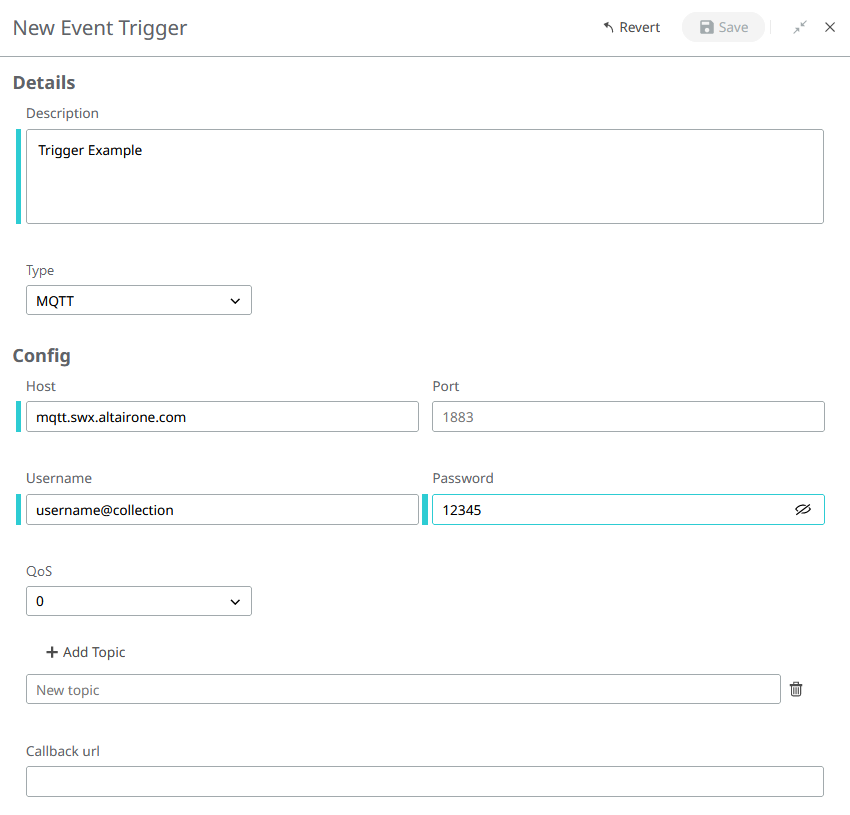
-
Click Save.
The Trigger status will change to
Running.
Test the Complete Project