Learn about the ribbon, opening and importing files, view controls, showing or hiding
objects, and setting up assets.
In this lesson you will learn about:
The ribbon
Opening and importing files
View controls
Showing and hiding objects
Setting up assets
Explore the Ribbon
Start Inspire Render.
The ribbon across the top of the application displays all of the tools
available in Inspire Render. Click on the tabs at the top of the
ribbon to switch between the various menus and ribbons. The name of the active
ribbon has a blue underline.
Some icons in ribbons such as Sketching provide access to one or more tools. As
you mouse over an icon, the individual tools glow with a blue border.
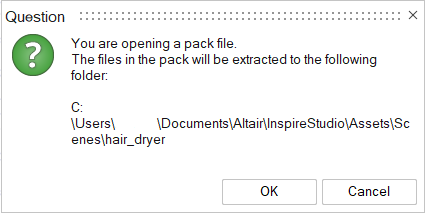
Open the Hair Dryer Model
Click Open Model on the Files
icon.
In the Open File window, browse to your personal assets
folder.
Note: During installation, you are prompted to choose a location for your
personal assets folder. The default location of this folder on Windows is
here:
Select the Hair dryer.iStudiopack file from the
Scenes directory.
Click Open and follow the prompts to extract the pack
files.
Use the View Controls
Pan the model using the right mouse button while
dragging the mouse.
Zoom in or out using the scroll wheel or Ctrl
+ Shift + right mouse button while dragging the mouse.
To rotate the model, use the middle mouse button while
dragging the mouse. This will rotate the model around the mouse pointer.
To do a turntable rotation, use Shift + right mouse
button while dragging the mouse. This is useful when your
model's vertical direction is aligned with the z-axis.
Press F to fit all visible objects in the scene.
Show and Hide Objects
Using Keyboard Shortcuts
To hide an object, select the part in the modeling view and press
H on the keyboard. The selected object when
hidden is drawn in transparent mode. With the object still selected, the
H key works as a toggle.
Using the Model Browser
To hide an object, select the part in the modeling views and press
H on the keyboard. The selected object when
hidden is drawn in transparent mode. With the object still selected, the
H key works as a toggle.
Using the Show/Hide Tool
Click the Show/Hide icon in the lower left corner of the modeling
window. The objects turn transparent as you select them and are grayed out
in the Model Browser.
Right-click to exit.
To see all hidden objects, select the Show/Hide
icon, hold Shift and click the transparent objects.
Right-click to exit.
Setting Up Assets
Set the Assets Folder From the Prompt
If the path to the assets is not set or is set
incorrectly, you may see the following prompt on first launch of Inspire Render.
You should select Use default. If you would like to
use assets from older versions of Inspire Render, follow the steps
below.
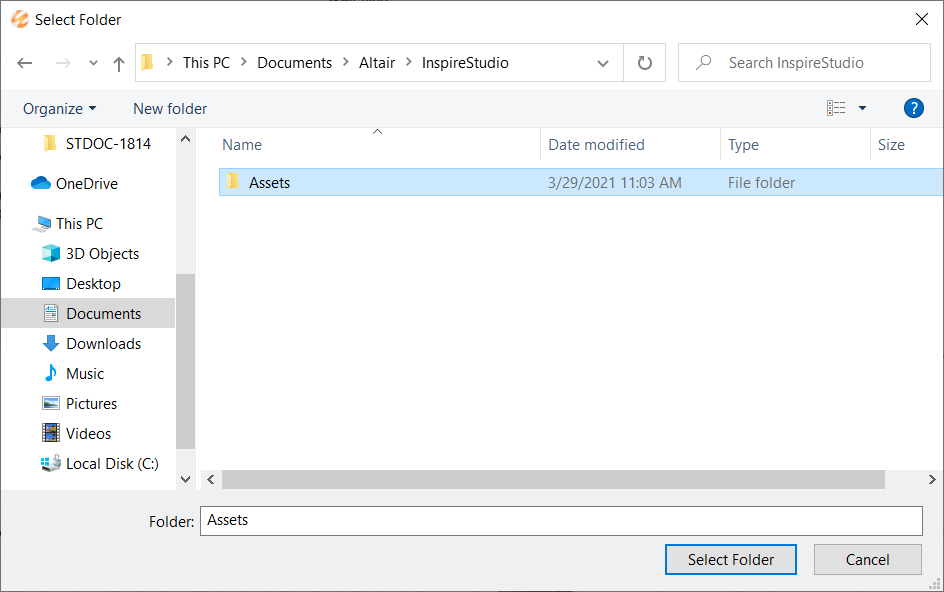
Click Browse.
Browse to an older installation of the application under
C:\Program Files\Altair\.
Select an installation that contains the assets folder.
For example: C:\Users\yourusername\Documents\Altair\Inspire Render\Assets
Select the Assets folder.
Click Select Folder.
Set the Assets Folder from the Preferences
On the File menu, click the
Preferences button.
Click Common Folders.
Click the Value of the Assets
folder.
Browse to the correct location and select the folder.


 icon in the lower left corner of the modeling
window. The objects turn transparent as you select them and are grayed out
in the Model Browser.
icon in the lower left corner of the modeling
window. The objects turn transparent as you select them and are grayed out
in the Model Browser.