
Molding Window
Use the Molding Window to calculate the optimal Mold Temperature, Melt Temperature, and Fill Time for the model.
Location: Molding ribbon

The Molding Window tool analyzes your model and shows optimal temperatures for the mold and material as well as optimal fill time for the molding process. You can adjust one parameter at a time to see how different settings in that parameter affect the optimal settings for the other parameters.
Optimize Parameters
Use the Molding Window tool to find an optimal combination of mold temperature, melt temperature, and fill time for your model.
-
Click the Molding Window icon.
The Calculating Molding Window window appears.
This operation may take several seconds, depending on the complexity of your model. Then, the Molding Window opens.
-
The green area of the graph shows preferred settings for your part.
- If there are no preferred settings visible, adjust the slider until a set of preferred settings appears.
- Use the dropdown menu above the slider to select between mold temperature, melt temperature, and fill time for the adjustable parameter.
-
Click in the green area of the graph to capture a set of preferred settings for
mold temperature, melt temperature and fill time. Click the Update
initial values button to save the values for an analysis.
Note: If you change the model and wish to see the preferred settings for the new changes, you will need to use the Relaunch button to run the analysis again. Use the Run Name menu to display the results from different analyses.
Configure Molding Window
Use the Configure Molding Window tool to customize the minimum and maximum values for mold temperature, melt temperature, and fill time for your model.
-
Click the Configure Molding Window satellite icon.

The Configure Molding Window dialog appears.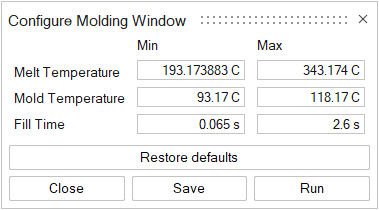
-
Use the fields to adjust the range of settings available in the molding
window.
Note: Changes to these fields change the range of settings available in the molding window only; they do not change the settings for an analysis.
-
Click Run to run a new molding window analysis with the
new range of settings in the molding window.