Slip table
Slip distribution = Table
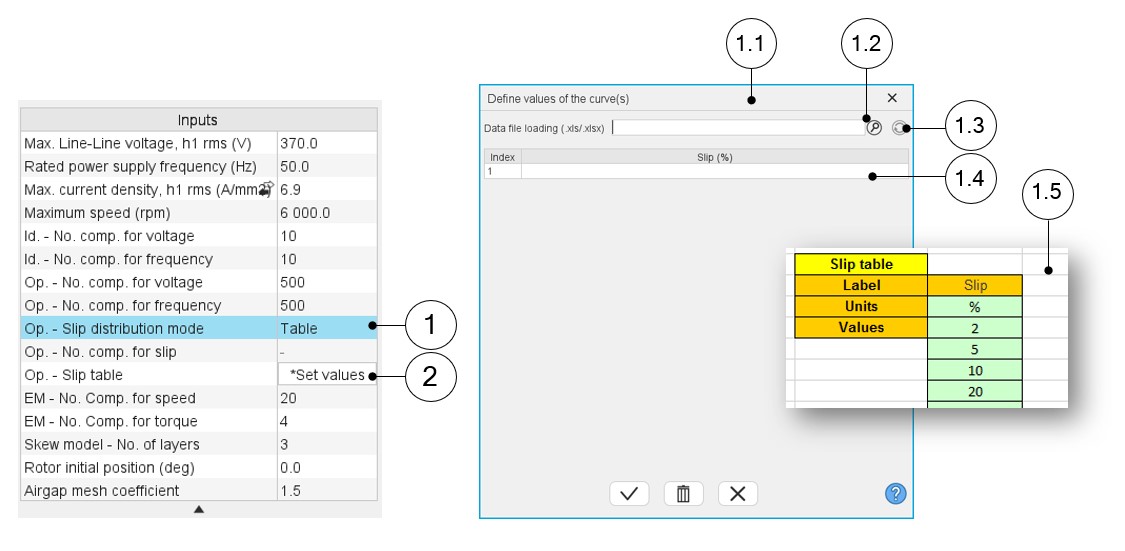
When “Table” is selected, the list of slips to be considered must be defined by using the field: “Slip table” and then clicking on the button “Set values”.
Two ways are possible to fill the table: either filling the table line by line or by importing an excel file, where all the slips to be considered are defined.
Note: The slips must be listed in ascending order.
 |
|
|---|---|
| 1 | Select the “Table” option. |
| 2 | Click the button “Set values” in the field “Slip table” to open a dialog box to define the list of slips to be considered. Refer to the next illustration which shows how to fill the Slip table. |
| 1.1 | Dialog box opened after clicked on the button “Set values” in the field “Slip table”. |
| 1.2 | Browse the folder to select an Excel file which is defined the list of slips. |
| 1.3 | Button to refresh the table data when the considered Excel file has been modified. |
| 1.4 | Fields to be filled with data to describe the slips to be considered. |
| 1.5 | Excel file template to define the list of slips. Excel template used to import a list of slips is stored in the folder Resource/Template in the installation folder of FluxMotor. |
Note:
- The slips must be listed in ascending order.
- We recommend to define at least 100 values to get an accuracy high enough, (especially since going below 100 does not lead to a significant reduction in computation time).