Running msolve in Different Environments#
This section provides step-by-step instructions for setting up and running msolve in PyCharm, Visual Studio Code and from the command prompt. Following these steps ensures that your environment is correctly configured so the API functions as expected. If the setup is incorrect, the API will not work, and errors may occur.
Running msolve in PyCharm#
You can create models and execute msolve simulations directly in PyCharm by following these steps.
Step 1: Create a New Project#
Open PyCharm and select File → New Project.
Choose a location for the project and select Virtualenv or Existing Interpreter (recommended).
If you select Virtualenv, PyCharm will prompt you to choose a Base Interpreter.
Important: Ensure that you select the Python interpreter from the Altair Installation, as only this version is supported.
(Optional) Configure additional Virtualenv settings:
Choose whether to store the virtual environment inside the project folder or in a separate location.
Decide whether to inherit global site-packages (recommended: leave unchecked for isolation).
Click Create to set up the project.
Note
If using the PyCharm terminal, the virtual environment should activate automatically. If not, you can activate it manually:
Windows:
venv\Scripts\activateLinux:
source venv/bin/activate
Step 2: Add msolve to the Project#
Open File → Settings → Project: <your_project> → Python Interpreter.
Ensure that the interpreter is correctly set to the Altair Installation (from Step 1).
Add msolve to the project:
Open File → Project Structure.
Under “Add Content Root”, select the directory where msolve is installed.
Click Apply and OK.
Verify that msolve is accessible:
Open the Python Console in PyCharm (View → Tool Windows → Python Console).
Run the following command:
import msolve
print(msolve.__version__)
If no error occurs, msolve is successfully added to the project.
If msolve is still not recognized:
Try restarting PyCharm (File → Invalidate Caches / Restart → Invalidate and Restart).
Ensure that the correct interpreter is selected in File → Settings → Python Interpreter.
Step 3: Create and Run a Script#
Right-click on the project folder and select New → Python File.
Name it, e.g., run_simulation.py.
Add a basic script:
import msolve

# Example: load a demo model
model = msolve.createDemoPendulum()
model.runSimulationEvents()
Right-click the script and select Run ‘run_simulation’ to execute it.
Running msolve in Visual Studio Code#
You can create models and run msolve (MotionSolve) simulations directly in Visual Studio Code. Follow these steps to set up Visual Studio Code for running MotionSolve via the msolve API.
Step 1: Install the Python Extension#
Open VS Code.
Go to Extensions (Ctrl+Shift+X).
Search for Python (provided by Microsoft) and install it.
Step 2: Select the Correct Python Interpreter#
Create a new Python file (e.g. test_pendulum.py).
Press F1, type Python: Select Interpreter, and press Enter.
Click Enter interpreter path….
Browse to the Python interpreter from your Altair Installation and select it.
Step 3: Add MotionSolve to PYTHONPATH#
Press Ctrl+, to open the Settings window.
In the search bar, type terminal.integrated.env.windows.
Click Edit in settings.json.
Add the following entry to set the PYTHONPATH to point to the msolve library:
{
  "terminal.integrated.env.windows": {
    "PYTHONPATH": "C:/Program Files/Altair/20XX/hwsolvers/motionsolve"
  }
}
Save the settings.json file.
Step 4: Enable Autocomplete and IntelliSense#
IntelliSense is a general term for code editing features that relate to code completion.
Press Ctrl+ to open the Settings window.
In the search bar, type python.analysis.extraPaths.
Click Add Item.
Add the msolve location C:/Program Files/Altair/20XX/hwsolvers/motionsolve and click OK.
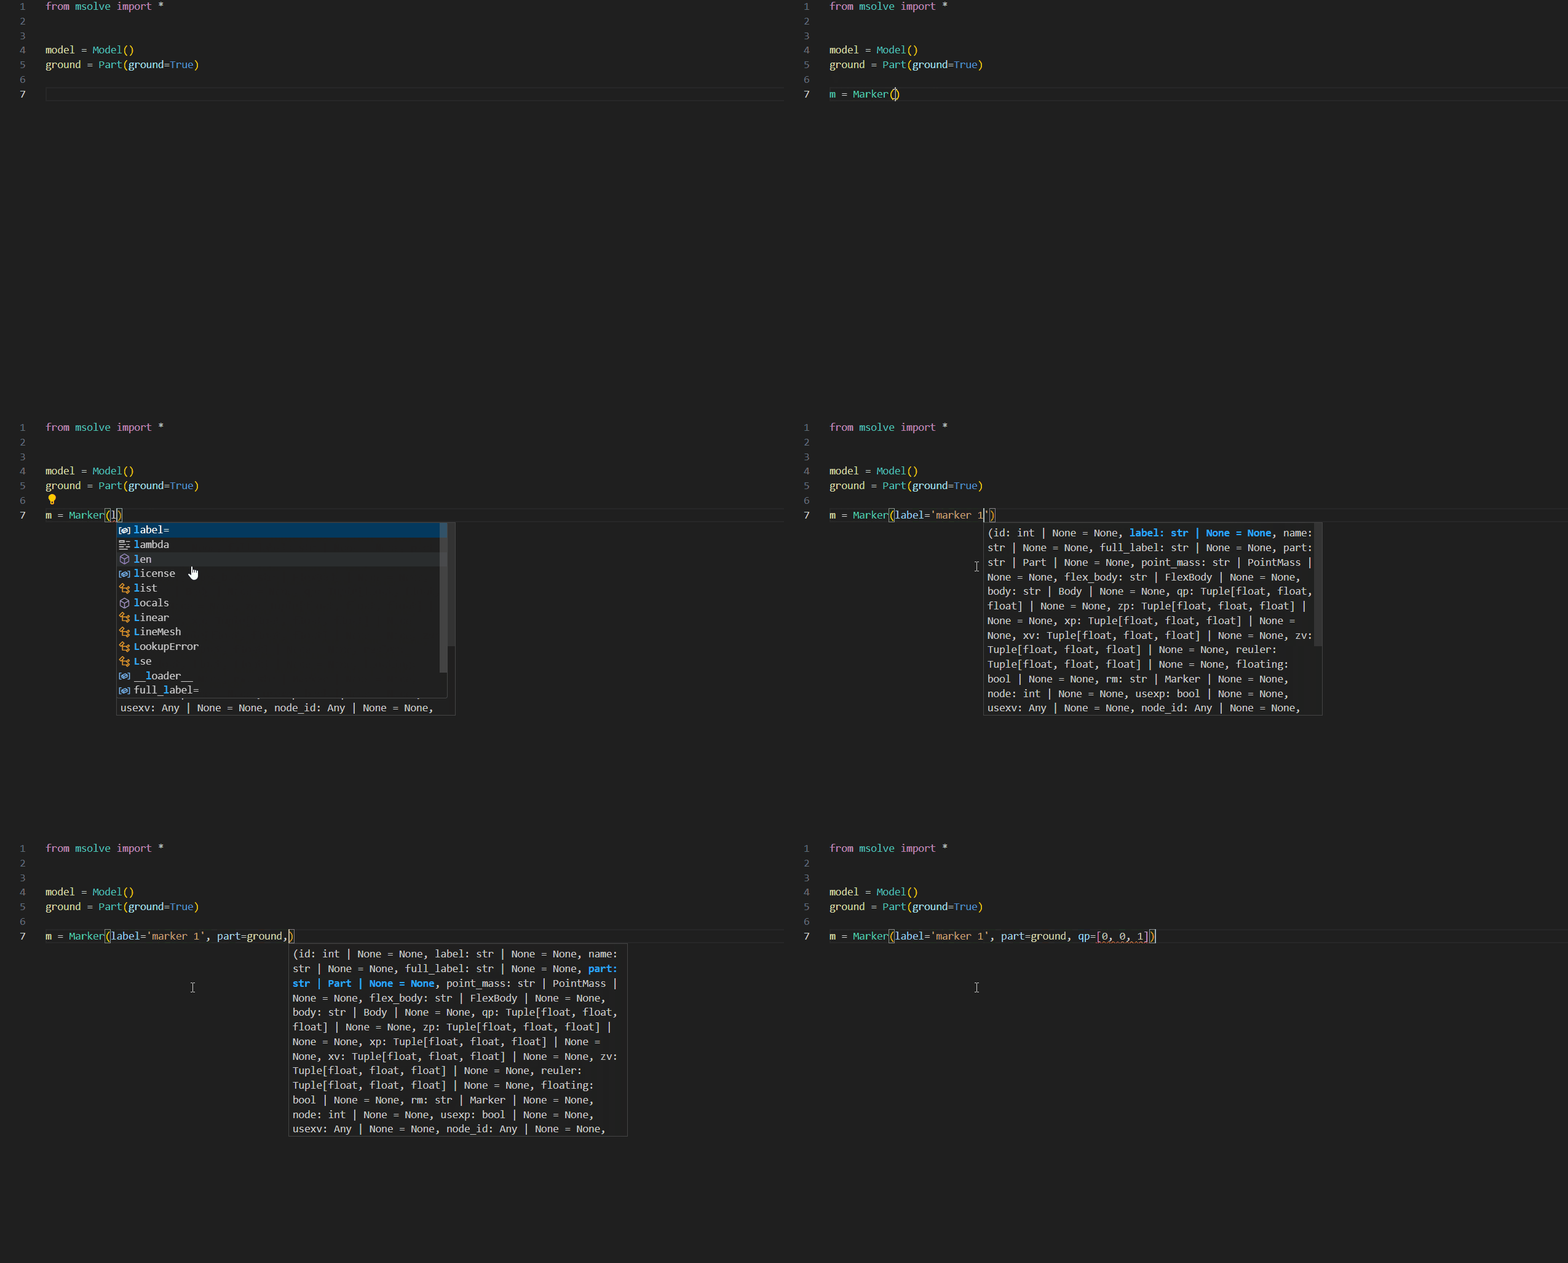
Pylance is the default language server for Python in VS Code, and is installed alongside the Python extension to provide IntelliSense features. These include autocomplete suggestions, information on which class attributes are optional, the return type of each class and more.

Step 5: Restart VS Code#
Close and reopen VS Code to apply the changes.
Step 6: Test the Setup#
There is a simple pendulum model in msolve that can be used to verify the setup. In the Python script (test_pendulum.py) add the following code:
from msolve import *

# Create a demo pendulum model
model = createDemoPendulum()

# Simulate the model for 1 second with a time step of 0.01s
model.simulate(end=1, dtout=1e-2)
Step 7: Run the Simulation#
Click the Run Python File icon (▶) in the top-right corner to execute the script.
Alternatively, open a terminal (Ctrl+`) and run:
python test_pendulum.py
Setting Up the Command Prompt#
To set up a command prompt and have access to the MotionSolve Python API (msolve), follow these steps:
Step 1: Ensure Python is installed#
Open a command prompt or terminal window.
Verify that Python is installed by running
pythonin the command prompt.If Python is not recognized, ensure the correct interpreter is set in your system path.
For compatibility with MotionSolve, use the Python interpreter included in the Altair installation:
C:\\Program Files\\Altair\\XXXX.XX\\common\\python\\python3.8\\win64
To add the Python interpreter to your system path, do this:
On Windows prepend the Python installation directory to your Path variable:
set Path=C:\\Program Files\\Altair\\XXXX.XX\\common\\python\\python3.8\\win64;C:\\Program Files\\Altair\\XXXX.XX\\common\\python\\python3.8\\win64\\Scripts;%Path%
On Linux add Python interpreter to the system PATH:
export PATH="<location of Python interpreter>:$PATH"
In addition to defining the path to the Python interpreter you also need to add the msolve location to PYTHONPATH:
On Windows:
set PYTHONPATH=C:\\Program Files\\Altair\\XXXX.XX\\hwsolvers\\motionsolve
On Linux
export PYTHONPATH="<location of folder containing msolve>"
Step 2: Test the Installation#
Start a Python REPL interactive session by opening a command prompt and type python. Copy the following commands and paste then in the REPL command prompt:
from msolve import *
model = createDemoPendulum()
model.runSimulationEvents()
plot(x="part_displ.X", y="part_displ.Y")
If these commands execute successfully, your MotionSolve Python API is correctly configured in the command prompt.
Final Notes#
Ensure that MotionSolve is correctly installed and accessible from your Python environment.
The PYTHONPATH setting ensures the Python interpreter is able to import the msolve library correctly.
This setup will allow you to efficiently develop models and run msolve simulations in PyCharm, Visual Studio Code or command prompt.