HL-V: 0020 Variable Amplitude Strain-Life Analysis
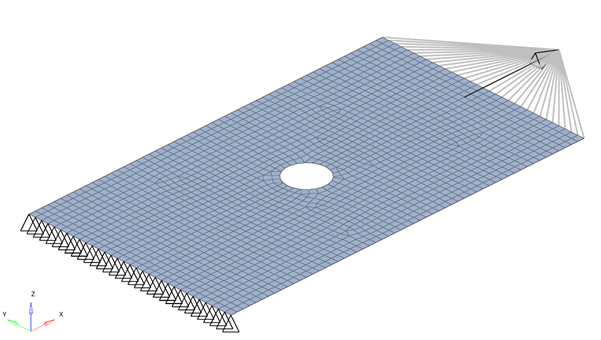
A notched plate subjected to variable stress time history.

Model Files
Benchmark Model
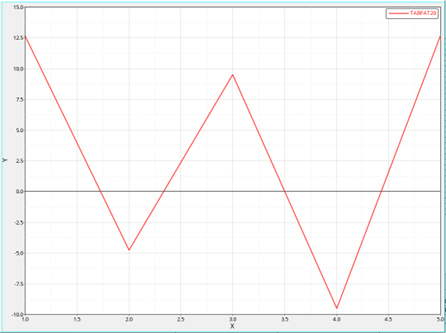
The model is a test specimen of thickness 6.0 mm, width 16.0 mm and center hole of diameter 3.0 mm. The notched plate is subjected to variable stress time history (Load of 1N and scaled with a load history profile shown below) and is assumed to follow elastic behaviour. The model was meshed with first-order shell elements and the loading is applied to RBE3 element. The Absolute Max principal combined stress was used.
| Properties | Value |
|---|---|
| Youngs Modulus, E | 207000 Mpa |
| Poisson’s Ratio, nu | 0.29 |
| Ultimate Strength, Su | 320 MPa |
| Cyclic Strength Coefficient, K’, | 1240 MPa |
| Cyclic strain hardening exponent , n’ | 0.27 |
| Fatigue Strength Coefficient, |
886 MPa |
| Fatigue Strength Exponent, b | -0.14 |
| Fatigue Ductility Coefficient, |
0.28 |
| Fatigue Ductility Exponent, c | -0.5 |
Load History Profile

| Time | Scale |
|---|---|
| 0 | 12.68 |
| 1 | -4.755 |
| 2 | 9.51 |
| 3 | -9.51 |
| 4 | 12.68 |
Load points are further scaled by 1000 within the fatigue event.
All the modifying factors (Surface Roughness and Fatigue Strength Reduction factor) are set to 1.0.
Results
| Result | Reference | HyperLife |
|---|---|---|
| Total Damage | 3.83e-5 | 3.828e-5 |
| Result | Path | Strain Amplitude | Max Stress | Damage |
|---|---|---|---|---|
| HyperLife | 2-3 (Cycle 1) | 0.106348e-2 | 166.824 | 0.526742e-5 |
| Reference | 2-3 | 0.10635e-2 | 166.9 | 0.528e-5 |
| HyperLife | 1-4 (Cycle 2) | 0.194512e-2 | 208.150 | 0.330117e-4 |
| Reference | 1-4 | 0.1945e-2 | 208.2 | 0.330e-4 |
Reference
Example 5.7: Fatigue testing and Analysis - Theory and Practice written by Yung-Li Lee et. al.