Create a New library
Create a new library
 |
|
| How to create a new library? | |
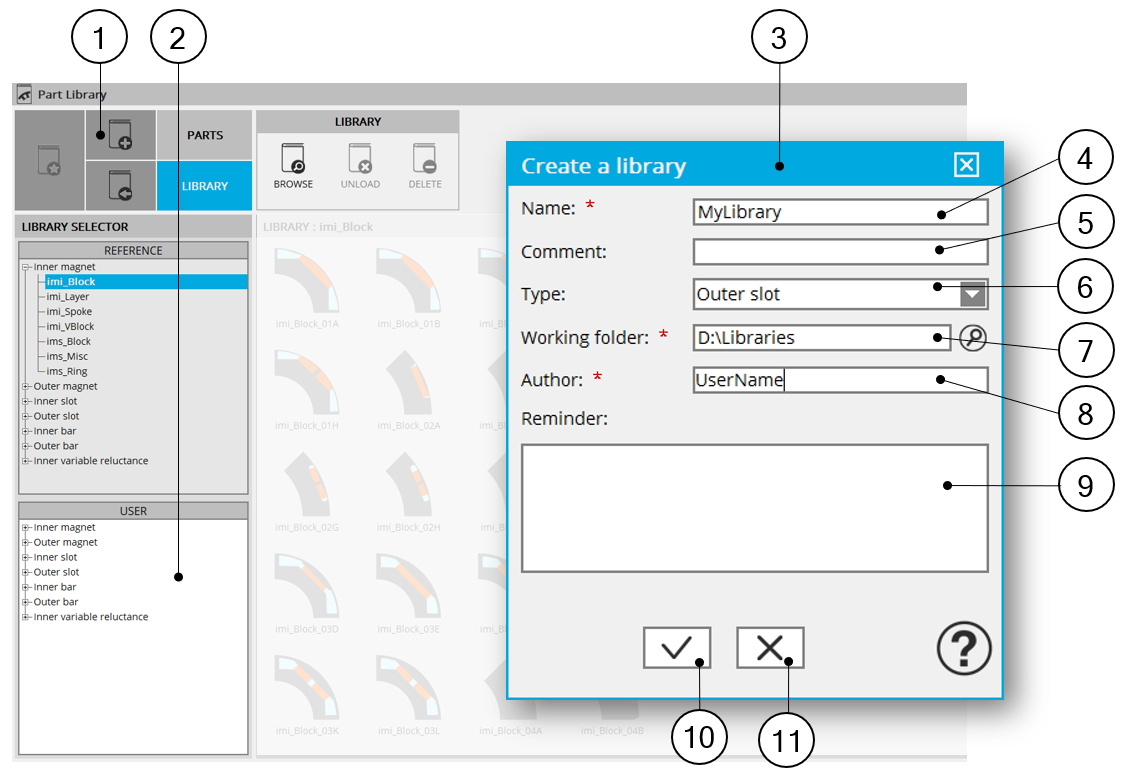
| 1 | Click on the button “create a new library” (Shortcut Ctrl - L). |
| 2 | The new library is stored as a user’s library (either a magnet library, a slot library or a bar library). |
| 3 | Clicking on the button “Create a new library” opens a dedicated dialog box. |
| 4 | A library is defined by a name (MyLibrary in our example). |
| 5 | A comment can be added (it will be the tooltip of the created library). |
| 6 | With the current version of Altair® FluxMotor®, different kinds of libraries can be created like “Inner Magnet”, “Outer slot”, “Inner bar” libraries |
| 7 | Select the folder in which you want to store the new library (D:\Library_Slot in our example). |
| 8 | Set the author of this new library. |
| 9 | A reminder allows you to keep important notes to know what was considered for the new library. |
| 10 | Button to apply inputs, create the new library and close the dialog box. |
| 11 | Button to close the dialog box and to cancel the creation of the library. |
Note: Once created, the library “MyLibrary” corresponds to a folder
where the name is “MyLibrary” in which are stored the parts. The library folder
“MyLibrary” is stored in a parent folder, Library_Slot for example. Here is the
corresponding path: D:\Library_Slot\MyLibrary.
Note: The “Parts” are stored in the library folder (folder
"Parts").All the data corresponding to a part, like the associated Excel file (see Part
Factory section), are stored in a specific folder. There are also the “Attachments”
(folder "Attachments") joined to the part by the user.