Trace Options Panel
This panel allows the user to configure the results that will be shown in the new trace.
- Simulation Results in this list, the user selects the type of the result to visualize. This list only includes the results according to the type of representation selected from the post-process window. For example, if the user selects the “table” option in the post-process window, the “Current Density” option for the simulation result will not appear because “Current Density” results only can only be visualized in diagram trace.
- Results Type in this list, the user selects a sub-type form the results selected on the previous list. This list only includes the sub-types of the results selected on the previous list, modifying it when the user changes the selected value on the “Simulation Results” list.
- Results Options this list is an auxiliary list that will be filled only if the results have other options (additional to the “Result Type” options). This list will be used, for example, for the “Near Field” results that have “Ex”, “Ey”,“Ez”,“ETotal”,“Hx”,“Hy”,“Hz” and“HTotal” as “Results Type” and “Scatter”, “Direct” and “Total” as “Result Options”.
- Project Options allows the user to select which project will take the results to load at that time to bring them into line results. The projects will be displayed in the list with the name of the project in question, accompanied by the nickname that will put the loaded result, for example, if the selected project is "Project002.nfp (_1)" and the result selected in "ETheta" when loaded in the result line will appear as "ETheta_2" .
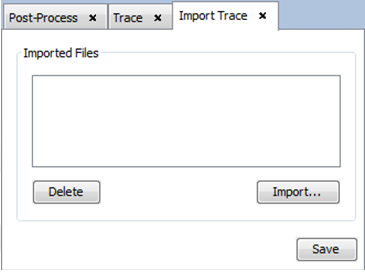
- “Import trace from project” button Allows the user to import the result that corresponds with a previous project having these same results. This button shows a window where the user needs to select the “.nfp” file(s) to import the results. Then, in the “Result Type” list, a new option appears including the name of the selected option with an added numeric value corresponding to each imported file.

- “Delete” remove the selected row for the file previously imported and close it from imported projects.
- “Import” import the results from a selected file and open the project to used its results.
- “Save” load the changes into "Trace Window" to actualise the enable imported projects.