Scale up an appliance by adding more hardware configurations.
Launch NavOps.
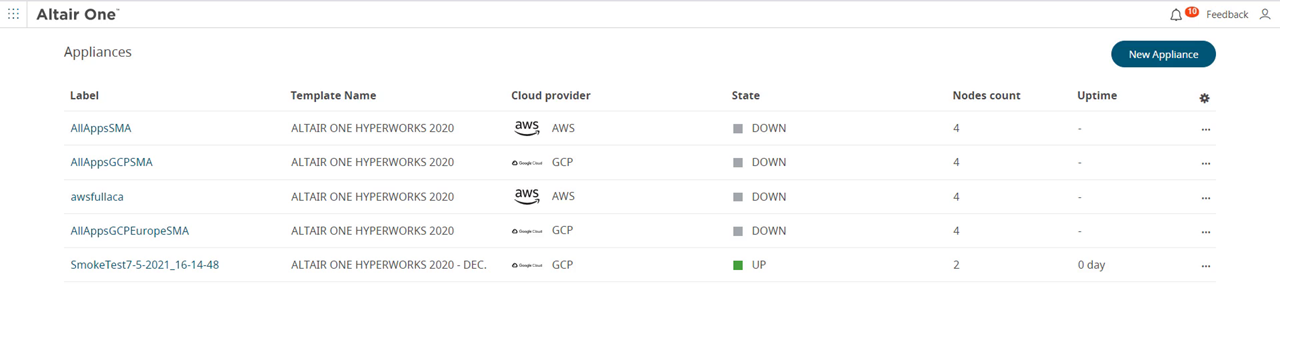
The list of appliances is displayed. Figure 1. Appliances
The list displays the Appliance Name, Model Name that is selected for
this appliance, Cloud Provider of the appliance, Appliance State, Nodes
Count and Uptime (number of days the appliance is up and running).
Note: Click to change the column list that is
displayed.
Click the appliance name from the Appliances list.
The Cloud tab displays the appliance details. Additionally, you
can view the owner name and number of Altair units checked out in the
bottom-left corner. You can also, set an end date for the appliance using
Edit. Figure 2. Appliance Details
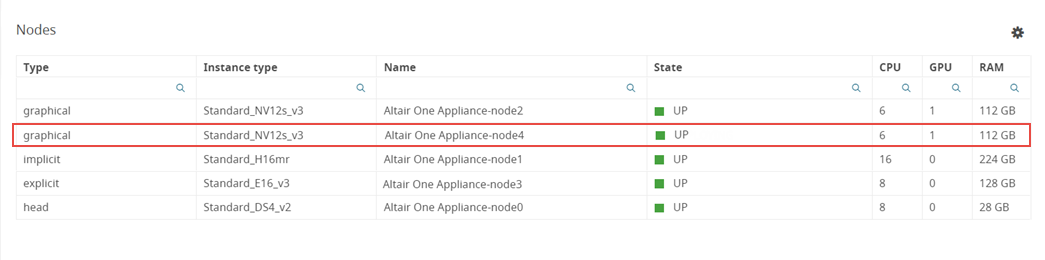
The Nodes table displays the node type, instance type, node
name, node status, CPU, GPU and RAM. Review this table information before
you scale up.
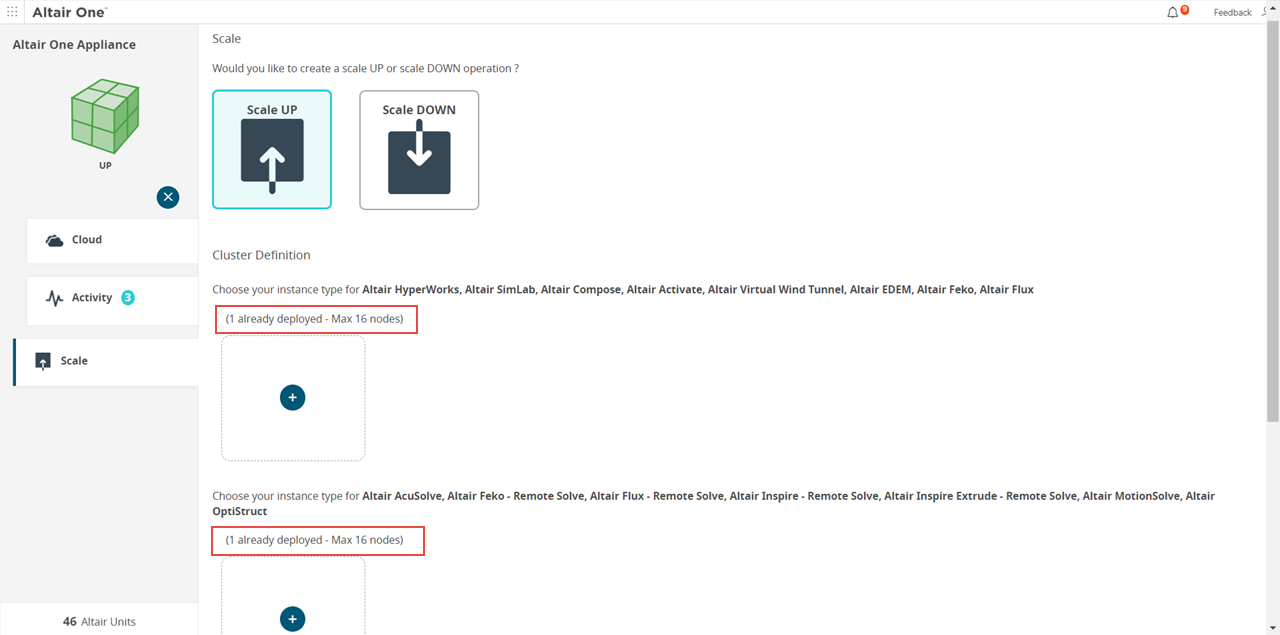
Click Scale in the left pane.
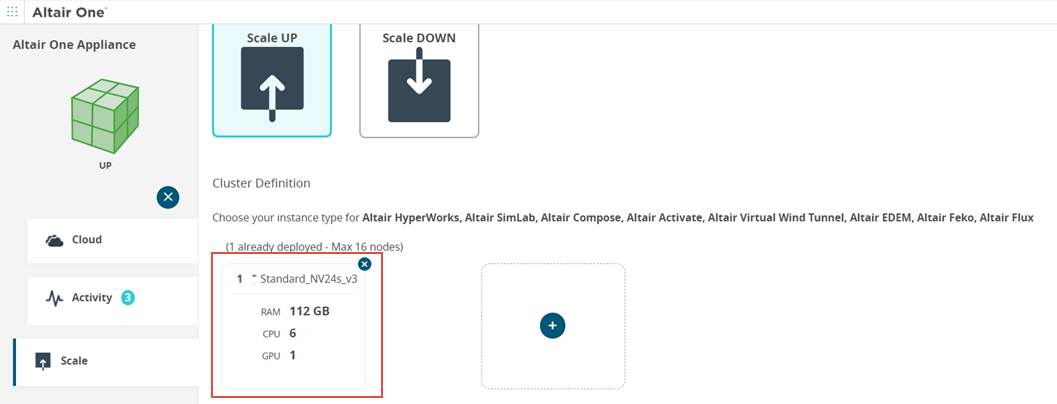
Scale UP is selected by default and the number of deployed nodes is
displayed. Figure 3. Scale UP
Click to configure the cluster.
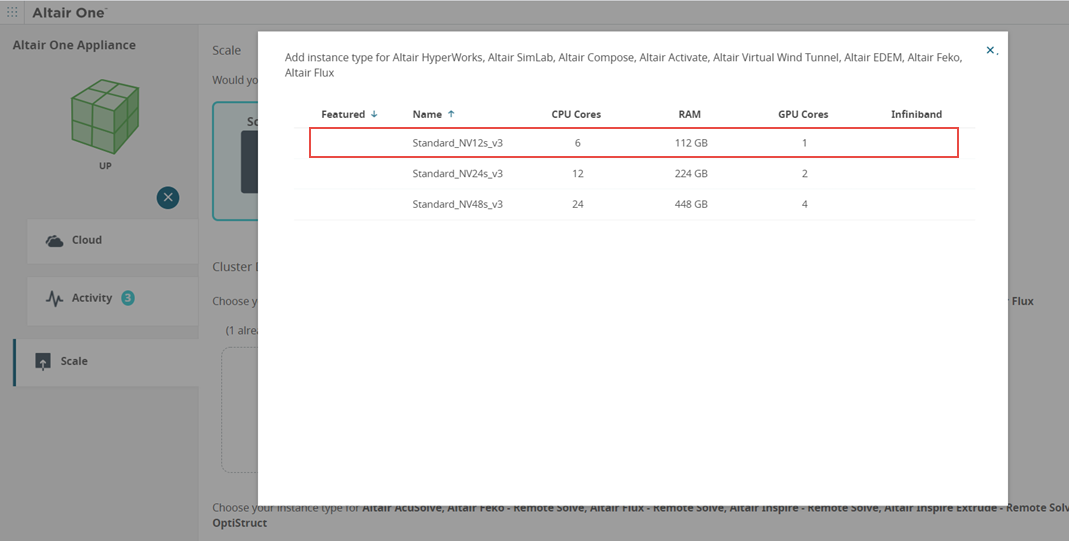
The list of instance types available in the cloud for the selected
application is displayed. Select the required instance.
Figure 4. Select Instance Type to Scale UP the Graphical Category
The selected instance is added. Figure 5. Selected Instance
Optional: Repeat the previous step to add more instances to the other clusters.
Click Deploy to scale up the appliance.
A confirmation message to deploy the selected instance is displayed.
Figure 6. Deploy
Click Yes.
The added instances will be deployed.
The
Activity tab displays the progress of the
deployment.
The Cloud tab displays the status
of the deployment.
Figure 7. Cloud Tab displaying the deployment status
Once the additional instance is deployed, the nodes list is
updated. Figure 8. Additional Node is UP
 to change the column list that is
displayed.
to change the column list that is
displayed.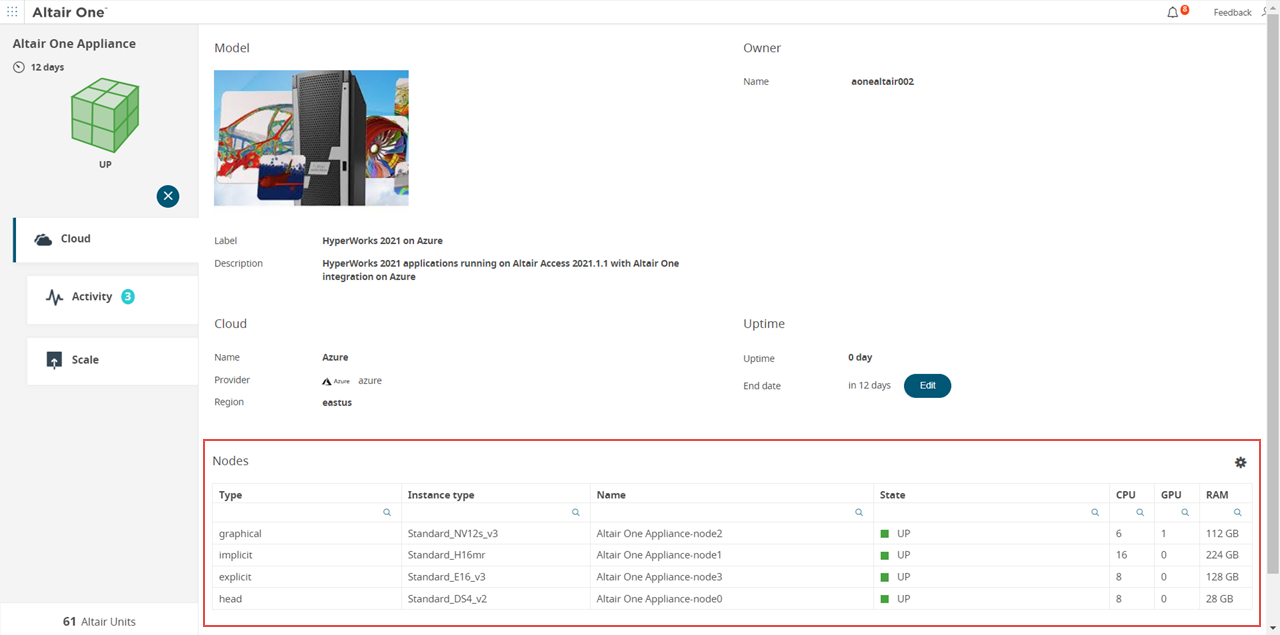
 to configure the cluster.