Transposing Columns
Transpose allows you to transform a table so you may view each row on a vertical instead of horizontal axis.
The values of the first column become column headers and the row associated with each value are displayed below each new column.
As an example, consider the following table:

When you transpose on the first column, i.e. Department:
-
Each Department value becomes a column header
-
Each Employee row associated with the department becomes a column, and all row values are listed below each department.
The resulting transform will look like this:

The original column headers are transposed as row values of the first column and what used to be column values now become horizontal records.
You can also transpose and use generic column headers so that the original column headers become another column:

You can only transpose columns from the Prepare Window.
Steps:
-
In Prep Data, select the table you want to transform.
-
Select the table you want to transform.
-
Select Transform on the Monarch Data Prep Studio Toolbar.
-
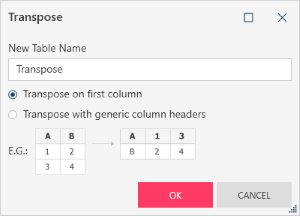
Select Transpose to display the Transpose dialog:
-
Select one of the following:
-
Transpose on first column
-
Tranpose with generic column headers.
-
Select OK when you are finished.
A dialog box allows you to select a transformation.

The new table is named Transpose. You can then rename the table as needed.


