This guide is designed to get you up and running with GateVision PRO. You will learn about
If you need help installing GateVision PRO or setting up the license, please read the Installation Manual.
GUI Overview
GateVision PRO’s user interface consists of a 'Menubar' and a 'Toolbar' on the top, two split Pane windows in the center, and a 'Console window'/'Statusbar' at the bottom.
The left Pane window has a Tab group including 'Tree' = design hierarchy tree, 'Mem' = notepad for remembering objects. The actual design data is displayed on the right side. The Tab group provides a 'Schem' = schematics view, 'Cone' = incremental navigation view and 'Source' = source code view tab.
Hovering the mouse pointer over a GUI element will display a 'Tooltip' briefly explaining the GUI element’s function.
Loading Design Data
GateVision PRO provides parsers for reading:
-
Structural Verilog netlists
-
EDIF netlists
-
LEF/DEF files
-
Liberty files
You can access the dialog to open files through the menu:
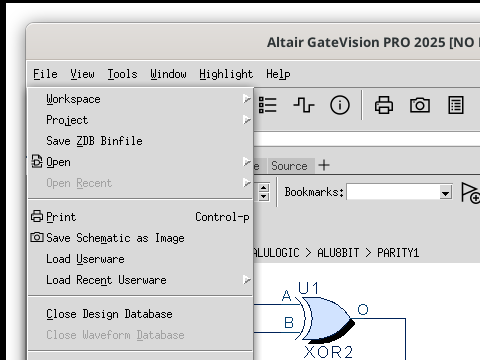
Or by using the corresponding open icon in the toolbar:
or this icon  to show the 'Open File' dialog.
Reading Files
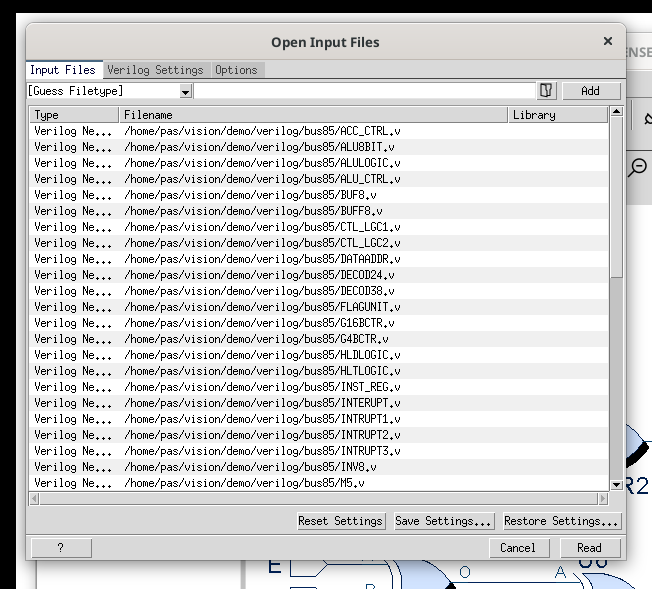
In the 'Read File(s)' dialog you can manually add your files or open a predefined fileset containing a list of your files.
Press the button:Read[] button to load the design.
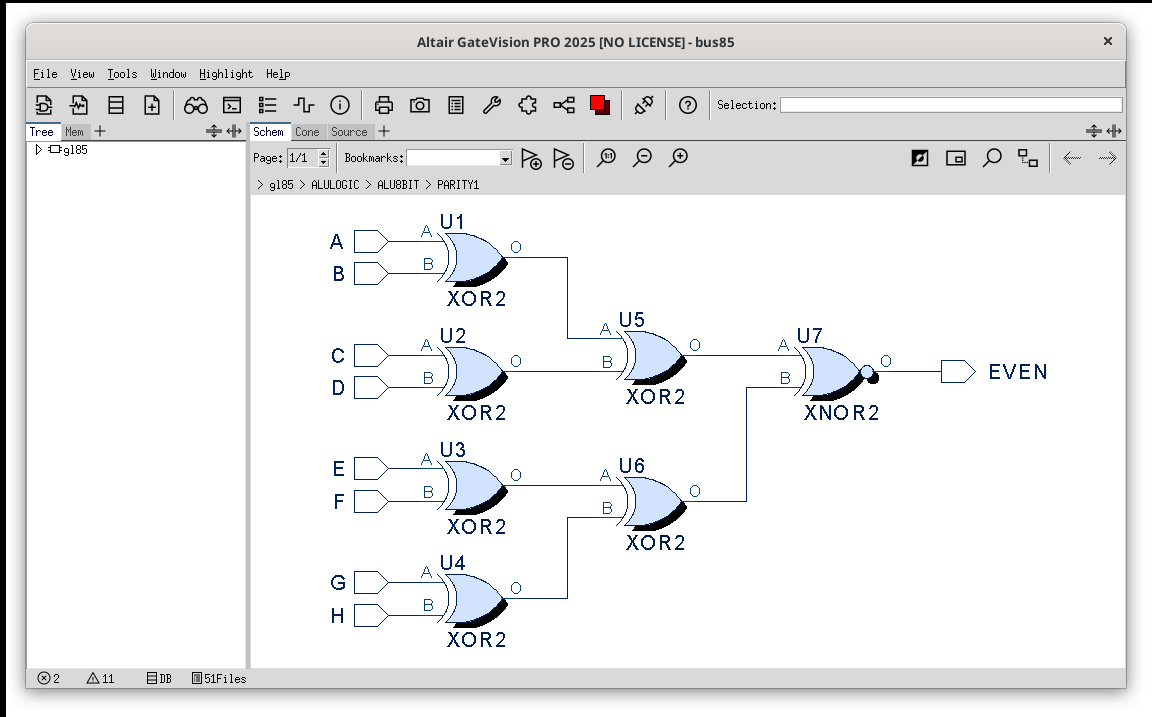
After the parser finished reading the design data the top-level circuit schematic will appear in the Schem window.
In the Tree window you can double-click on the nodes for hierarchical instances to display other levels of the circuit hierarchy.
The Key Features
Mouse Button Assignment
By default, Drag & Drop is performed with the left mouse button - you can switch to the right mouse button in the 'Preferences' dialog. The mouse strokes button is always the opposite of Drag & Drop.
Drag and Drop
The basic way of 'cross probing' between the different windows is Drag & Drop. Drag & Drop is supported by all windows of GateVision PRO.
Pick an object with the Drag & Drop mouse button (keep it pressed) and drag it to another window (then release the button).
While dragging, you can stop for a second on an inactive tab (keep the mouse button pressed while waiting) - the tab will activate, and you can continue the Drag & Drop operation to the desired target window and release the button at the desired position there.
The drop targets Schem and Source will scroll to and highlight the dropped objects.
The drop targets Mem and Cone will add the dropped objects to the display lists (and eventually highlight them).
Instead of dragging a single object, you can first select multiple objects (with Ctrl + left mouse click) and then start Drag & Drop on one of the selected objects.
The Context Menu
Perform a Right Mouse Click (no dragging) on a single object or a selection of multiple objects to open the Context Menu for the selected object(s).
The context menu’s upper part is static, while the entries in its lower part depend on the clicked window.
Navigate and Zoom in the Schem Window
A double-click on a block instance dives down one level of hierarchy, a double-click on a block instance pin additionally performs a goto to the lower-level IO port. A double-click on a IO port dives up to the corresponding block instance pin.
Press-drag-release actions with the opposite Drag&Drop mouse button (called strokes) perform a function depending on the stroke direction:
-
a stroke towards the top left dives up one level of hierarchy,
-
a stroke towards the top right reduces the zoom factor (zoom-out),
-
a stroke towards the bottom right defines a zoom-in rectangle, and
-
a stroke towards the bottom left performs a zoom-fit.
Alternatively, the shortcuts I, O and F (zoom-in/out/fit) - as well as menu entries in - do the same.
Incremental Schematic in the Cone Window
Use Drag & Drop to load objects (primitive or block instances) into the Cone window.
Then, you can e.g. follow a signal by incrementally extending the schematic by double-clicking on instance pins and nets (instances and nets are automatically added to the window). "Dashed" nets indicate that they are not completely loaded. A double-click on a dashed net loads one more connected instance. The net turns into solid style if it is complete.
To remove objects from the Cone window, select them and use (keyboard shortcut: Del). To remove everything and reinitialize the Cone window, use (keyboard shortcut: Ctrl+Del).
Customizing GateVision PRO
GateVision PRO provides a rich
API
to access the loaded design database and the
GUI
by using the Tcl/Tk scripting language.
The scripts are called Userware.
By using Userware you can customize GateVision PRO, e.g add customer specific new features, extend the GUI, or automate common tasks.
Userware scripts can be loaded at startup time (with the command line option -userware script.tcl), from the menu, or with the source command from the GUI’s Console window.
A lot of example scripts can be found in the demo/api directory of the GateVision PRO installation.
The
API Catalog
briefly explains the function of each script.
There are also a lot of comments in the scripts that describe each called API procedure.
To write your own Tcl/Tk Userware extensions, please refer to the API Tutorial for a step-by-step introduction on how to write scripts, and the API documentation for a detailed documentation of all API calls.
Tutorials and Documentation
For in-depth information about the features of GateVision PRO, please consult the documentation and the Users Manual.
For some common tasks, we offer special tutorials:
-
Use the Clock Domain Analyzer window.
-
Create and use your own symbol library.
-
Use the provided command line tools.
Visit our web page for several Demo Videos showing the basic features as well as advanced features.