Copying Models to a New Location
In the previous lesson, we converted text and XML models into binary formats. Now, we can copy these models to a new location.
-
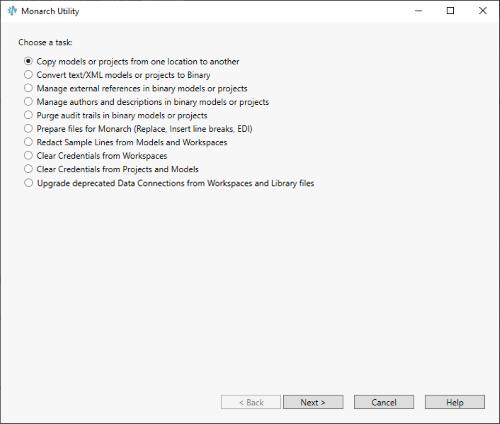
Launch the Monarch Utility and select the button Copy models or projects from one location to another from the Monarch Utility wizard that displays. Click Next.
-
In the next screen that displays, enter the path to the source folder containing the files you want to move. You can use the Browse
 button located beside this field to search for the appropriate folder.
 -
Check the box for Include subfolders if you wish to copy all subfolders as well.
-
In the next screen, enter the path to the destination folder in which to place the copied files. You can use the Browse
button located beside this field to search for the appropriate folder.
-
Tick the box labeled Preserve subfolders if you wish to retain the same folder structure adopted in the source folder when the selected models or projects are copied. Note that this field only displays when the Include subfolders option in Step 3 is enabled.
-
Click Next when you are finished.
The next screen reiterates your instructions for the copy operation. Select Finish to proceed with the copy operation if the indicated operation is correct. If you wish to make changes to the operation, select Back.
A process log showing the status of the copy operation displays.
This log displays the source paths of the models that were copied, as well as their destination paths, a status message about the task's success or failure and, when applicable, error messages.
We’ve completed Lesson 1. If you’re ready to explore additional capabilities of Monarch Utility, let’s go on to Lesson 2.
© 2025 Altair Engineering Inc. All Rights Reserved.