Adding Columns
While traps define how data is extracted, columns define what data is extracted.
You can add columns using Add Column in the context menu or by selecting the Add Column tool.
Adding columns
-
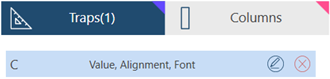
Define your trap.
Refer to Defining Traps Manually for details.
This is indicated by the red triangle at the upper-corner of the trapped cells.
The trap definition is added to the trap list for the current template:
-
Add columns.
To do so, select cells, right-click and select Add Column from the context menu or select the Add Column tool:
 .
.
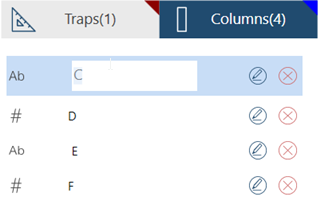
As you add columns, the column definition is added to the Column List and sample data are displayed on the Preview Grid:

-
Modify column names and properties.
By default, columns are assigned the column name where they come from. You can rename a column in several ways:
-
Double click on the name on the list and edit the name:
-
-
Click the edit button
 beside the column to display column properties and change the name:
 -
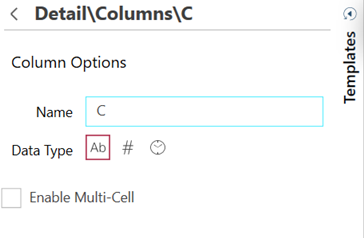
At this point you can also change the column's data type .
-
-
Add Column headers.
Defining multi-cell columns
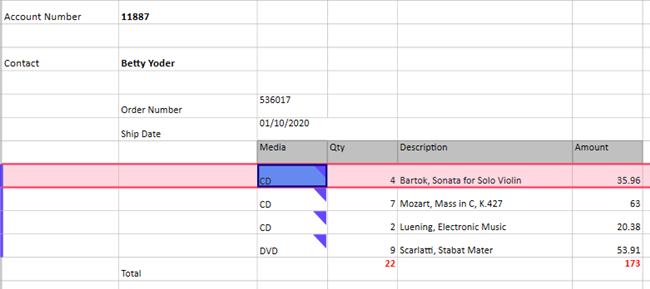
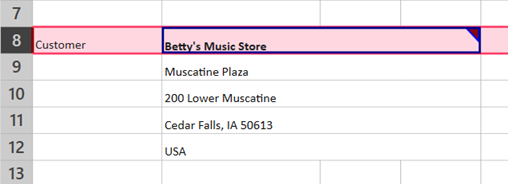
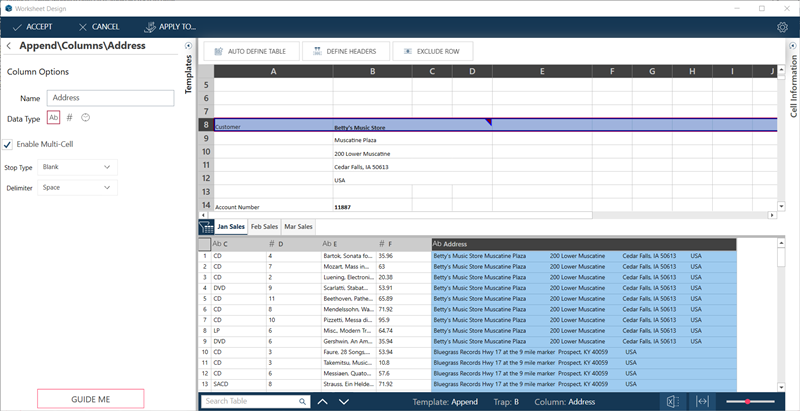
Sometimes you need to pick up column values that span several cells, like the address on this worksheet:
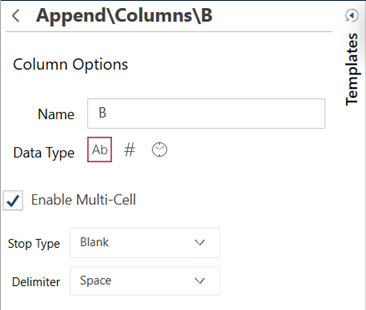
To consolidate cell value into one column, activate Enable Multi-Cell on the Column properties:
-
Click the edit button
beside the column to display column properties. The properties panel displays. -
Click the Enable Multi-Cell box.
-
Select the stop type:
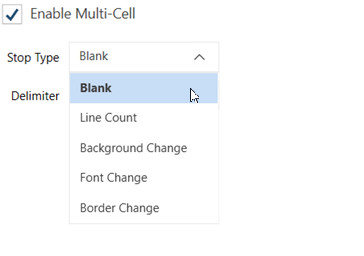
The stop type tells Worksheet Design the end of the multi-cell value. This can be:
-
a blank cell
-
a specific number of lines (e.g. an address is consistently five lines)
-
when the cell background changes
-
when the font changes
-
when the cell border changes
In our example, the address stops on a blank cell.
-
-
Select the delimiter.
The delimiter will separate the cell values when they are extracted and displayed in one column.
The preview grid shows how the address is extracted and displayed with space as the delimiter:
Note:
:
-
You can only define up to 32 continuous cells.
-
This demonstration describes how to use the Auto-Define Table function and add columns and headers to your table.
-
How to include and exclude data is demonstrated here.
© 2025 Altair Engineering Inc. All Rights Reserved.