Connector Dialog for Amazon EMR Hive
The Amazon EMR Hive connector dialog includes the following fields and settings:
|
Field |
Description |
|
Host Name |
The name of the machine or domain containing the data source. This host must be accessible from the box where Data Prep Studio is installed. |
|
Port |
Port Number required to access the data source. A list of default connector ports is available here. |
|
User ID |
A valid User ID required to log-on to the data source. |
|
Password |
A valid Password required to log-on to the data source. This password must match the User ID above. |
|
Hive Server Type |
Select the server type from this list. You can select Autodetect or select the server type manually. |
|
Other Connection Options |
Connection options required to connect to the data source. If you need multiple string connection options, separate these by a semi-colon. However, you can only enter up to a maximum of 512 characters into this text box. Available options and valid values are discussed here. |
|
Database |
The name of the database which you want to connect. You need to click Fetch Databases to select and then make existing databases available on the database drop-down list. |
|
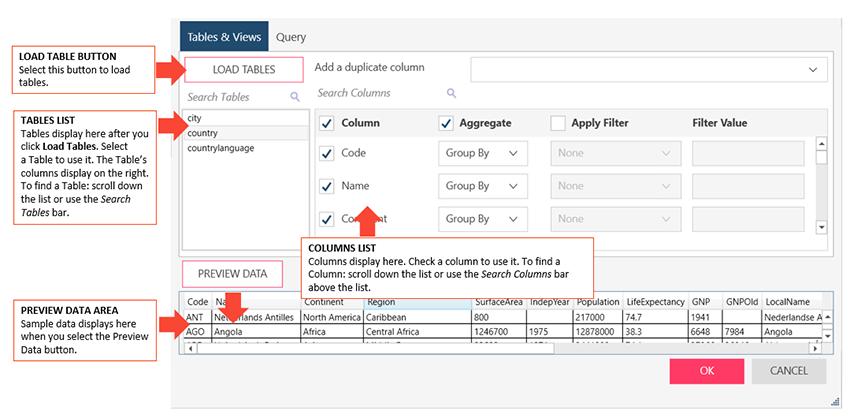
Tables & Views |
Allows you to load, and then select, the tables from your database by manually selecting from a list.
To load tables and views via search and select:
Note: If you wish to add a duplicate column, select this column from the Add a duplicate column drop-down list provided.
To select a column: Check the boxes beside the columns you want to use. If you want to use all columns, check the Column box on the header.
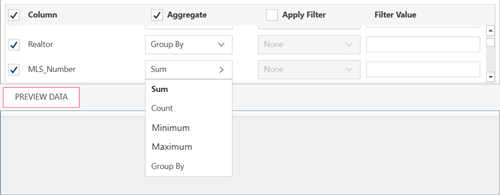
To aggregate columns: If the data returned are to be aggregated, check the Aggregate box on the header, then select the aggregation method you want to use for each column.
The following aggregation methods are possible for each data type:
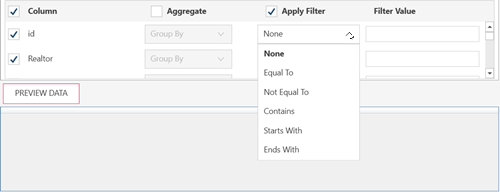
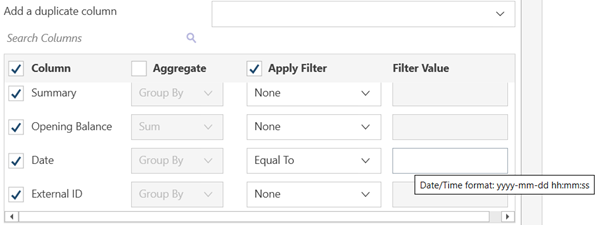
To filter columns: If the data returned are to be filtered, check the Apply Filter on the header. Then, for each column, select a filter method from the filter drop down and then enter the filter value in the Filter Value box.
Notes:
|
|
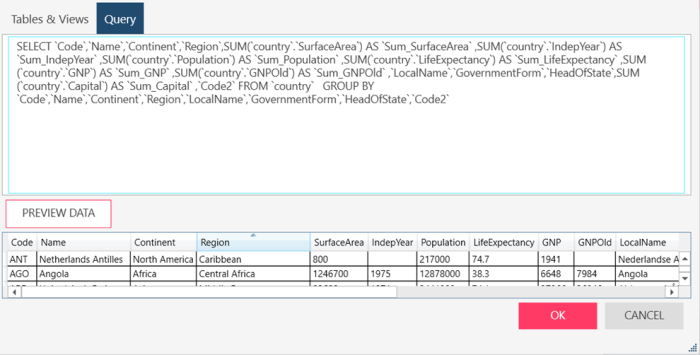
Query |
Allows you to load, and then select, the tables from your database by entering a SQL Statement. If you already selected Tables and Views, this box is updated to show the corresponding SELECT * FROM TABLE query.
If you want to define the query, enter the SELECT, EXEC, and/or WITH statements to execute.
Notes:
|
|
Preview Data |
Click to fetch data using the credentials and criteria you have specified. This allows you to confirm your connection, ensure you have connected to the correct table, check your query, and verify the information that will be loaded. Notes:
|
|
OK/CANCEL |
Select OK to establish the connection and fetch data or Cancel to close the dialog. The state of the OK and PREVIEW buttons provide a handy status about the state of your connection:
|
© 2025 Altair Engineering Inc. All Rights Reserved.
