
Clips
Y-Clip Vehicle Center | Right
-
From the Post ribbon, click on the Box
Clip tool.
Figure 1.  The Box Clip guide bar opens.
 -
From the Box Clip guide bar, set the entity selector to
Boundary Groups, then click on the vehicle.
The Vehicle boundary group is highlighted.
-
From the Box Clip guide bar, click on the
Box button.
Figure 2. 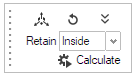 The Box Clip guide panel opens.
 - Select Outside from the Retain drop-down.
- Press the Fold Frame button to expand the box dimension fields.
- Set Width to 2.0.
- Press the Show Move Tool button.
- From the Move tool, click on the Y arrow.
- Set the Y value to -1 and press the middle mouse button to accept.
-
From the Box Clip guide bar, press the
Play button.
The Box Clip is created.
- From the Post Browser, under , right click on the newly created Clip and rename it as Y-Clip Vehicle Center | Right.
- Right click on Y-Clip Vehicle Center | Right and click Hide.
Y-Clip Vehicle Front Axle Center | Right
-
From the Post ribbon, click on the Scalar
Clip tool.
Figure 3.  The Scalar Clip guide bar opens.
 -
From the Scalar Clip guide bar, set the entity
selector to Boundary Groups, then click
on the vehicle.
Figure 4. 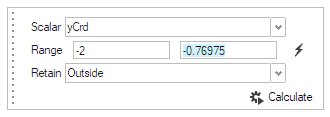 The Vehicle boundary group is highlighted, and the Scalar Clip guide panel opens..
 - Select yCrd from the Scalar drop-down.
-
Set Range from -2.0 to
-0.82434.
Note: The value of -0.82434 pertains to the y-midpoint of the front-left tire. You may calculate this value from the data contained in Wheel_Tire_Front_Left.csv, which was created following the steps in the Save Boundary Information section.
- Select Outside from the Retain drop-down.
- Press the Calculate button.
- From the Scalar Clip guide bar, press the green check mark button to accept.
- Rename the new clip as Y-Clip Vehicle Front Axle | Right and hide the clip.
Z-Clip Vehicle Center | Bottom
- Repeat Steps 1-5 (Box Clip).
- Set Height to 2.0.
- Press the Show Move Tool button.
- From the Move tool, click on the Z arrow.
- Set the Z value to 1 and press the middle mouse button to accept.
-
From the Box Clip guide bar, press the
Play button.
The Box Clip is created.
- Rename the new clip as Z-Clip Vehicle Center | Bottom and hide the clip.
Z-Clip Vehicle Front Axle | Top
- Repeat Steps 1-2 (Scalar Clip).
- Select zCrd from the Scalar drop-down menu.
-
Set Range from -2 to
0.368879.
Note: The value of 0.368879 pertains to the z-midpoint of the front-left tire. You may calculate this value from the data contained in Wheel_Tire_Front_Left.csv, which was created following the steps in the Save Boundary Information section.
- Repeat Steps 5-7.
- Rename the new clip as Z-Clip Vehicle Front Axle | Top and hide the clip.
Z-Clip Vehicle Mirror Center | Top
- Repeat Steps 1-2 (Scalar Clip).
- Select zCrd from the Scalar drop-down menu.
-
Set Range from -2 to
1.03571.
Note: The value of 1.03571 pertains to the z-midpoint of the left mirror. You may calculate this value from the data contained in Body_Exterior_Mirror_Left.csv, which was created following the steps in the Save Boundary Information section.
- Repeat Steps 5-7.
- Rename the new clip as Z-Clip Vehicle Mirror Center | Top and hide the clip.
Z-Clip Vehicle Windshield Center | Bottom
- Repeat Steps 1-2 (Scalar Clip).
- Select zCrd from the Scalar drop-down menu.
-
Set Range from 1.142861 to
2.
Note: The value of 1.142861 pertains to the z-midpoint of the front window. You may calculate this value from the data contained in Body_Exterior_Windshield_Front.csv, which was created following the steps in the Save Boundary Information section.
- Repeat Steps 5-7.
- Rename the new clip as Z-Clip Vehicle Windshield Center | Bottom and hide the clip.
X-Clip Vehicle Center | Rear
- Repeat Steps 1-3, 5 (Box Clip).
- Set Length to 4.4.
- Press the Show Move Tool button.
- From the Move tool, click on the Z arrow.
- Set the X value to 2.2 and press the middle mouse button to accept.
-
From the Box Clip guide bar, press the
Play button.
The Box Clip is created.
- Rename the new clip as X-Clip Vehicle Center | Rear and hide the clip.
X-Clip Vehicle Center | Front
X-Clip Vehicle -0.9 | Front
X-Clip Vehicle -0.45 | Front
X-Clip Vehicle 1.7 | Front
X-Clip Vehicle 2.15 | Front
X-Clip Reference Iso-Surfaces | Front
- From the Post Browser, navigate to and show all reference Iso-Surfaces.
-
From the Post ribbon, click on the Box
Clip tool.
The Box Clip guide bar opens.
- Open the Advanced Selection Dialog Box and from there, click on the down arrow of the drop-down menu and select By Iso-Surfaces.
- Press the button with a checked box icon to Select All.
- Close the Advanced Selection Dialog Box by clicking on the X in the top right corner of the dialog box.
- Repeat Steps 3-5.
- Set the values of Height, Width, and Length to 10.
- Repeat Steps 3-4.
- Set the X value to 5 and press the middle mouse button to accept.
-
From the Box Clip guide bar, press the Play button.
The Box Clip is created.
- Rename the new clip as X-Clip Reference Iso-Surfaces | Front and hide the clip.
X-Clip Reference Iso-Surfaces | Rear
- Repeat Steps 1-5 .
- Repeat Steps 3 and 5.
- Repeat Steps 7-10 .
- Rename the new clip as X-Clip Reference Iso-Surfaces | Rear and hide the clip.
- From the Post Browser, navigate to and hide all Reference Iso-Surfaces.