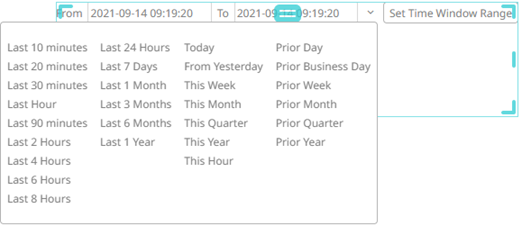
Adding an Action Date Range Picker
The Action Date Range Picker allows setting a date range (From Date and To Date) and triggering an action.
Whenever the date range picker values are changed, the associated action is executed.
Steps:
1. After double-clicking or drawing a rectangle
on the dashboard canvas, click  on the Select Part pane
then click the Action Date Range Picker
  icon.
icon.
The Action Date Range Picker pane is displayed, and the Action Date Range Picker part is added on the dashboard canvas with the current date range (parameters From Date to To Date) and the Set button.
For this example, the following parameters are defined:
|
Parameter Name |
Type |
Default Value |
|
Ticker |
Text |
COST |
|
TWS |
Text |
2008-01-01 |
|
TWE |
Text |
2009-03-01 |
|
SS |
Text |
2009-03-01 |
These parameters are used on the Title of the Line graph (e.g., Start: {TWS: yyyy-MMM-dd HH:mm:ss}, End = {TWE: yyyy-MMM-dd HH:mm:ss}, Snapshot: {SS: yyyy-MMM-dd HH:mm:ss}).
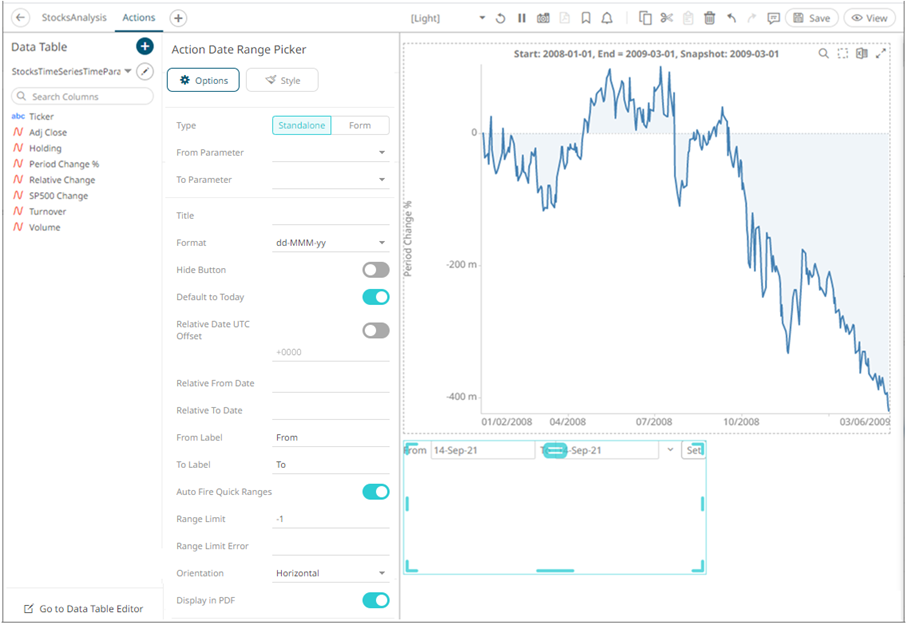
2. The action date range picker can be configured to either be a Standalone or a Form component.
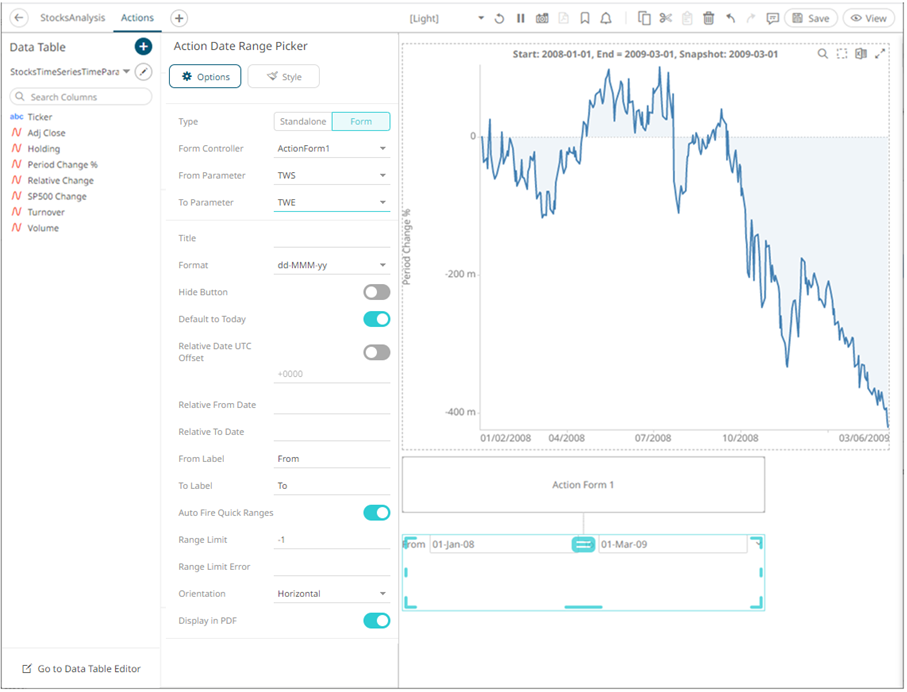
When set to Form, the action date range picker can be connected to any form controller on the same dashboard. The parameters that the action part can set depends on how the form is configured.
|
NOTE |
An action form part must be defined first to associate the action date range picker as a component. Refer to Adding an Action Form more information. |
A line connects the component to the associated form.
If the action date picker should not be connected to a form, it can be set to Standalone instead. Select the parameters that will be used for the From Parameter and To Parameter dates range.
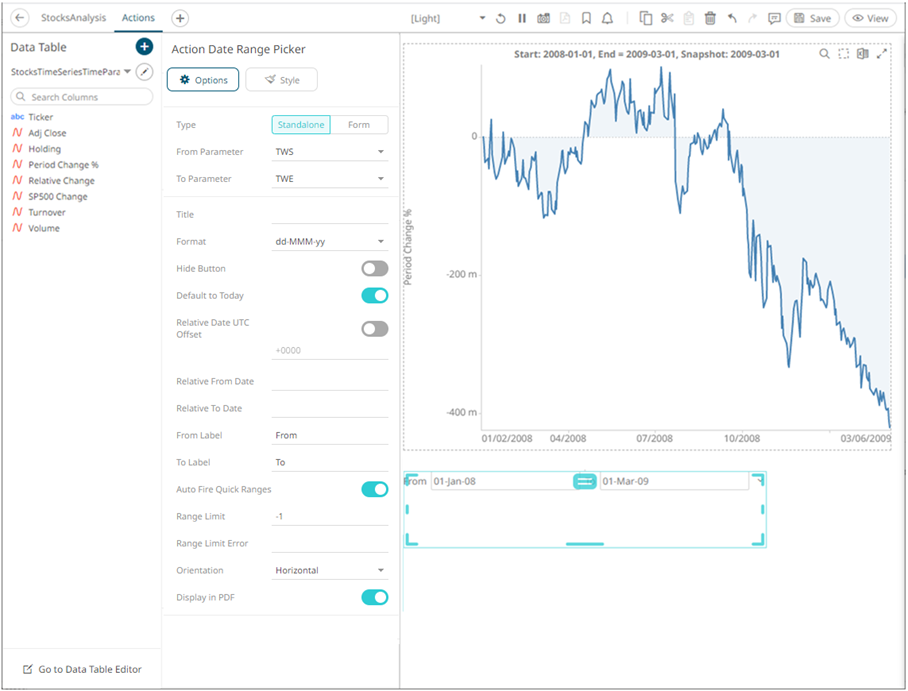
3. Enter the Title of the action date range picker button.
4. Select the Date/Time Format.
Clicking on the Date/Time box displays the date picker in calendar mode.
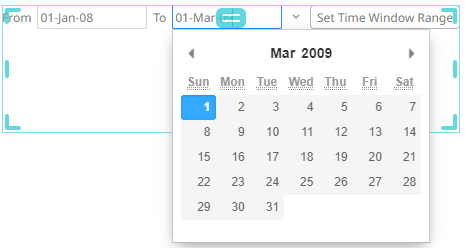
The text of the date can be directly entered, or alternatively it can be clicked on, to bring up a date picker in the Web client.
5. Tap the Hide Button slider to turn it on. This means the action control will update the parameter whenever the value of the data picker changes.
6. Tap the Default to Today slider to turn it on. This allows the action date range picker to check the current value of the dashboard parameter. If it is set to null/empty, an action is executed to update the parameter and trigger the loading of the parameterized data with the current date.
7. Tap the Relative Date UTC Offset slider to turn it on then enter the UTC Offset value (default is +0000).
By default, when an action date range picker performs a relative date calculation, the point in time that the calculation is relative to will be based on the time zone picked up from the browser (i.e., the timezone the user is in). Since parameters do not encode the time zone information, the resulting value from the relative date calculation will be affected by the time zone the relative calculation is performed in.
Example:
User timezone: UTC+0200
Expression: now
UTC Offset: none
Current time: 2001-01-01T00:00:00.000+0000
Evaluated time: 2001-01-01T02:00:00.000+0200
Parameter value: 2001-01-01T02:00:00.000
The now expression is evaluated in relation to the current time and when formatted, the time zone information is no longer encoding, resulting in a parameter value offset from UTC by +0200.
The UTC offset setting allows for configuring an offset from UTC for the time the calculation is relative to, independent of the timezone the user is in.
Example:
User timezone: UTC+0200
Expression: now
UTC Offset: +0600
Current time: 2001-01-01T00:00:00.000+0000
Evaluated time: 2001-01-01T02:00:00.000+0200
Parameter value: 2001-01-01T06:00:00.000
Since the UTC offset is +0600, the resulting parameter value is formatted with the offset from UTC rather than as the time zone the user is in.
This allows the parameter values generated by date pickers to target a specific UTC offset instead of generating values based on the time zone the user is currently in.
8. Instead of turning the Default to Today slider on, enter the following date range values:
· Relative From Date or the start Date/Time
· Relative To Dateor the end Date/Time
This allows the relative date calculation (based on today’s date), by parsing the input text string.
This method uses the following pattern:
SIGN NUMBER UNIT
Where:
¨ SIGN is either a ‘+’ or ‘-’
¨ NUMBER is any number
¨ UNIT which can be any of the following:
o m - minute
o H - hour
o D - day
o B - business day
o M - month
o Y - year
For example:
|
Setting |
Description |
|
-5m |
Back 5 minutes from current time. |
|
-1D |
Back 1 day from today. |
|
+D |
Forward 1 day from today. |
|
-1B |
Back 1 business day from today (ignore Saturday and Sunday). |
|
+1B |
Forward 1 business day from today (ignore Saturday and Sunday). |
|
-1M |
Back 1 month from today. |
|
-1Y |
Back 1 year from today. |
|
-7D |
Back 7 days from today. |
|
-14D |
Back 14 days from today. |
When these values are entered, the correct date should be selected, and then the data requests are executed based on this date.
The special now term can also be used, this represents the current Date/Time. For example:
¨ Using now will set the date picker to the current Date/Time
¨ now-7D will set the date picker to 7 days ago. This is the same as specifying -7D
For example:
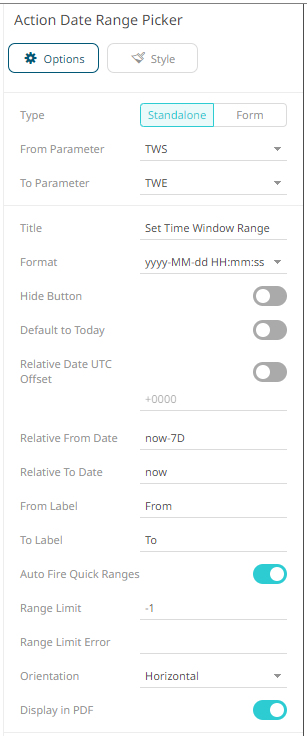
The From date will be now-7D and the To date will be now by default.
For example, now is September 14, it will go back 7 days (September 7) and then the date will be recalculated.

In addition, you can use the SIGN UNIT NUMBER pattern to modify the relative date calculation.
For example, if you enter -1M:

The recalculated relative date will be August 14:
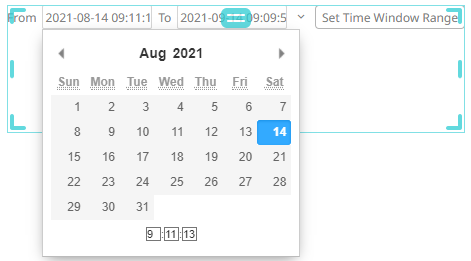
Complex expressions can also be entered to recalculate the relative date. These expressions are evaluated from the left to right pattern. The now term can also be used as a pointer to the currently evaluated value of the relative time expression.
For example, if you enter now-5M-2D+3Y as the Relative To Date and now as the Relative From Date:
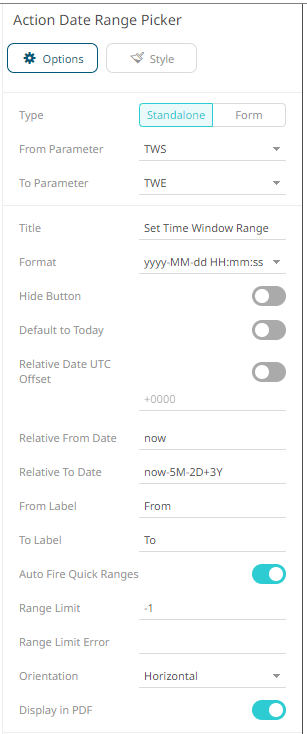
The date will be now-5M-2D+3Y by default.
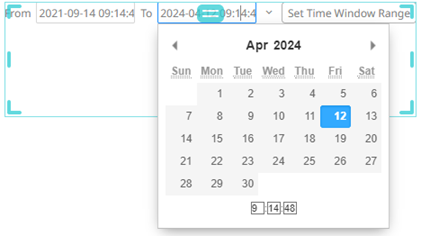
In the expression, you can also use startOf and endOf functions. Both functions take the same arguments, a relative time string, and a unit.
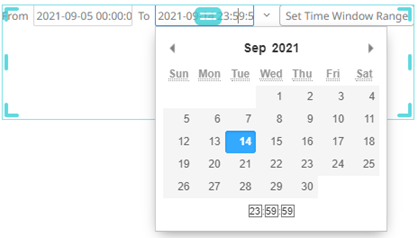
Lastly, you can define a complex expression with the functions. For example, if you enter startOf(now-7D, W) as the Relative From Date and endOf(now, D) as the Relative To Date:
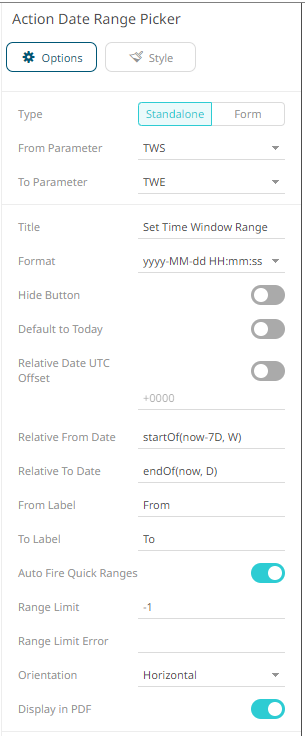
The From date will display the start of the previous week and the To date will display the end of the current day:
|
NOTE |
· The Default Relative Date will be used if the dashboard parameter is null/empty. · The relative Date/Time string is case sensitive. · You can also opt to select from pre-populated date ranges: Refer to Selecting Relative Dates in Action Date Picker and Action Date Range Picker Controls for more information. |
9. You may opt to set new From Label and To Label.
10. Tap the Auto Fire Quick Ranges
slider to turn it on. This automatically updates the date ranges as
you click in the drop-down in the Web client. Otherwise, you have
to select a date range first in the drop-down and then click
![]() to update.
to update.
11. Set the Range Limit of the date by selecting the number of days. By default, the range limit is -1.
|
NOTE |
Selecting a shorter date range limit can help in having a faster response time. |
12. When a Range Limit has been set, the Range Limit Error box is enabled. It is mandatory to enter an error message to help in defining a better input to match the set limit.
For example: “The Range Limit is set to 30 days. Modify the To date within this limit.”

13. Tap the Display in PDF slider to turn it on and include the action date picker in the PDF output.
14. To set the style of the action date
range picker, click Style  .
.
The page updates to display the Style pane.
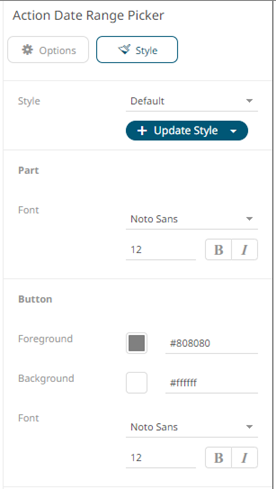
15. Set the Font type, size, style (Bold and/or Italic) of the part and button.
16. Click the Foreground or Background box to display the Color dialog and set the color or enter the Hex color code.
17. Click Update Style and select any of the following options:
· Set current as default – Save the changes and set it as the default.
· Create custom style – Save the changes and set it as a custom style.
The Style pane updates to display the Title control.
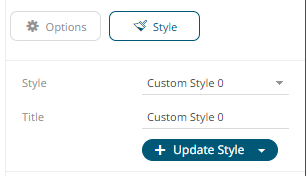
¨ Enter the custom style Title.
¨ If there are additional changes made, click Update Current Style in the Update Style drop-down.
The new custom style is added in the Workbook > Theme > Custom Styles list.
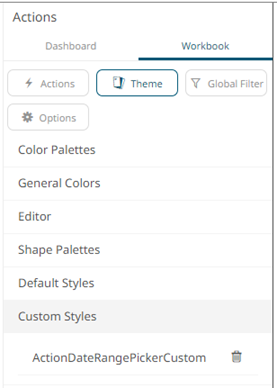
If published, the custom style configuration of the action date range picker will be added to the Global custom styles list and can be applied to other parts.
· Reset to default – Revert to the original default settings.
18. Click the Save  icon on the toolbar to save the
changes.
When
saved, the  notification
is displayed.


