


|
Configuring Instances
Creating an Instance
To create an instance:
1. Select the Configurator tab, and click the Instances tab. The Instance page is displayed.
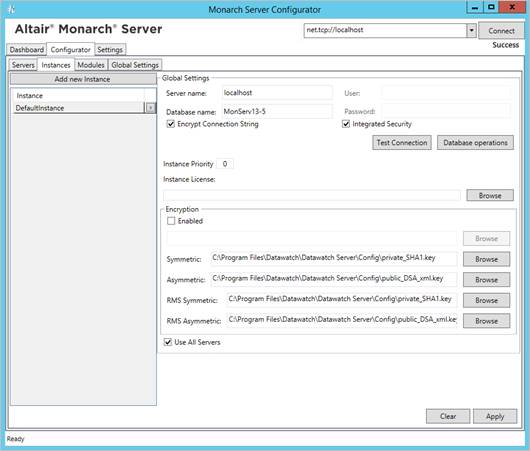
2. Under Global Settings, specify the database connection string parameters:
· Server name
· Database name
· User
· Password
|
NOTE |
This connection string will be used by services for database access. |
3. Select the Encrypt Connection String check box if you want to encrypt connection string.
4. Select the Integrated Security check box if you want to access SQL Server via Windows Authentication. If you do so, the fields User and Password become unavailable.
5. Click Test Connection. If connection is successful, you will be able to perform database operations.
|
NOTE |
If there is no database with the specified name, create a new database. |
6. In the Instance Priority field, enter value to define instance priority.
7. In the Instance License field, specify the path to the license file.
|
NOTE |
This license is used only for a particular instance. To set the global license used for all instances, see Global Settings. |
8. Under Encryption, specify the path to the encryption file. Note: You can specify the encryption file only if the Enabled check box selected.
9. Under Symmetric, specify the path to the private key file for checksum in symmetric mode for MS.
10. Under Asymmetric, specify the path to the public key file for checksum in asymmetric mode for MS.
11. Under RMS Symmetric, specify the path to the private key file for checksum in symmetric mode for RMS.
12. Under RMS Asymmetric, specify the path to the public key file for checksum in asymmetric mode for RMS.
13. The Database Common Time-out setting is configured manually in the config.xml file. Path to this file: C:\Program Files\Datawatch\Datawatch Server\Config\config.xml
This parameter is located in the <Database> of the <Instance>:
<Instance Name="DefaultInstance" Priority="1">
<Database>
…
<CommandTimeout>0</CommandTimeout>
</Database>
…
</Instance>
The default timeout is 0 (it means no timeout).
To define the servers available for an instance:
1. Under Servers available for Instance, click the  button and select servers from the drop-down list.
|
NOTE |
In this case, an instance will be able to use only those services that are installed on the selected servers. |
2. Select the Use All Servers check box, to allow instances use all servers.
3. Click Apply.
4. To add a new instance, click the Add new Instance button.
5. To delete an instance, click the  button by the instance name.
Creating a New Database
To create a new database:
1. On the Instances tab, click the Database Operations button.
2. In the Database operations window, enter your username and password.
|
NOTE |
Select the Integrated Security check box to use Windows Authentication. The specified user must have system administrator rights to create a new database. |
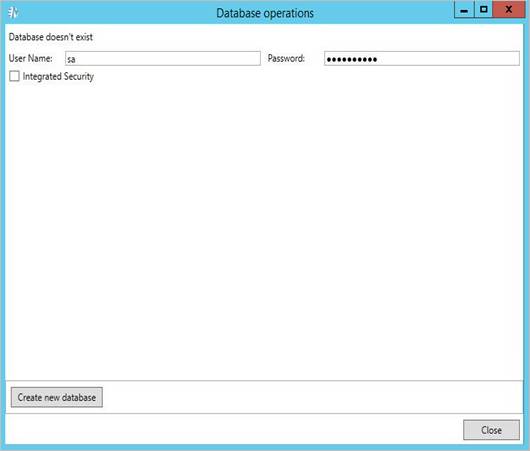
3. Click Create new database.
4. Click Close.
Updating Database
To update the database:
1. On the Instances tab, click the Database Operations button.
2. In the Database operations window, enter your username and password.
|
NOTE |
Select the Integrated Security check box to use Windows Authentication. The specified user must have system administrator rights to update the database. |
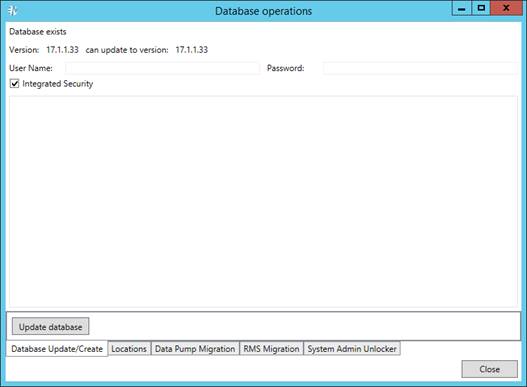
3. Click Update database.
4. Click Close.
Managing Locations
To add a new location:
1. On the Instances tab, click the Database Operations button.
2. In the Database operations window, enter your username and password.
|
NOTE |
Select the Integrated Security check box to use Windows Authentication. The specified user must have system administrator rights to update the database. |
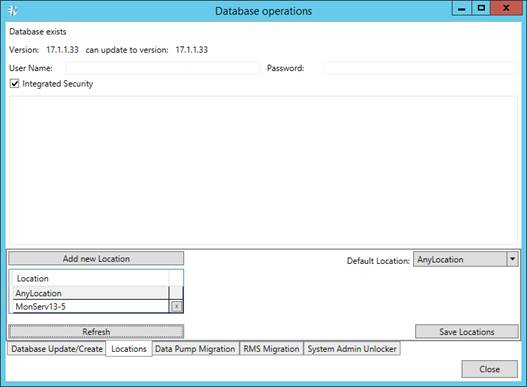
3. Click the Refresh button to display existing in the database locations.
4. Click the Add New Location button to add new location.
5. To edit a location, select its name and click the Edit Location button.
6. In the Default Location field, select default location from the drop-down list.
7. Click the Save Locations button to save changes.
Migrating Data
To import data:
1. On the Instances tab, click the Database Operations button.
2. In the Database operations window, enter your username and password.
|
NOTE |
Select the Integrated Security check box to use Windows Authentication. The specified user must have system administrator rights to update the database. |
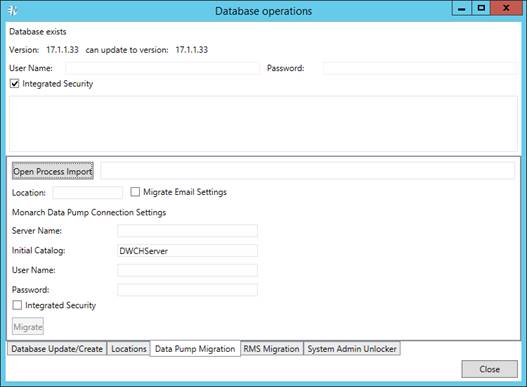
3. Select the Data Pump Migration tab.
4. Click the Open Process Import button to import processes. In the displayed Open File dialog box, choose the files with the imported from the previous Automator versions processes.
5. Select the Migrate Email Settings check box to transfer settings.
6. In the Location field, enter location name. The specified location will be used for the imported processes.
7. To set connection to the database of the previous Automator version, under Automator Connection Settings specify the following parameters:
· Server Name
· Initial Catalog
· User Name
· Password
|
NOTE |
Select the Integrated Security check box to use Windows Authentication. |
8. Click the Migrate button. The following data will be migrated to the current database:
· Global distributions
· Global scripts
· Alerts
· Email settings (if the Migrate Email Settings check box was selected)
· Default job disposition settings.
RMS Migration
To import RMS data:
1. On the Instances tab, click the Database Operations button.
2. In the Database operations window, enter your username and password.
|
NOTE |
Select the Integrated Security check box to use Windows Authentication. The specified user must have system administrator rights to update the database. |
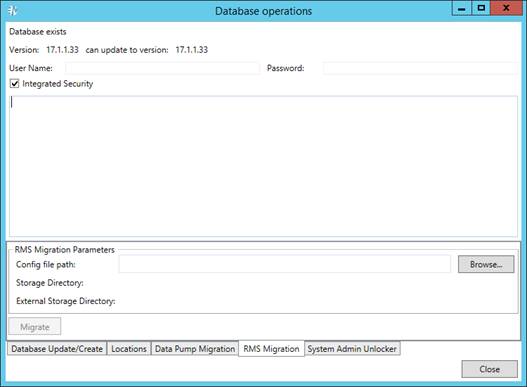
3. Select the RMS Migration tab.
4. Click the Browse button to select web config file from previous RMS versions that contains storage settings.
5. Click the Migrate button. The following data will be migrated to the current database:
· RMS system settings
· Users with their profiles
· Models
· View definitions
Unlocking System Administrator
To unlock system administrator:
1. On the Instances tab, click the Database Operations button.
2. In the Database operations window, enter your username and password.
|
NOTE |
Select the Integrated Security check box to use Windows Authentication. The specified user must have system administrator rights to update database. |

3. Select the System Admin Unlocker tab.
4. Click Refresh to display available system administrators in the table.
5. Select the Reset password check box if you want to reset the current admin password to the default one.
|
NOTE |
You can modify the default password in the Default Password field. |
6. Select the Reset attempts check box if you want to reset the number of login attempts to 0 for the corresponding administrator.
|
NOTE |
The number of failed attempts is displayed in the Attempts count field. |
7. Select the Locked check box if you want to lock the corresponding administrator. To unlock the administrator, clear the check box.
8. Click Submit to apply changes.
9. Click Close.