Adding an Aggregation Operator
The aggregation operator aggregates the data based on a grouping key and a set of aggregated fields.
- On the Application page, click
 and select Aggregation
  in the Add Operator pane.
The Aggregation node
 icon displays in the Graph pane, as well as the properties to be defined in the Operator Settings pane, and the preview of the data in the Schema pane.
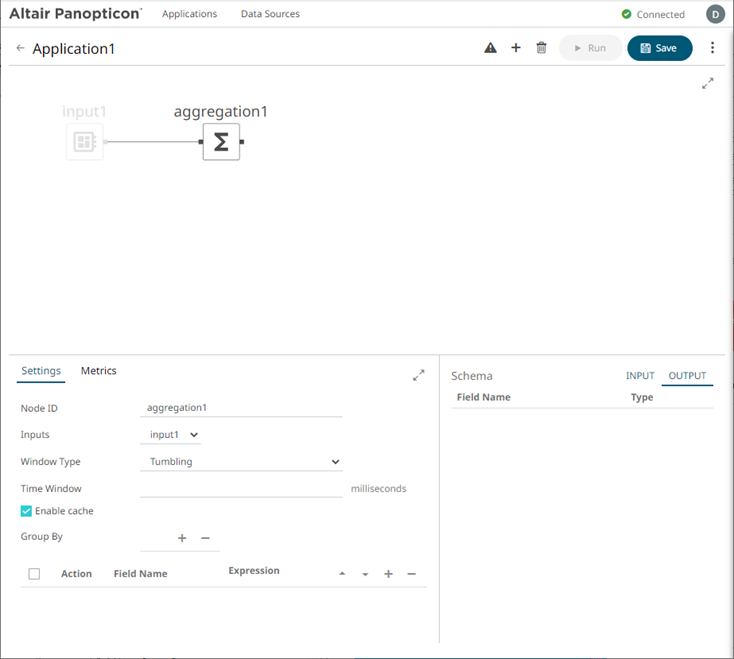
This operator has left (inbound) and right (outbound) edges that allow connection to other operators in the application.
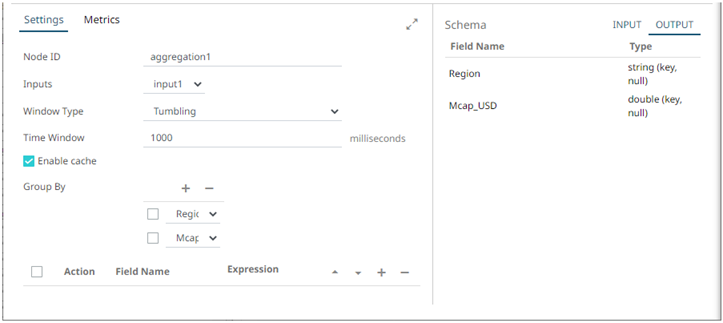
- In the Operator Settings pane, define or select the following required properties:
Property Description Node ID
The ID of the aggregation operator.
Inputs
Automatically connects to the currently selected operator.
You can select another ID of the operator that will be the source of the data in the Inputs drop-down list.
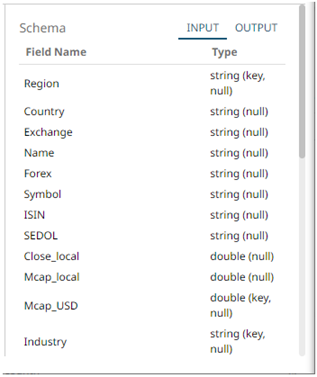
The preview of the data (INPUT) is displayed in the Schema pane.
This window type is a hopping window whose window size (Time Window) is equal to its advance interval. Since tumbling windows never overlap, a data record will belong to only one window.
Window Type
Select either:
-
Tumbling (default)
A series of fixed-sized, non-overlapping, and adjoining time intervals.
This window type is a hopping window whose window size (Time Window) is equal to its advance interval. Since tumbling windows never overlap, a data record will belong to only one window.
-
Hopping
This window type models fixed-sized, scheduled overlapping windows.
Defined by the window’s size (Time Window) and advance interval (Advance Period).
Time Window
The window’s size (in milliseconds).
Advance Period
The advance interval for the Hopping Window (in milliseconds). Specifies by how much a window moves forward relative to the previous one.
Enable Cache
Specifies whether to start or stop caching tables. When caching is stopped, it gets every event input into the table to produce an output event. This is necessary for delta/prev aggregates.
Group By
The name/IDs of the columns that the data will be grouped by. (Proceed to step 3.)
Fields List
A set of aggregated fields (with actions and expressions).
(Proceed to step 5.) -
- In the Group By section, click . A column is added in the list. Click the drop-down list to select another column.
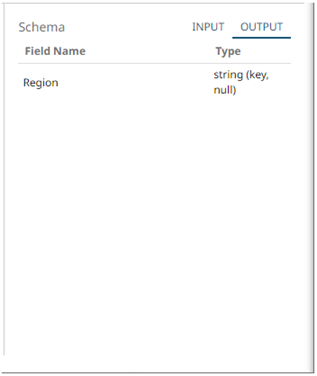
- Select a column that will be used to group the data.
The INPUT and OUTPUT schema are displayed.
Repeat steps 3 and 4 to add more.
You can also delete a column in the Group By list by selecting its check box and clicking
 .
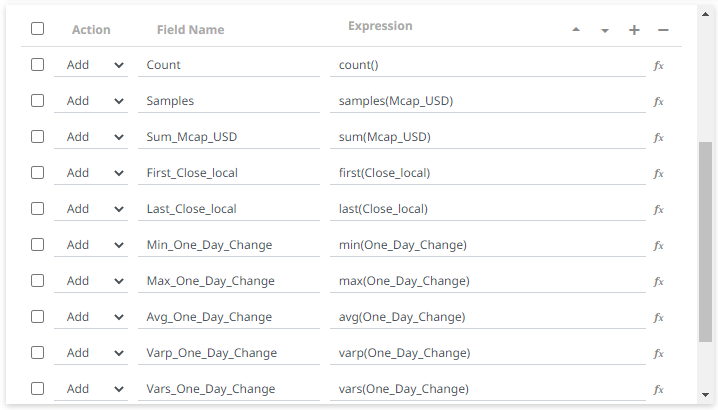
. - Under the Field List section, click . A new field entry displays.

- Enter the Field Name and the Expression that will be evaluated for each incoming record.
Example:
Field Name: Count
Expression: count()
- Repeat steps 5 and 6 to add more aggregated fields.
You can also:
- Select the topmost checkbox to select all of the fields
- Change the order of the fields by selecting a field’s checkbox and clicking either the
 or
or  button
 - Delete a field entry in the Field List by selecting its checkbox and clicking
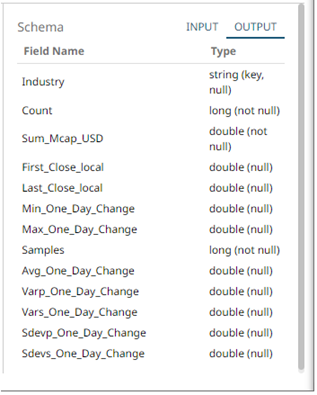
The OUTPUT schema is updated based on the added aggregations.
- Save the changes.
Example
<aggregation>
<id>Aggregation</id>
<fields>
<field>
<id>ColumnId</id>
<action>ADD</action>
<expression>Sum(Mcap_USD)</expression>
</field>
</fields>
<groupBy>
<field>Industry</field>
</groupBy>
</aggregation>
(c) 2013-2025 Altair Engineering Inc. All Rights Reserved.