Adding a R Transform Operator
An R script can be executed as a data transformation step in the data pipeline. Specifically:
- Data is retrieved from an underlying source.
- The returned data table is translated into an R data frame.
- The R data frame and supplied R Script are passed to an external R process running Rserve.
- The external Rserve process returns a resulting R data frame.
- The returned data frame is translated into a Panopticon table for visualization rendering.
For this to occur, both R and Rserve must be installed, and initialized.
- On the Application page, click
 and select R Transform
  in the Add Operator pane.
The R Transform node
 icon displays in the Graph pane, as well as the properties to be defined in the Operator Settings pane, and the preview of the data in the Schema pane.
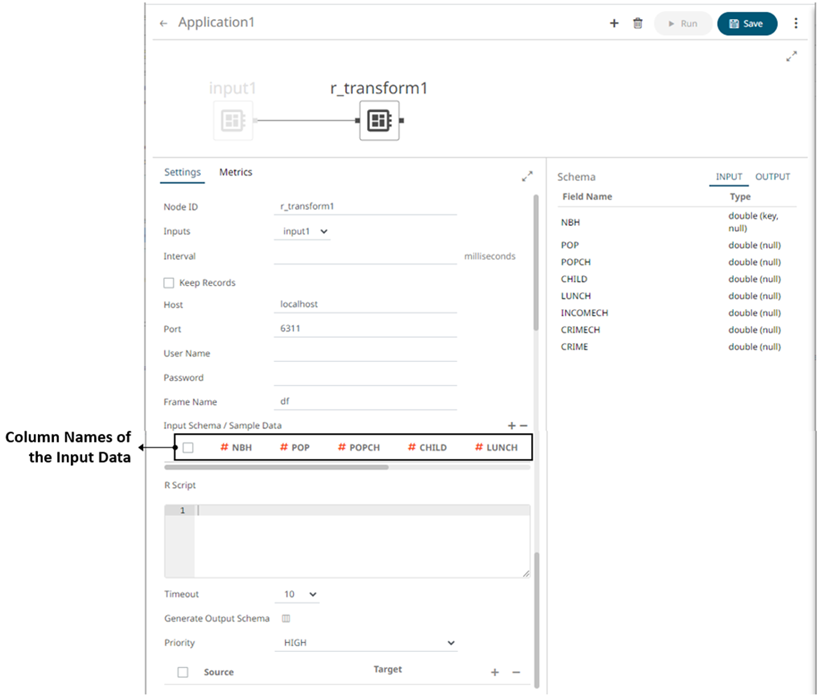
The right (outbound) edge allows you to connect to the other operators.
- In the Operator Settings pane, define or select the following required properties:
Property Description Node ID
The ID of the R Transform operator.
Inputs
The stream of records or input you will be subscribed to.
Interval
The interval of which the data should be published to the output stream (in milliseconds).
Keep Records
Select to retain or not to remove flushed elements. This means the entire set of records will be flushed at each interval.
Host
Host of the Rserve instance.
Port
Port of the Rserve instance.
User Name
The user Id if authentication is enabled on the Rserve process.
Password
The password if authentication is enabled on the Rserve process.
Frame Name
The Frame Name that Panopticon Streams will produce that will be utilized by the R scripts. The default is df.
R Script
The R script that reference the input frame name. Returns a data frame.
Timeout
The length of time to wait for the server response (10 to 300). Default is 10.
- On the Input Schema/Sample Data section, the column names of the Input data source are displayed. You can opt to add sample data to ensure transform is applied in case the input database, files, or infrastructure becomes unavailable.
To add or manage the sample data, you can use the following:
Button Description Add sample data for the input column names.

Select the check box of a sample data row and click
to delete, or select the topmost check box and click to delete all of the sample data rows. - In the Generate Output Schema section, click Generate Output Schema
 to fetch the schema of the output topic. This populates the list of columns, with the data type found from inspecting the first ‘n’ rows of the file.
 - Select the Priority of the node’s startup:
Priority Description APPLICATION
Running and successful completion of the node is critical in the application startup.
HIGHEST
Highest priority but not critical.
HIGH (Default)
High priority but not critical.
STANDARD
Standard priority.
LOW
Low priority.
- You can also click the following icons:
Button Description Add a new field entry then enter/select the following properties:
-
Source – the column of the source schema.
-
Target – the column name of the target schema.
-
Type - The data type of the column. Can be: BOOLEAN, DATE, DATETIME, DOUBLE, FLOAT, INT, LONG, STRING, TIME.
Select the checkbox of a field entry and click
to delete. -
- Continue adding the necessary operators then save the changes in the application.
(c) 2013-2025 Altair Engineering Inc. All Rights Reserved.