Setting Up Alerts on the Web Client
Alerts can be defined against:
- Streaming data sources (including CEP Engines and message queues)
- Periodically refreshed data sources (like REST services, files on HTTP URLs, databases, Python or R)
Alert definition can be done by right-clicking on a streaming numeric data in a visualization in the Web Client and setting the limits, duration, what will be included, how many and when an email will be sent.
NOTE:
The alert criteria will be evaluated across the full series span along the axis, not on the latest value alone, when using an X-Axis or Y-Axis visualization and the domain axis is using any of the following:
- Text column and is set to Axis Data: Series
- Numeric column
- Time column while the data table does not have a Timeseries Transform applied to it
In contrast, the alert criteria will be evaluated data point by data point as new data is received when using any of the following:
- None-series graphs (such as the Treemap and the Scatterplot)
- Axis graphs that use a nominal text axis or a Timeseries Transformed data table
NOTE: Before setting up the visualization alert, enter the email of the user or group who will receive the alert on the User Preferences:
- On the Workbooks and Folders Summary page, click the user icon
 .
.

The Profile pane displays with the name of the user and the role.
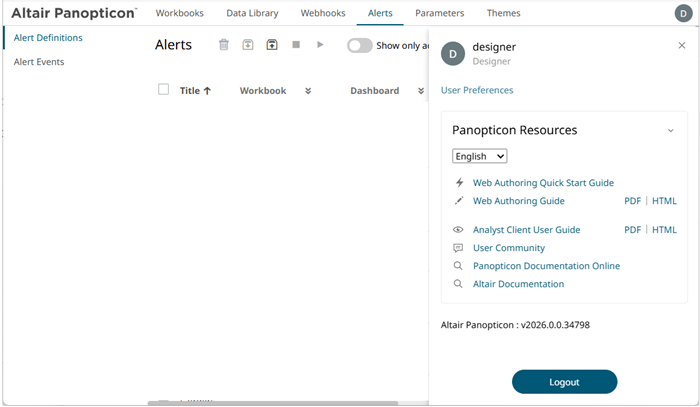
- Click User Preferences.
The User Preferences page displays.
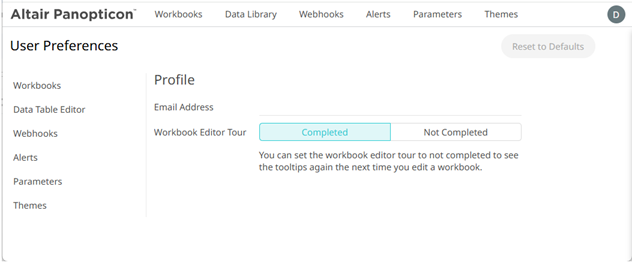
- Enter the Email Address.
To set the alerts:
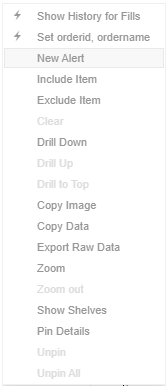
- Open a workbook on the Workbook and Folders Summary page and right-click on a streaming numeric data in a visualization. Select New Alert in the context menu.
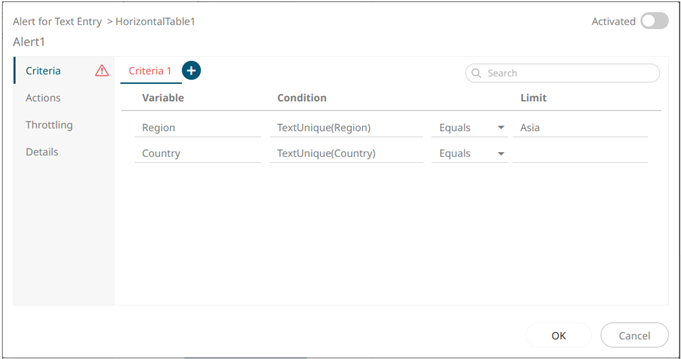
The Alerts dialog displays the name of the visualization where the alert will be set. You can define the alert definition using the four tabs in the dialog: Criteria, Actions, Throttling, and Details.
Sample Text Alerting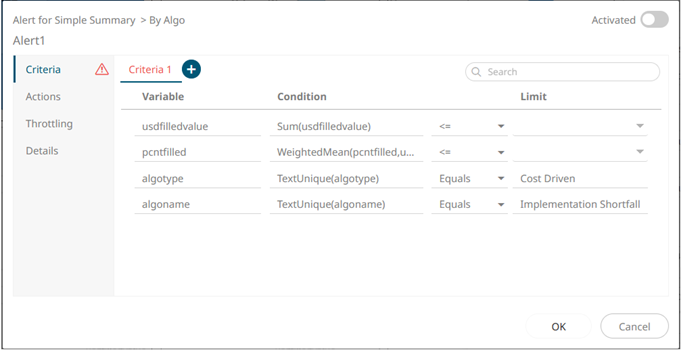
Sample Numeric AlertingNOTE: If there are necessary settings missing in the Alerts dialog,
 is displayed and the corresponding section is displayed in red font. Hover on the problematic section to see the cause of the error.
 - The alert name is editable (i.e., Alert1). Double-click and enter a descriptive alert name.
- On the Criteria tab, you can enter or perform the following:
Property
Description
Search
Search for columns.
Criteria
Criteria set of the alert. Can be multiple, in which case all criteria sets are evaluated in parallel, each triggering respective alerts.
Additional criteria sets can be added by clicking
 . You can also right-click a Criteria tab and select Rename to rename the criteria or select Remove to delete. The Remove option is disabled when only one criteria set is available.
Variable
Available variable columns in the visualization where the alert is set.
Condition
Allows setting the following Limit of all the available numeric variables in the visualization:
-
Upper or Equal To (<=)
-
Lower or Equal To (>=)
-
Upper values (<)
-
Lower values (>)
-
Between – values between the Lower and Upper values
For text variables, there are four types of conditions:
-
Equals - The string is equal to another string, e.g., Country=Sweden
-
Not Equals – The string is not equal to another string
-
Wildcard: The string matches a wildcard expression, e.g., Country=Norwa* would match Country=Norway
-
Regex: The string matches a regex expression, e.g., Country=I[a-zA-Z]+a would match Country=India and Country=Indonesia
-
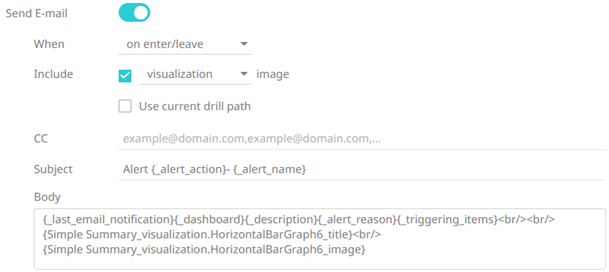
- On the Actions tab, you can specify the following:
Property Description Send E-mail
Tap the slider to update the dialog and display the following settings:
-
When
Determines when an alert email will be sent:
-
On enter
-
On leave
-
On enter/leave
If unchecked, the notification will only be displayed on the Web client.
-
-
Include
Determines whether the image of the visualization or dashboard will be included in the alert email.
For the included image of the visualization, check the Use current drill path box to generate a drilled image in the email.
-
CC
CC mailing groups that will receive the alert, separated by a comma.
-
Subject
The subject of the alert’s email notifications.
-
Body
The content of the alert’s email notifications.
Call Webhook
Tap the slider and select the one or more webhooks that will be executed when the alert is triggered.
Play Sound
Tap the slider and select the sound that will be played for a triggered alert. The available sounds are mp3 files placed in the AppData/Sounds folder. Panopticon is shipped with one sound (i.e., bell_ping_1s.mps). Default is None.
-
- On the Throttling tab, you can specify the following:
Property
Description
For the Last
Checks if a value has reached the limit on the set Date/Time unit:
- second(s)
- minute(s)
- hour(s)
- day(s)
Action Limit (Max)
The maximum number of times an alert will be sent on the set Date/Time unit:
- second
- minute
- hour
- day
Active Hours
Tap the slider to update the dialog and display the following settings:
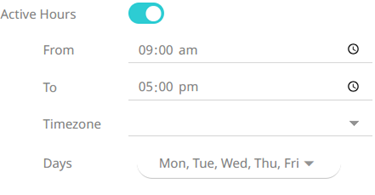
Determines when an alert should be active. Set the From and To time limits, Timezone, and Days.
NOTE: Once you set the Timezone, the From and To limits will be applied for that time zone. If not set, the server’s default time zone will be used.
- On the Details tab, you can view or specify the following:
Property
Description
Breakdown
Current breakdown of the visualization.
Description
Description of the alert.
Parameters
Available parameters in the visualization.
- Tap the Activated slider to turn it on.
- Click
 . The new alert is added on the Alerts Definition page.
NOTE: When creating alerts for grand total, ensure that no breakdown is set.
(c) 2013-2025 Altair Engineering Inc. All Rights Reserved.