Creating New Lookup Columns
A lookup calculated field provides a convenient table lookup where the value of a designated input field is checked against a lookup table. If a matching input value from the lookup table is found, then the corresponding output value is used. If no matching value is found, then the output is either the same as the input value, null or a default value. Comparisons can be case-insensitive or case-sensitive.
For example, you can have a report that just contains an Item No field. You can define a lookup field, Item Desc, that will match an Item No value with the corresponding Item Description:
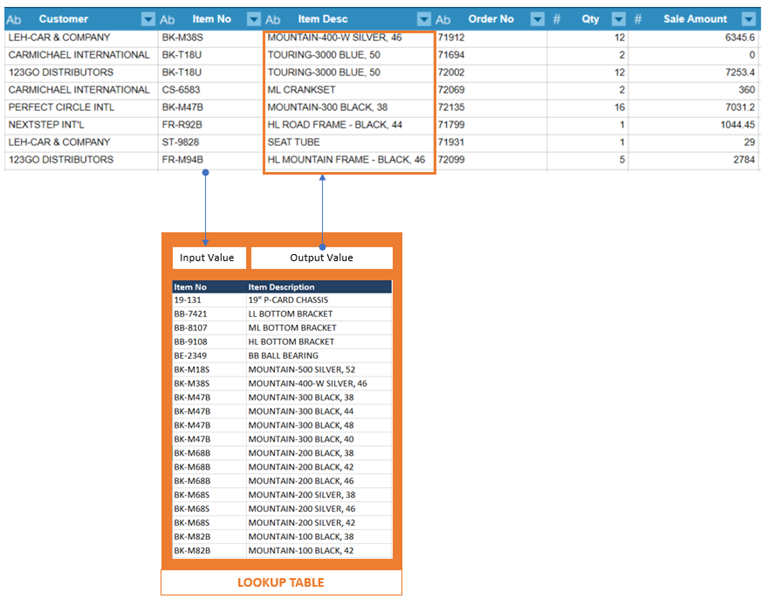
The central control for the lookup field is the lookup table. This is a table where you define the input value/output value pairs. In our example above, the Item Description that matches an Item number.
The table may be populated in two ways:
-
You can type in or import the input values
-
You can type in or paste the output values.
-
Right-click on a column and select Column > New Lookup Column.
-
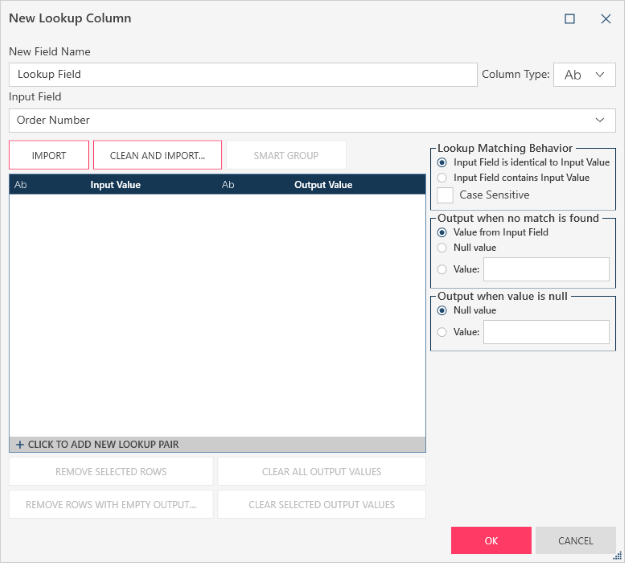
The New Lookup Column dialog box displays:
-
Enter a field name and set the data type.
-
Define the Input and Output Value pairs.
If you want to import the Input Field values from a column in the table, select the column from the Input Field drop-down, and then select one of the following buttons:
-
Import imports values as is.
-
Clean and import cleans up the values before importing. You can select to change the case and/or trim spaces of the input field values.
For each input value, define the corresponding output value.
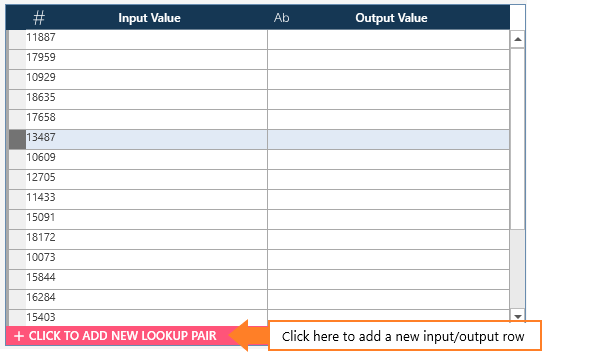
If you do not want to import input values, or if the input values are incomplete, enter the lookup pairs manually. To do so, select + Click to Add a New Lookup Pair at the bottom of the lookup table.
You can fill out the lookup table via a combination of importing and manually enter values.
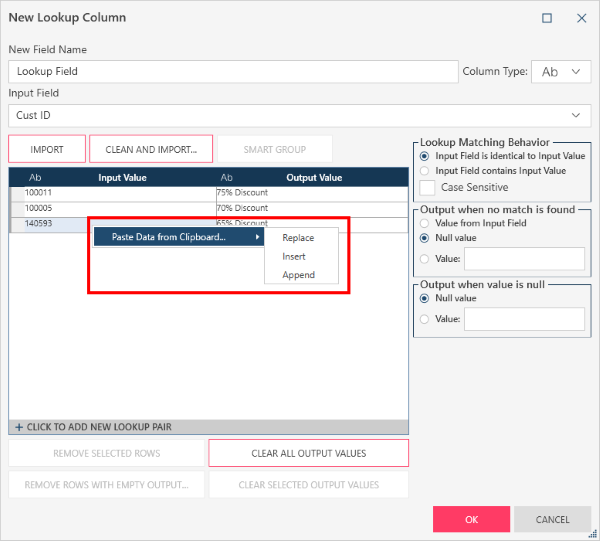
If you wish to paste data from the clipboard as a means of modifying input/output values, select the value(s) to be modified, right-click on your mouse, and then select Paste Data from Clipboard...
-
Replace - Replace the selected values with the values in the clipboard
-
Insert - Insert items from the clipboard after the currently selected items
-
Append - Append items from the clipboard to the end of the table
-
Use the following buttons below the lookup table to clear input or output values:
-
Remove selected rows. You must select rows before you can select this option. Select the empty space before a row to select it:
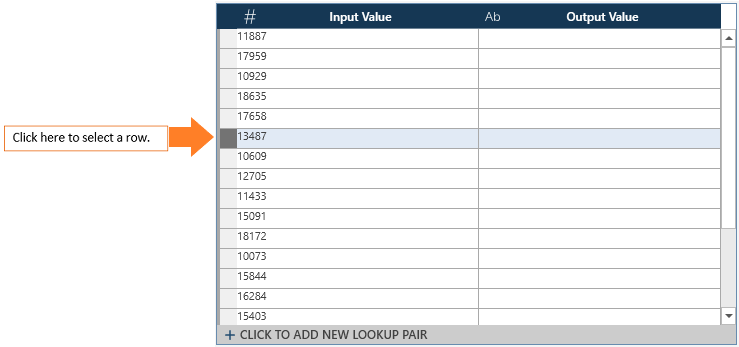
Use CTRL + Select to select multiple rows.
-
Remove rows with empty values
-
Clear all output values
-
Clear selected output values. You must select output values before you can select this option. Use CTRL + Select to select multiple output values.
-
-
For text data types, use Smart Group to see suggested groupings of input values that appear to be closely related, possibly due to variations such as misspellings or typographical errors, and could be standardized to one output. This feature is a useful data matching tool that can help identify and group entries in a dataset that refer to the same entity. To use the smart grouping feature, take the following steps:
-
Click the Smart Group tab.
-
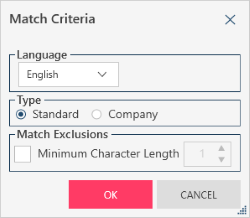
The Match Criteria dialog box displays.
-
Set the language to be used in matching by choosing from the options in the drop-down list. The language options available are English, French, and German.
-
Set the input data type (i.e., Standard or Company). The Company data type can be used for input values containing organization names. Note that choosing the most appropriate language and input data type will improve the outcome of the group matching.
-
Set the minimum character length for the input values to be matched.
-
Click OK.
-
The matched groups are then displayed in the Matched Groups window.
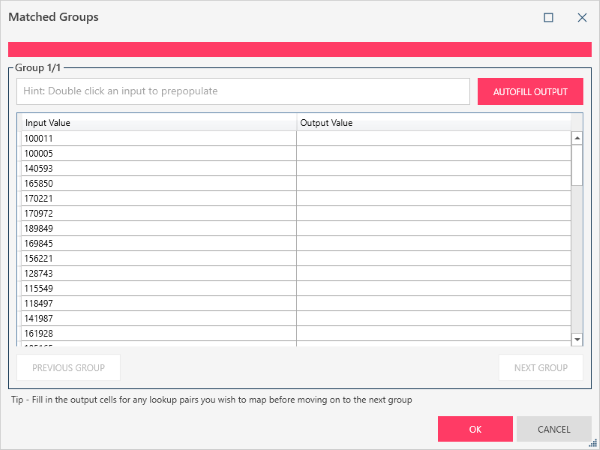
Here, you have several options:
-
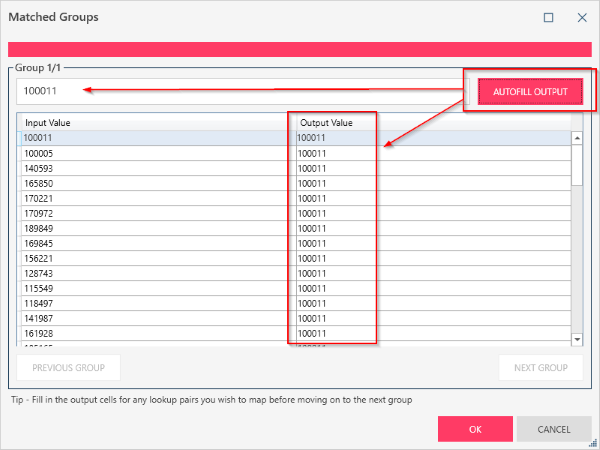
Select any of the input values as the mapping or output value and then click Autofill Output to apply the selection to the group.
-
Ignore the suggested grouping and view the next suggested grouping by clicking Next Group.
-
Modify or set your own custom value as the mapping or output value.
Click OK to finish the mapping. You can then view and modify your lookup mappings further in the New Lookup Column dialog box.
-
Define the lookup matching behavior. Select one of the following:
-
The input field value must be identical to the input value.
-
The input field value must exactly match the input value.
Check the Case Sensitive box to indicate that the input values must match the case of the input field.
-
-
Define the behavior when no matched is found. Select one of the following:
-
Use the input field value when no match is found.
-
Output a null value (i.e., "null") when no match is found.
-
Use a default text value. If you select this option, enter the text value in the Value box.
-
-
Define the output when the input value is null. Select one of the following:
-
Output a null value (i.e., "null") when no match is found.
-
Use a default text value. If you select this option, enter the text value in the Value box.
-
-
Click OK.
© 2025 Altair Engineering Inc. All Rights Reserved.