Connector Dialog for Splunk
The Splunk connector dialog includes the following fields and settings:
|
Field |
Description |
|
Host Name |
The name of the machine or domain containing the data source. This machine must be accessible from the machine where Data Prep Studio is installed. |
|
Username |
The username of a person who is authorized to log in to Splunk. |
|
Password |
The password of the user logging in to Splunk. |
|
Port |
The port number required to access the data source. |
|
TEST CONNECTION |
Click this button after specifying the connection information above to test whether a connection to the host can be successfully established. |
|
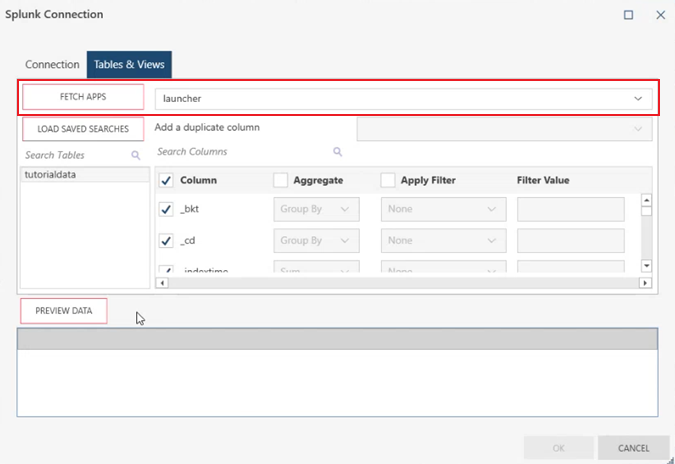
Tables & Views |
Allows you to load, and then select, the tables from your database by manually selecting from a list.
To fetch apps:
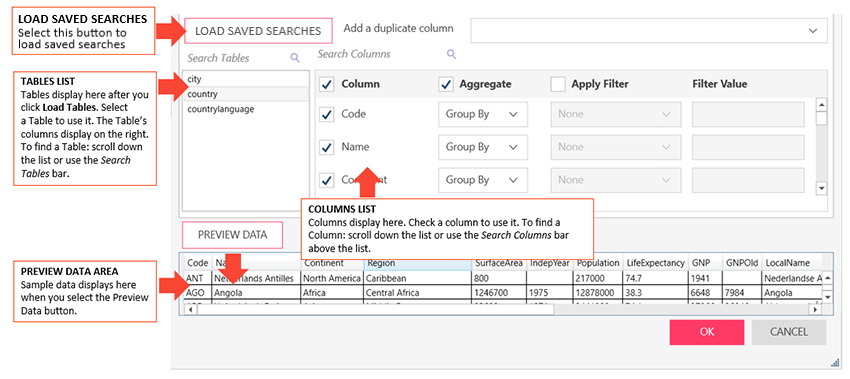
To load saved searches:
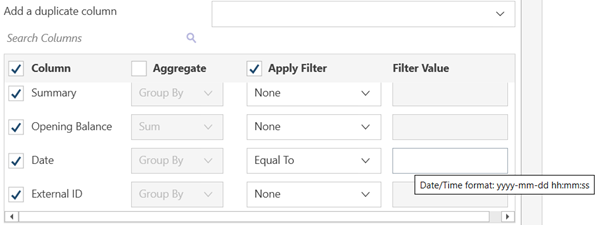
Note: If you wish to add a duplicate column, select this column from the Add a duplicate column drop-down list provided.
To select a column: Check the boxes beside the columns you want to use. If you want to use all columns, check the Column box on the header.
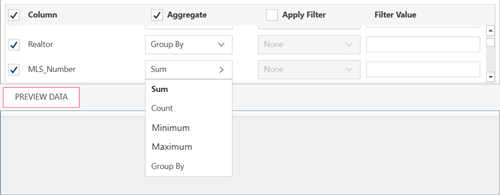
To aggregate columns: If the data returned are to be aggregated, check the Aggregate box on the header, then select the aggregation method you want to use for each column.
The following aggregation methods are possible for each data type:
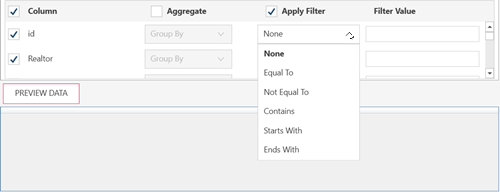
To filter columns: If the data returned are to be filtered, check the Apply Filter on the header. Then, for each column, select a filter method from the filter drop down and then enter the filter value in the Filter Value box.
Notes:
|
|
Preview Data |
Click to fetch data using the credentials and criteria you have specified. This allows you to confirm your connection, ensure you have connected to the correct table, check your query, and verify the information that will be loaded. Notes:
|
|
OK/CANCEL |
Select OK to establish the connection and fetch data or Cancel to close the dialog. The state of the OK and PREVIEW buttons provides a handy status about the state of your connection:
|

© 2025 Altair Engineering Inc. All Rights Reserved.