Click Advanced for updating advanced options. These settings are valid for remote machines and are optional. 

 
Field
 | 
Description
 | 
HM EXE Path 
 | 
Specify the HM installation location or specify the unix scripts location on remote machine 
 | 
HX EXE Path 
 | 
Specify the HX installation location or specify the unix scripts location on remote machine 
 | 
License Path 
 | 
Enter valid remote server license 
 | 
Library Path 
 | 
Select Library path 
 | 
UG Base directory 
 | 
Specify the UG installation directory location 
 | 
UG Root directory 
 | 
Specify the UG installation ugii directory location 
 | 
Verify 
 | 
Checks whether hxjm scripts folder exist at specified remote location 
 | 
Update 
 | 
Copies hxjm unix scripts to remote location 
 | 
 
 
How Do I…
| 1. | Click Configure > Add Server. |  
 | 2. | Choose appropriately all the options which are explained in the previous section. |  
 | 3. | Click Add to save the service into HX Job Manager database. |  
   
 | 
 
| 1. | Click Configure > Passwordless Connection to invoke the dialog. |  


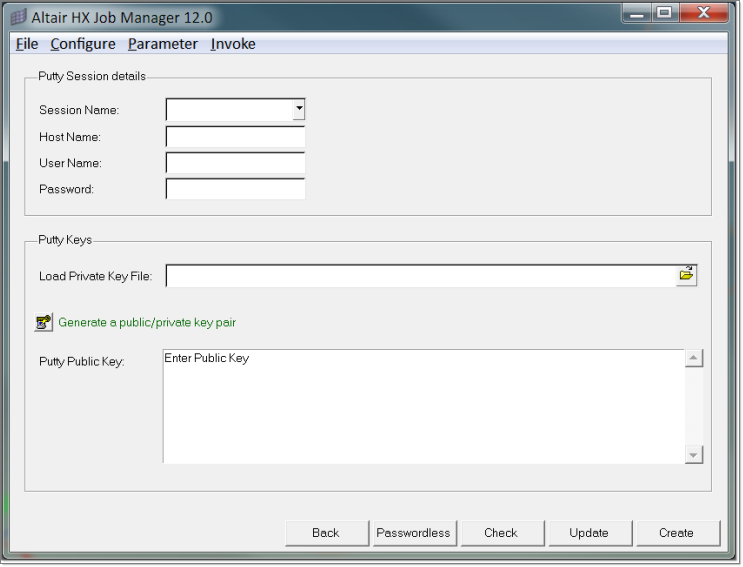
Putty Session Details
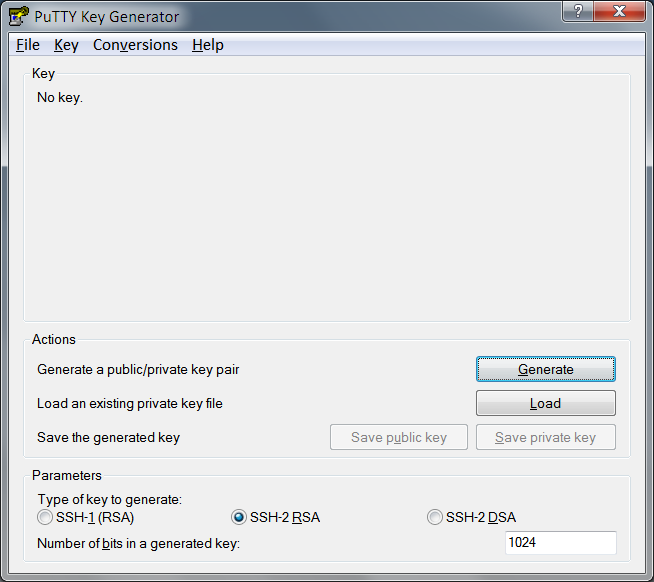
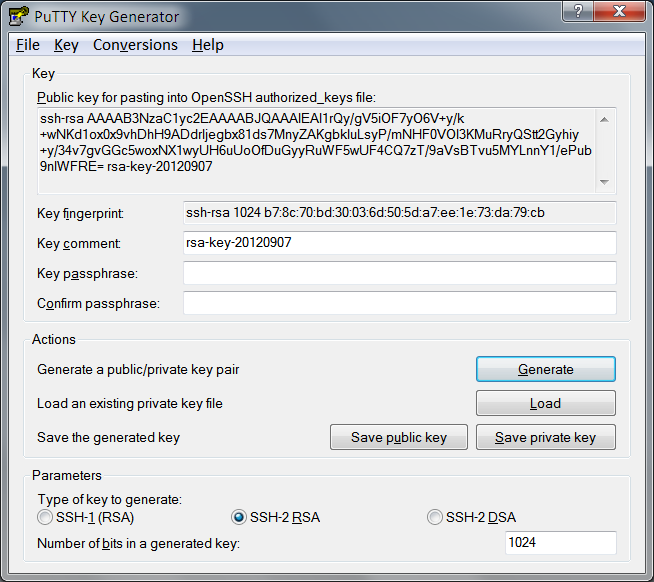
Field
 | 
Description
 | 
 
Session Name 
 | 
Select the session name from the drop down. If not include a new session name in the entry.  
 | 
 
Host Name 
 | 
Based on the selected session name, host name gets updated automatically. In case new addition, enter the host name. 
 | 
 
User Name 
 | 
Enter your Unix user name 
 | 
 
Password 
 | 
Enter password  
 | 


Putty Keys
Field
 | 
Description
 | 
 
Load Private Key File 
 | 
Select the private key file (*.ppk) if already generated.  
 | 
 
Generate Public / Private Key Pair 
 | 
Click on the icon   to open PuTTY password creation window 
 | 
 
Putty Public Key 
 | 
Specify the public key or once private key is loaded, public key gets automatically updated. 
 | 


 | 
 
| 1. | Select the session name from the drop down. Its lists all the saved sessions. |  
 | 2. | Enter valid host name, user name and password. |  
 | 3. | Click on the icon   to open the Putty password creation window. |  
   
| 4. | Select which type of key you want to generate, and select the strength of the key. Select SSH-2 RSA key and 1024 as strength of key. |  
 | 5. | Click on Generate to generate the key. |  
 | 6. | In this window when key generation is going on, roll over the cursor in the empty space, so that it generates password with great strength. |  
   
| • | Once you have generated the key, select a comment field and a passphrase (you have to leave this field blank). |  
 | • | Now you are ready to save the private key to disk; click Save private key. Save your private key to secured location and close this window. |  
 | • | Go back to the HX Job Manager dialog and load the new private key. It will automatically update the public key. |  
 | • | Click on Passwordless button in the button bar. |  
 | • | Verify the user name and enter the password in the small pop-up window.  |  
 You will be notified about the status of the passwordless connection set up. 
  
 |