To flash code to a Texas Instruments device, the Texas Instruments UniFlash tool (v3.x, 4.22, or 5.0.0.2289, and 6.2.0.3059) must be installed on your computer. If you have not yet installed UniFlash, see the Altair Embed Installation Guide. We recommend installing UniFlash 6.2.0.3059.
1. Plug your device into your computer.
2. Open the diagram.
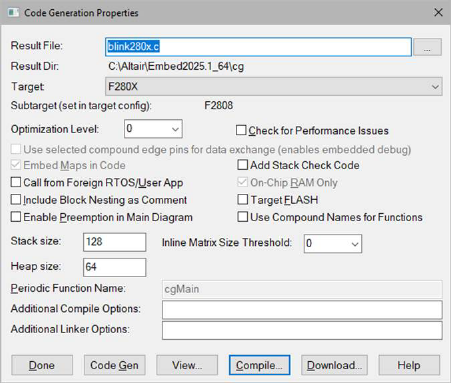
3. Click Tools > Code Gen.

4. Activate Target FLASH. You can leave the remaining parameters as they are.
5. Click Compile to create an OUT file that will run from FLASH. The OUT file is stored in the specified result directory.
6. Click Quit.
7. Start UniFlash.
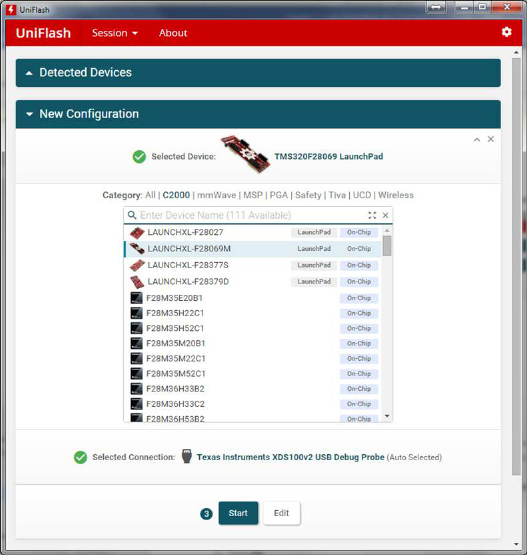
8. Under New Configuration, select your target device and connection.

In the above window, the Texas Instruments F28069M LaunchPad is selected. The corresponding XDS 100v2 USB Debug Probe connection is automatically selected.
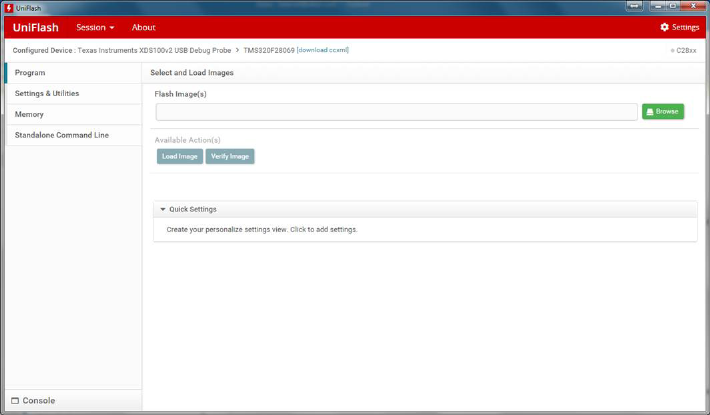
9. Click Start to select and download your OUT file to FLASH. The following dialog appears:

10. Under Flash Image(s), click Browse and select the OUT file you created in Step 4.
11. Under Available Actions(s), click Load Image.
Note: To verify that the OUT file was written to FLASH, click Verify Image.
12. Unplug your device and then plug it back in; the code will now run in FLASH.
Note: In order to boot from FLASH, the GPIO lines must be set to a specific pattern. For example, to boot from FLASH on the F28069M, GPIO37 and GPIO34 must be High, and SW1 and SW2 on the LaunchPad must be in the ON position. For more information, refer to the Boot Selection Mode in the Texas Instruments Technical Manual for your device.