EDEM Creator - Set up the Model
Learn how to set up a simulation model and equipment, and define the generation of bulk materials using EDEM Creator.
Select the units of measurement to be used throughout EDEM.
For more information about how to select units, see Select Units.
- Click and then select the Units tab.
- In the Units tab, change the following measurement units:
- Angular velocity to deg/s
- Length to mm
- Click OK.
Review the Model
The next step is to review the setup and the Physics of the contact model.
-
Review the model that has been set up.
- Open the
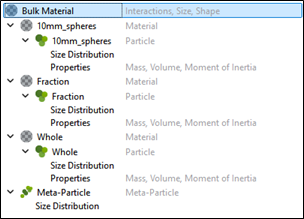
Replacement_Tutorial.demfile.Note: This model has been previously set up with Materials and Geometry. - Right-click Bulk Material in the Creator
Tree.
- Review the Geometry setup.
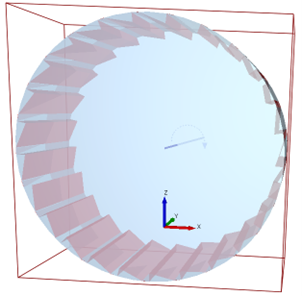
Note: The Meta-Particle has been created but left intentionally blank. This is to allow analysis of Meta-particle with the custom model. In this simulation, we will create a mill with non-breakable grinding media (one hundred 10 mm spheres). Though three whole particles are created initially, at a set time, these whole particles will be replaced by smaller ‘Fraction’ particles with the custom API model. The Fraction particles will be bonded together and will be broken up by the grinding media.
- Open the
-
Review the Physics model.
- In the Creator Tree, select Physics.
- Select Particle to Particle from the Interaction dropdown list.
- Based on the selected interaction, click Edit Contact Chain.
- In the Select Contact Models dialog box, select the Bonding V2 contact model.
- Click the
 icon to define the contact model parameters.
 - In the Parallel Bond V2 Configuration dialog box,
review the following:
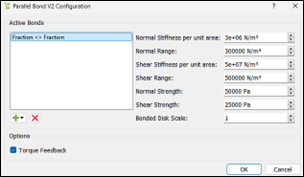
Note: The Fraction < > Fraction Physics model has been set up as shown.
Load the Custom Particle Factory
The next step is to load a custom particle factory to the model.
- Expand Geometries in the Creator Tree.
- Right-click Plugin Factories and select Import Factory.
-
Import the
ParticleReplacementlibrary.Note: If the error ‘no user defined factories available’ is displayed, ensure that theParticleRepacement.dlland associated.txtfiles are in the same location as thesimulation .demfile. - In the Creator Tree, select Physics.
- Select Particle Body Force from the Interaction dropdown list.
- Based on the selected interaction, click Edit Contact Chain.
-
In the Select Contact Models dialog box, select the
ParticleReplacement plug-in model.
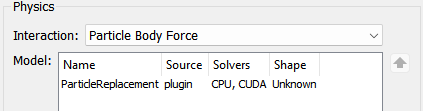
Note: The Particle Body Force part of the model removes all particles called 'Whole' at a set point in time. When removing the particles, it stores the positions of the removed spheres and passes the positions to the factory. The factory reads theParticle_Cluster_Data.txtfile and all the individual fraction spheres, and then places these files in the simulation based on the positions of the removed 'Whole' particle.Figure 1. Single Sphere Particle replaced by a Multi-Sphere Meta-Particle 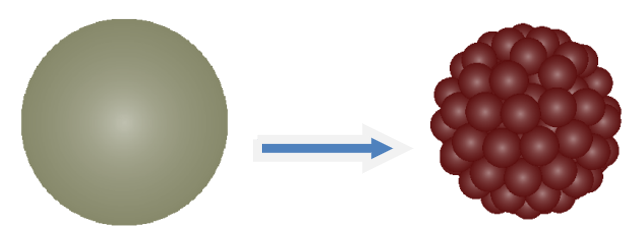
- Settings for the factory are defined in
Particle_Replacement_prefs.txtfile. - The positions of the individual spheres within the Meta-Particle are
controlled by the
Particle_Cluster_Data.txtfile.
- Settings for the factory are defined in