


|
Adding a Numeric Range Action Slider
The Numeric Range Action Slider allows sliders of two parameters.
Whenever the slider values are changed, the associated action is executed.
Steps:
1. After double-clicking or drawing a rectangle
on the dashboard canvas, click  on the Select Part pane
then click the Numeric Range Action Slider
on the Select Part pane
then click the Numeric Range Action Slider  icon.
icon.
The Numeric Range Action Slider pane is displayed, and the Numeric Range Action Slider part is added on the dashboard canvas.
For this example, the following parameters are defined:
|
Parameter Name |
Type |
Default Value |
|
Ticker |
Text |
COST |
|
AdjCloseMin |
Numeric |
30 |
|
AdjCloseMax |
Numeric |
205 |
These parameters are used on the Title of the Line graph (e.g., Price History for {Ticker} with the Adj Close range of {AdjCloseMin} to {AdjCloseMax}).
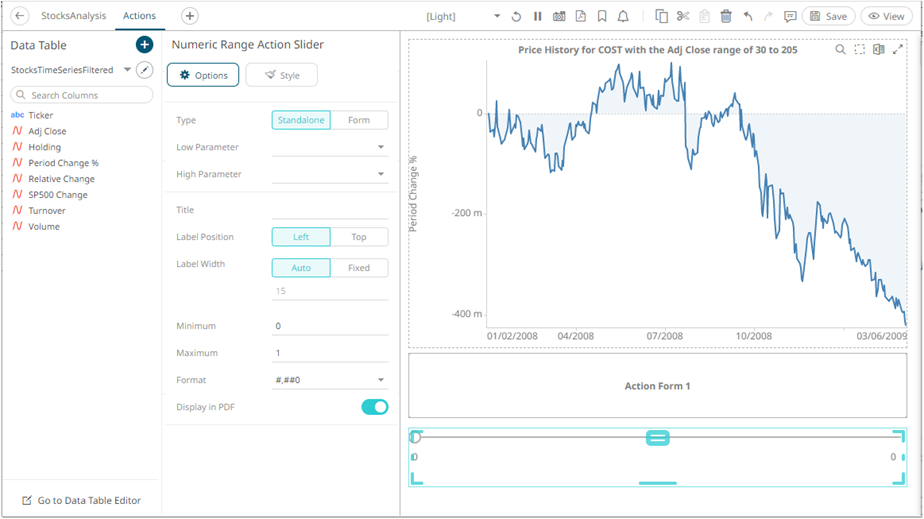
2. The numeric range action slider can be configured to either be a Standalone or a Form component.
When set to Form, the numeric range action slider can be connected to any form controller on the same dashboard. The parameters that the action part can set depends on how the form is configured.
|
NOTE |
An action form part must be defined first to associate the numeric range action slider as a component. Refer to Adding an Action Form more information. |
A line connects the component to the associated form.
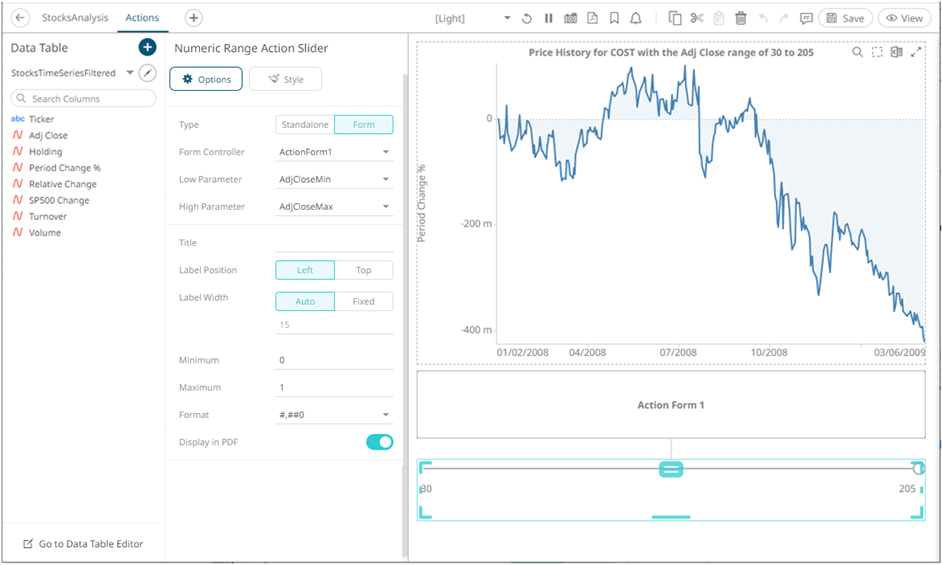
If the numeric action slider should not be connected to a form, it can be set to Standalone instead. Select the Low Parameter and High Parameter that will be updated by this action part.
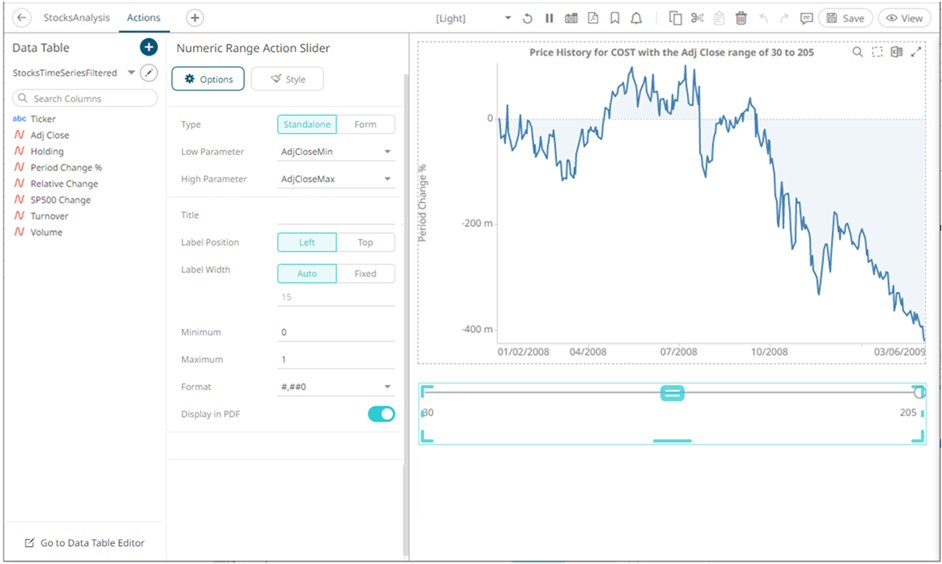
3. Enter the Title of the numeric range action slider.
4. Select the Label Position: Left or Top.
5. Select the Label Width:
· Auto, or
· Fixed then enter the width (default is 15).
6. You can opt to enter the allowed Minimum and Maximum values.
7. Enter the Format that the numeric value will be displayed.
8. Tap the Display in PDF slider to turn it on and include the numeric action slider in the PDF output.
9. To set the style of the Numeric Range
Action Slider, click Style  .
.
The page updates to display the Style pane.
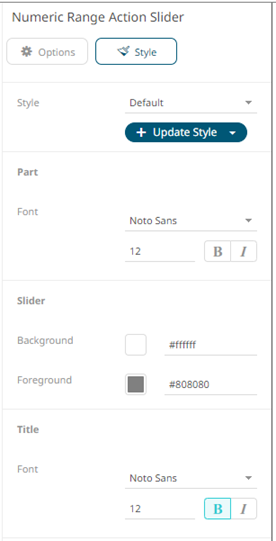
10. Set the Font type, size, style (Bold and/or Italic) of the part and title.
The part title’s font is set to Bold by default.
11. Click the Foreground or Background box to display the Color dialog and set the slider color or enter the Hex color code.
12. Click Update Style  and
select any of the following options:
and
select any of the following options:
· Set current as default – Save the changes and set it as the default.
· Create custom style – Save the changes and set it as a custom style.
The Style pane updates to display the Title control.
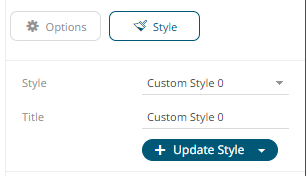
¨ Enter the custom style Title.
¨ If there are additional changes made, click Update Current Style in the Update Style drop-down.
The new custom style is added in the Workbook > Theme > Custom Styles list.
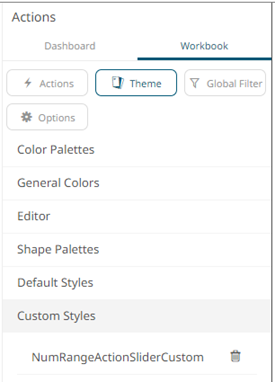
If published, the custom style configuration of the Numeric Range Action Slider will be added to the Global custom styles list and can be applied to other parts.
· Reset to default – Revert to the original default settings.
13. Click the Save  icon
on the toolbar to save the changes.
icon
on the toolbar to save the changes.
When
saved, the  notification
is displayed.
notification
is displayed.