Uploading Workbooks
Users with a Designer role can upload and publish workbooks to the currently selected folder in the Workbooks page.
Steps:
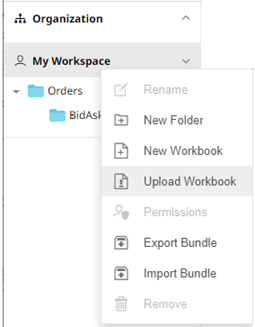
1. On the Workbooks page, click on a folder or subfolder and select Upload Workbook.

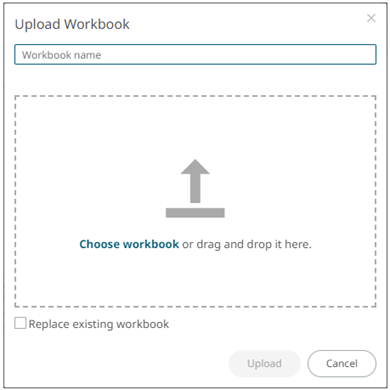
The Upload Workbook dialog displays.

2. To upload a workbook, you can either:
· drag it from your desktop and drop on the dialog, or
· click Choose Workbook and select one on the Open dialog that displays.
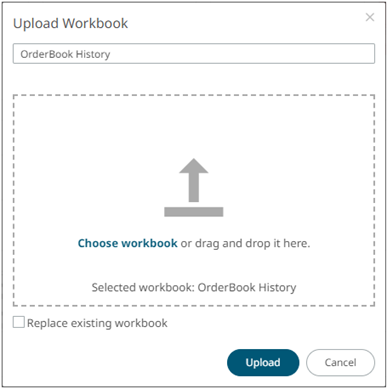
The name of the workbook is displayed on the uploaded workbook area and in the Name box.

3. You can opt to rename the workbook.
4. To replace an existing workbook, check the Replace existing workbook box.
5. Click ![]() .
.
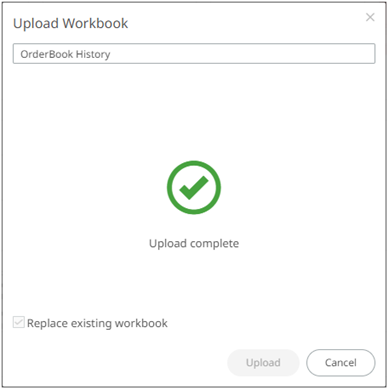
You will be notified once the workbook is uploaded.

The workbook is added and displayed.
|
NOTE |
· An error message is displayed if the data source schema of the uploaded workbook has not been updated or missing. · The uploaded workbook will not include the data source. However, if Panopticon Real Time can reach the same folder of the data source, or the workbook has been designed in the same machine, then the data can be viewed. |


