Joining Multiple Data Sources in Workbook Data Table Editor
There are occasions where the desired data is not achieved or available using a single query and table. This is often the case with time series where you want to join a static data set to a time series database.
To join multiple tables, add the source tables in the Workbook Data Table Editor view and join them using a common field or a join key. Furthermore, you can also perform a transform of a table for time series analysis, if required.
|
NOTE |
· Joining two data sources can be done using more than one left and right key columns is now supported. · It is no longer needed to modify the data types to text to join data sources. |
In this section, we will discuss how to join the following sample tables using two common fields.
Sample Table 1
|
Item |
isodatetime |
ask_price |
ask_volume |
bid_price |
bid_volume |
|
Price |
2008/01/17 13:00:00 |
17.75 |
2 |
17.65 |
1 |
|
Rate |
2008/01/17 13:00:01 |
17.70 |
2 |
17.64 |
1 |
|
Price |
2008/01/17 13:00:00 |
17.74 |
1 |
17.61 |
1 |
Sample fields
Sample Table 2
|
TradeID |
RatePrice |
ISODateTime |
trade_price |
trade_volume |
Side |
AggressivePassiveDark |
|
1 |
Price |
2008/01/17 13:00:00 |
17.79 |
200 |
Buy |
Aggressive |
|
2 |
Rate |
2008/01/17 13:00:02 |
17.65 |
100 |
Sell |
Dark |
|
3 |
Price |
2008/01/17 13:00:04 |
17.72 |
100 |
Buy |
Dark |
Sample fields
Steps:
1. On the Data Sources Settings pane, add a new
data source by clicking the Add Data Source  button.
The list File/URL data sources is displayed on the Connectors pane.
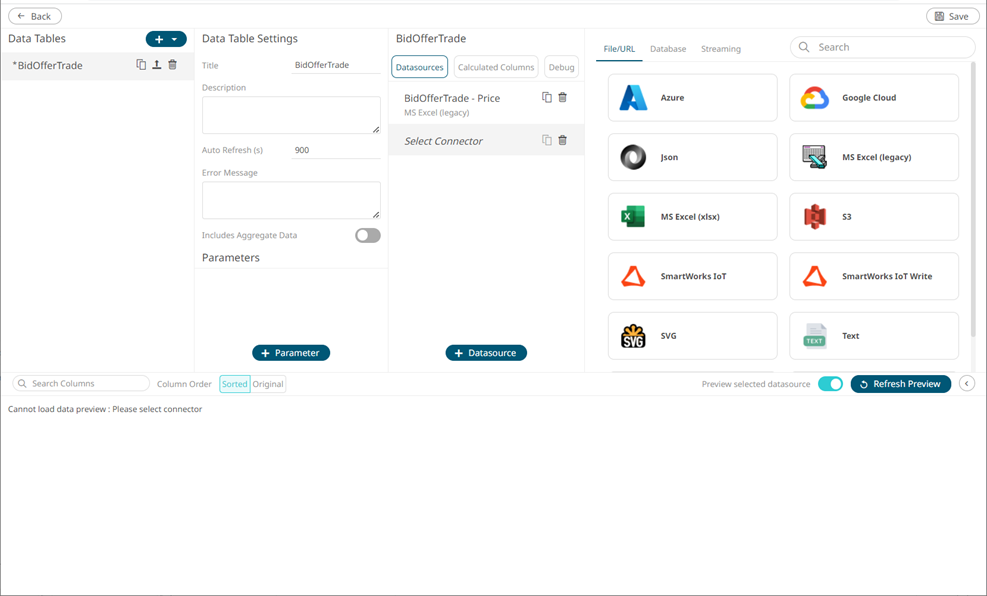
2. Select a data sources tab then select a data source.
When
there are two or more data sources on the Data Sources pane,
the Join ![]() icon
is displayed.
icon
is displayed.
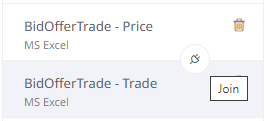
3. To join the data sources, click the
Join ![]() icon.
icon.
The
icon changes to ![]() and the Join
Settings pane displays.
and the Join
Settings pane displays.
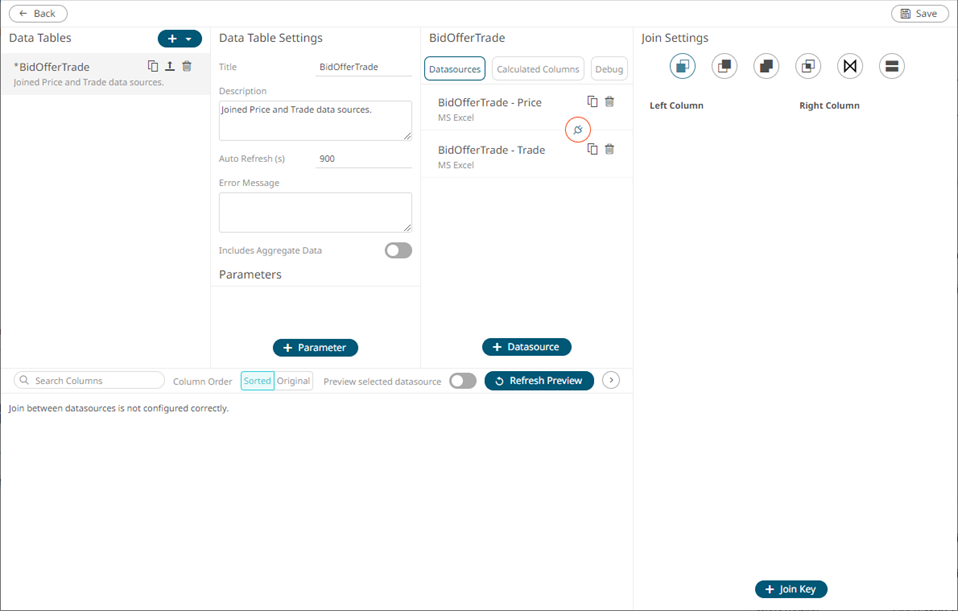
4. Select the join Type:
· Left Outer Join 
Keep all rows from the left table. When there are no matching values from the right table, empty values will be returned.
· Right Outer Join 
Keep all rows from the right table. When there are no matching values from the left table, empty values will be returned.
· Full Outer Join 
Returns all rows from both tables, whether they have a matching row or not.
· Inner Join 
Select only rows from both tables for which the join keys match.
· Cross Join 
Returns the Cartesian product of rows from tables in the join.
5. Click ![]() .
.
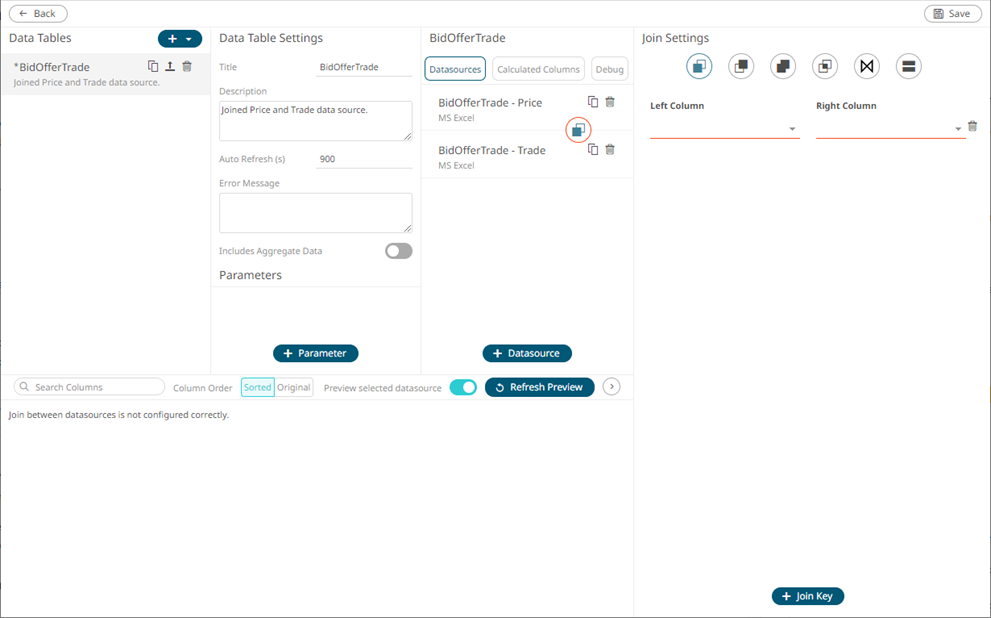
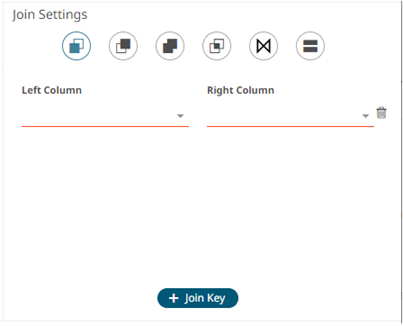
6. Select the unique ID from the Left Column data source from the drop-down list that will be used to match the unique ID from the Right Column data source (e.g., Item).
7. Select the unique ID from the Right data source from the drop-down list (e.g., RatePrice).
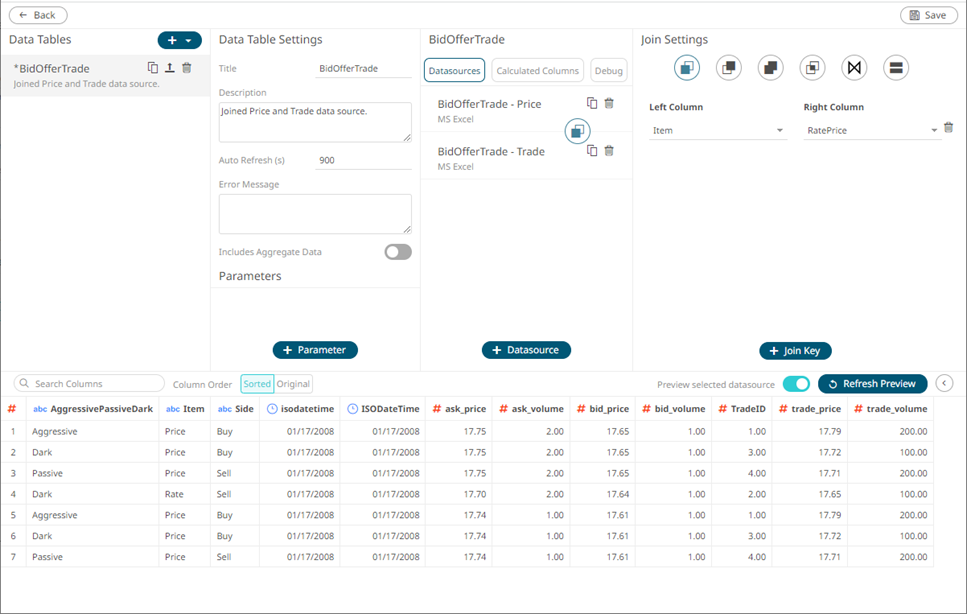
8. Click  then click
 ![]() to
expand the Data Preview pane.
to
expand the Data Preview pane.
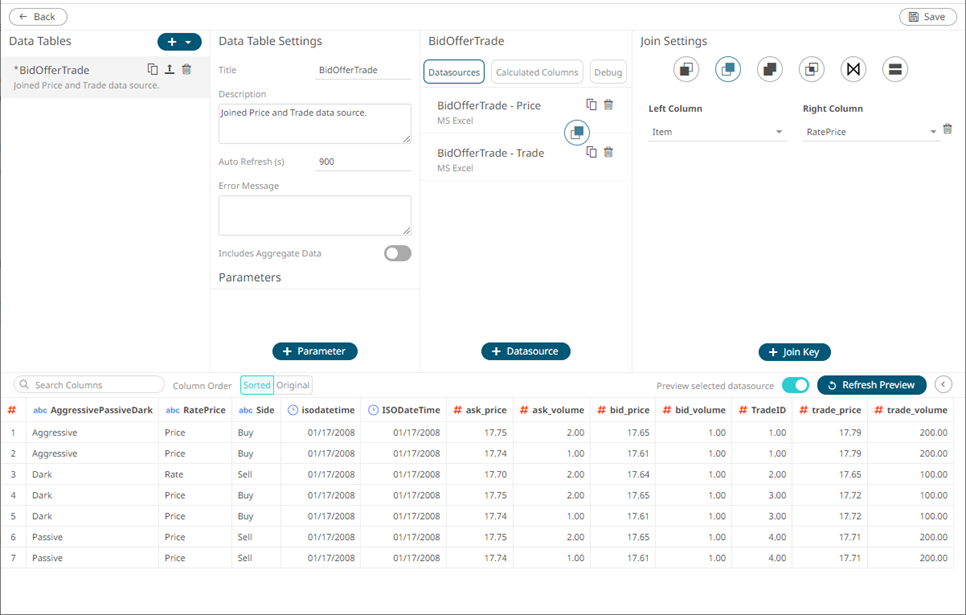
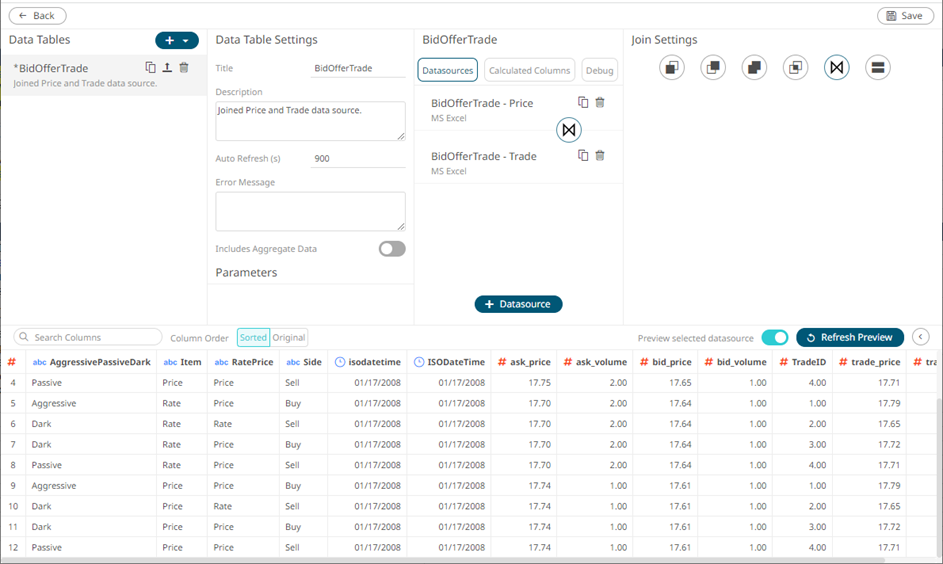
The selected join type is displayed in the Join definition box and the data table of the joined data sources is loaded on the Data Sources Preview area.
· For the Left Outer Join, the joined table now displays seven rows based on the Item join key of the left table.
· For the Right Outer Join, the joined table now displays seven rows based on the RatePrice join key of the right table.
· For the Full Outer Join, the joined table now displays all rows that are matching or not matching based on the Item/RatePrice join keys of both tables.
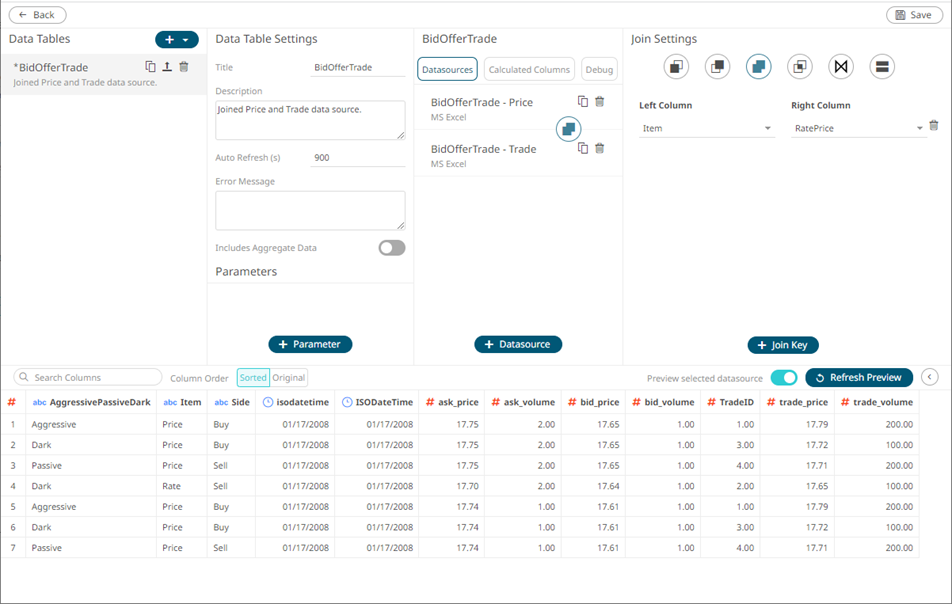
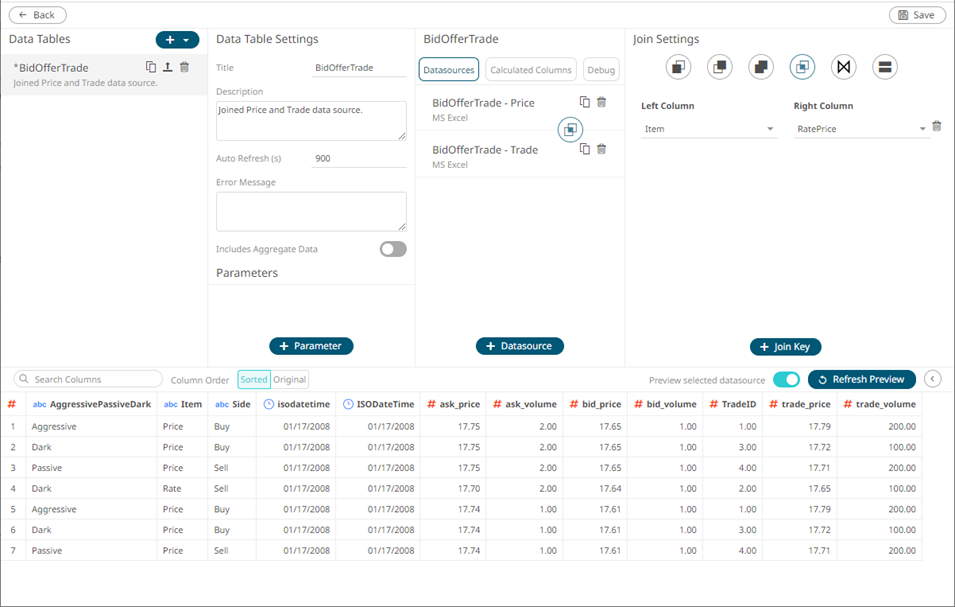
· For the Inner Join, the joined table now displays seven rows based on the Item/RatePrice join keys of both tables.
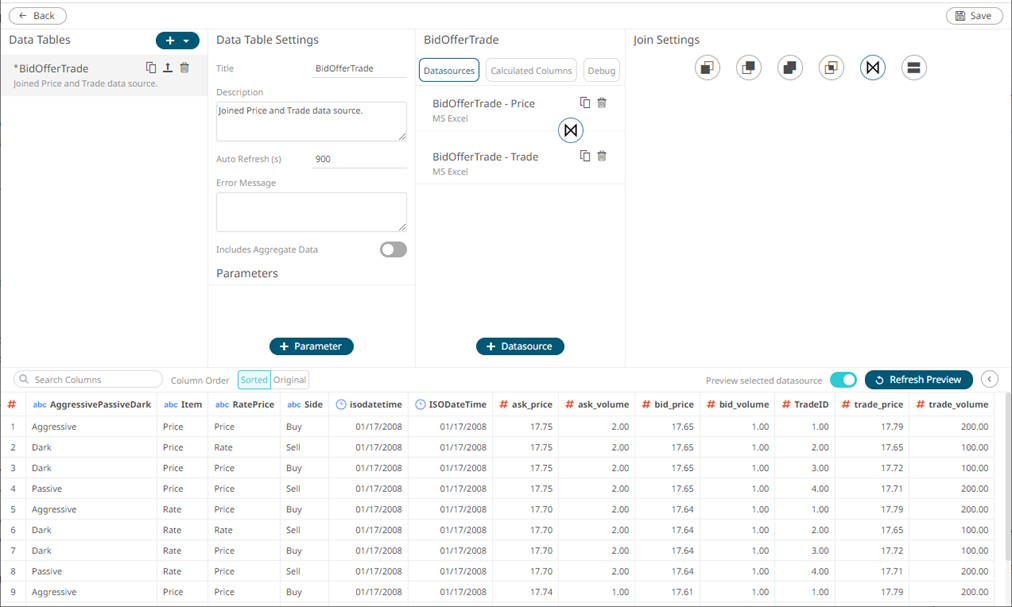
· For the Cross Join, the joined table now displays twelve rows based on the combination of each row from the first table with each row from the second table.
Note that Join Keys definition is not available.
9. Now, let us add new left and right join
keys. Click ![]() on
the Join Settings pane.
on
the Join Settings pane.
A new Left Column and Right Column entry displays.
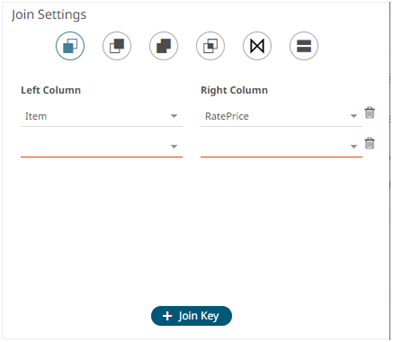
10. Select the left and right join keys (e.g., isodatetime and ISODateTime)
11. Again, select the join Type.
12. Click  .
.
The selected join type is displayed in the Join definition box and the data table of the joined data sources is loaded on the Data Sources Preview area.
· For the Left Outer Join, the joined table now displays three rows based on the Item and isodatetime join keys of the left table.
All of the rows from the left table are kept. Note that for the rows with no matching values from the right table, empty values are returned.
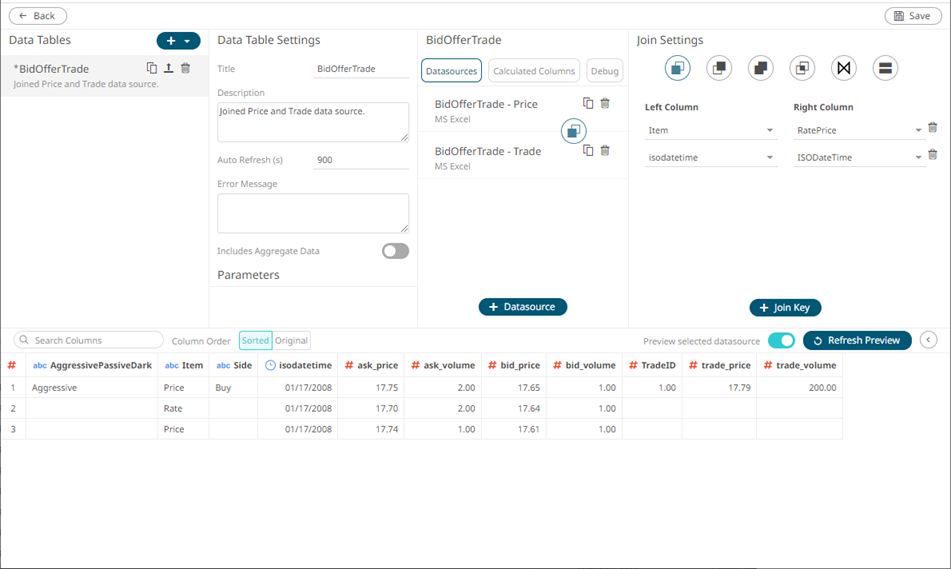
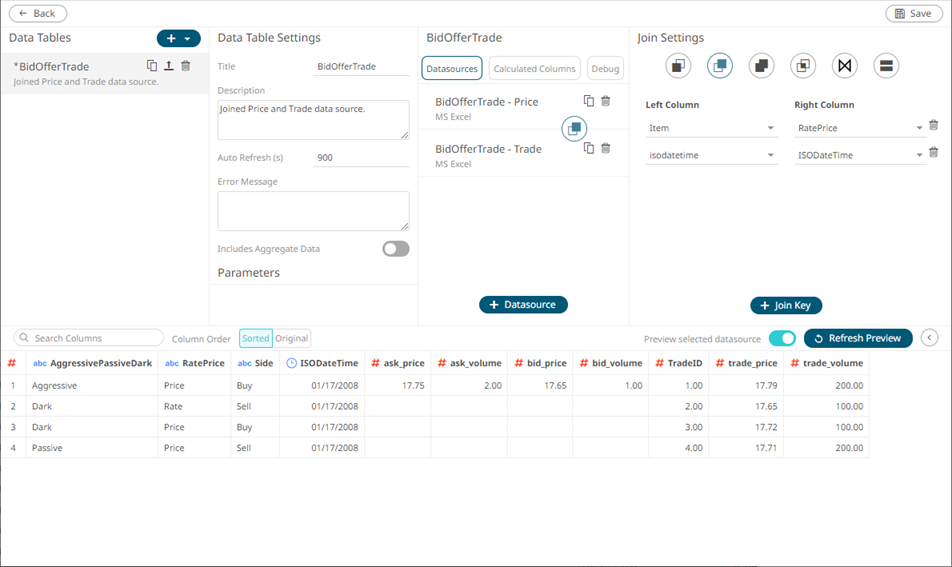
· For the Right Other Join, the joined table now displays four rows based on the RatePrice and ISODateTime join keys of the right table.
All of the rows from the right table are kept. Note that for the rows with no matching values from the left table, empty values are returned.
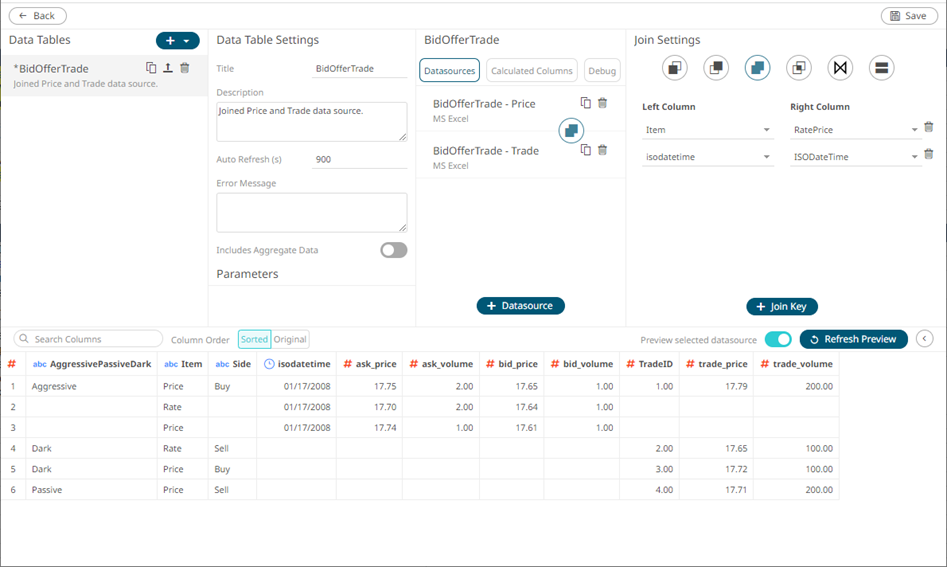
· For the Full Outer Join, , the joined table now displays six rows from both tables. The first row is based on the Item/RatePrice and isodatetime/ISODateTime join keys of both tables while the next five rows are those that did not match the join keys.
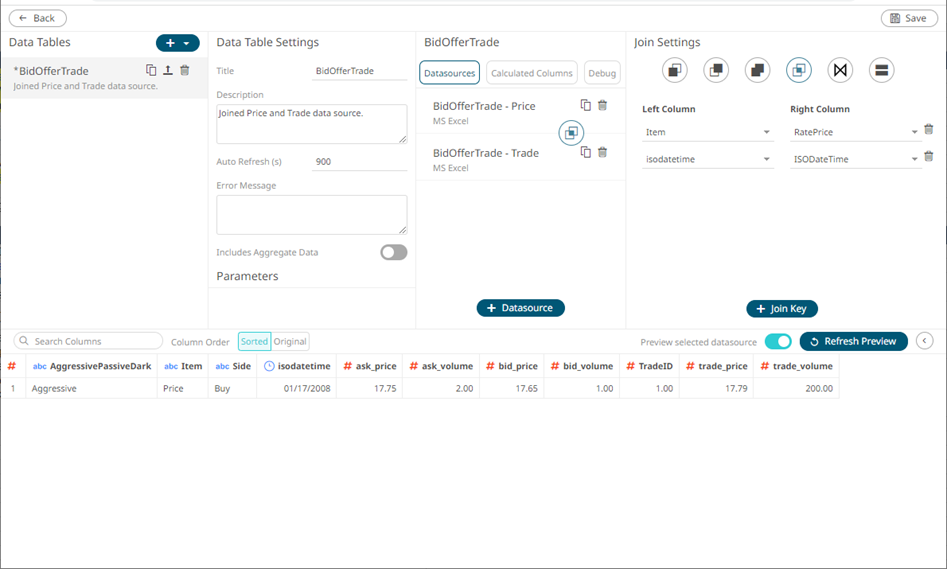
· For the Inner Join, the joined table now displays one row based on the Item/RatePrice and isodatetime/ISODateTime join keys of both tables.
· For the Cross Join, the joined table now displays twelve rows based on the combination of each row from the first table with each row from the second table.
Note that Join Keys definition is not available.
13. To delete left and right join keys in
the Join Settings pane, click ![]() .
.
14. Click  to save
the join. Once saved, a notification message displays.

|
NOTE |
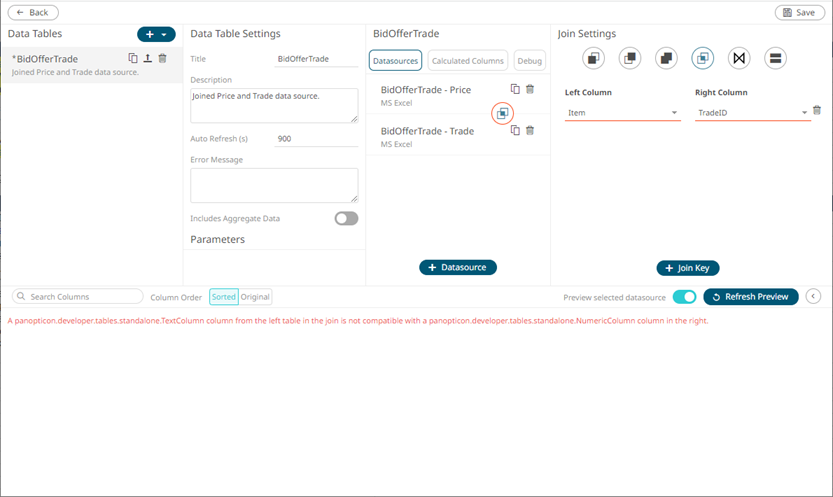
If there is an error in the join definition, the Join icon or Left/Right Column drop-down is marked with a red border. Consequently, the preview is not displayed. For example, if the join keys have different data types, an error message is displayed: “A panopticon.developer.tables.standalone.TextColumn column from the left table in the join is not compatible with a panopticon.developer.tables.standalone.NumericColumn column in the right.”
|


