


|
Adding a Series Legend
The Series Legend displays configured reference lines, their associated labels, and visual members.
Steps:
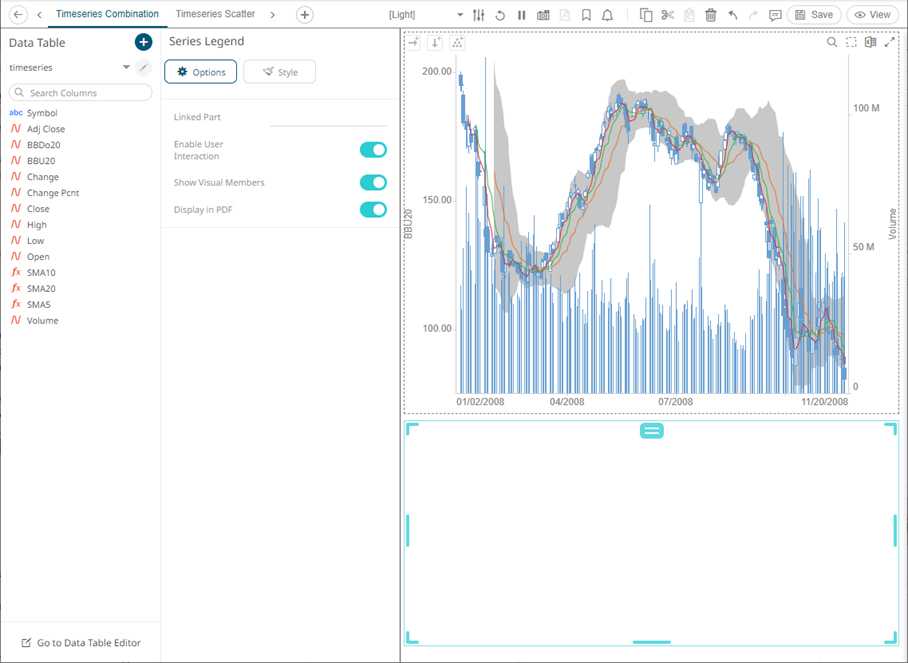
1. After double-clicking or drawing a rectangle
on the dashboard canvas, click  on
the Select Part pane then click the Series Legend
on
the Select Part pane then click the Series Legend  icon.
icon.
The Series Legend Settings pane is displayed, and the Series Legend part is added on the dashboard canvas.
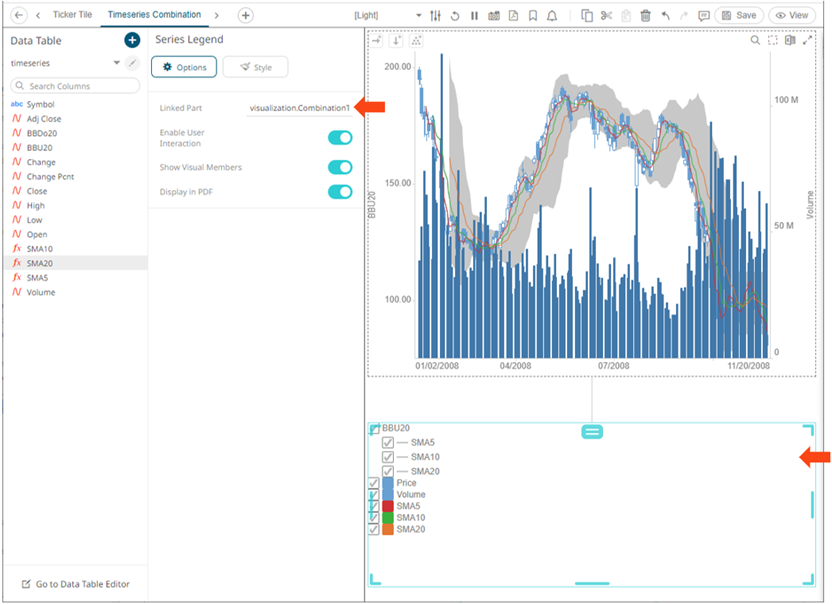
2. Select any of the available parent visualizations from the Linked Part drop-down list.
The series legend is connected to its parent visualization and the link between them is displayed. The reference line listing from this visualization is retrieved and the constituent reference lines in a vertical column along with their associated levels are displayed.
|
NOTE |
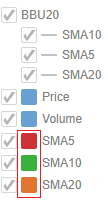
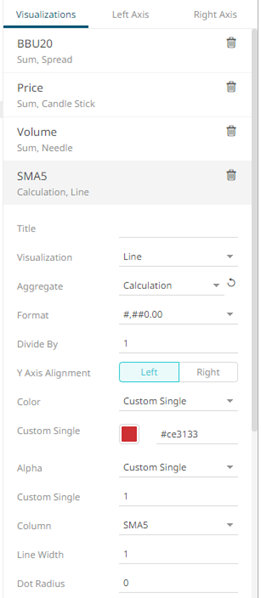
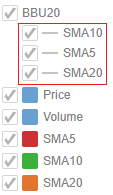
In the example above, for SMA5, SMA10, SMA20, the square represents the configured Custom Single color for each visual member.
For the BBU20, Price and Volume members, there is no configured Custom Single color.
Setting the Custom Single color for the visual members helps display the Color Legend for layers in the Combination Graph, in cases where the Color variable is not used. Furthermore, the SMA10, SMA5, and SMA20 are the reference lines added under the BBU20 visual member. |
3. On the Series Legend Settings pane, tapping the Enable User Interaction slider enables checkboxes of the visuals and reference lines and users can check or uncheck them to filter which ones to displayed in the parent visualization.
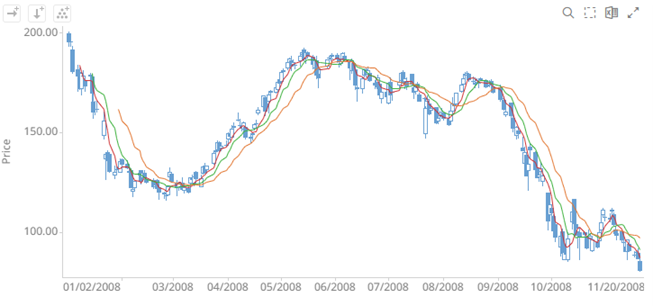
For example, if BBU20 is unchecked:
The visualization and reference lines for BBU20 will not be displayed.
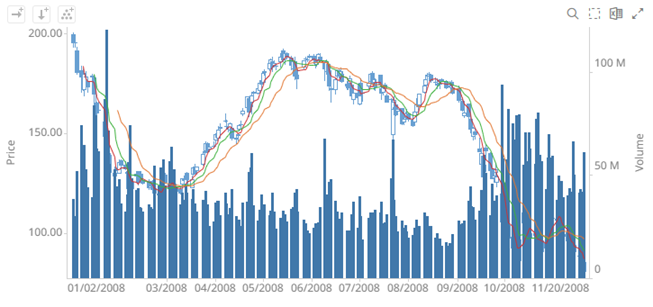
If Volume is also unchecked:
The visualization for Volume will also not be displayed.
4. Tapping the Show Visual Members slider allows users to display visual members in the series legend.
Disabling Show Visual Members hides the visual members in the series legend. However, the reference lines will still be displayed.
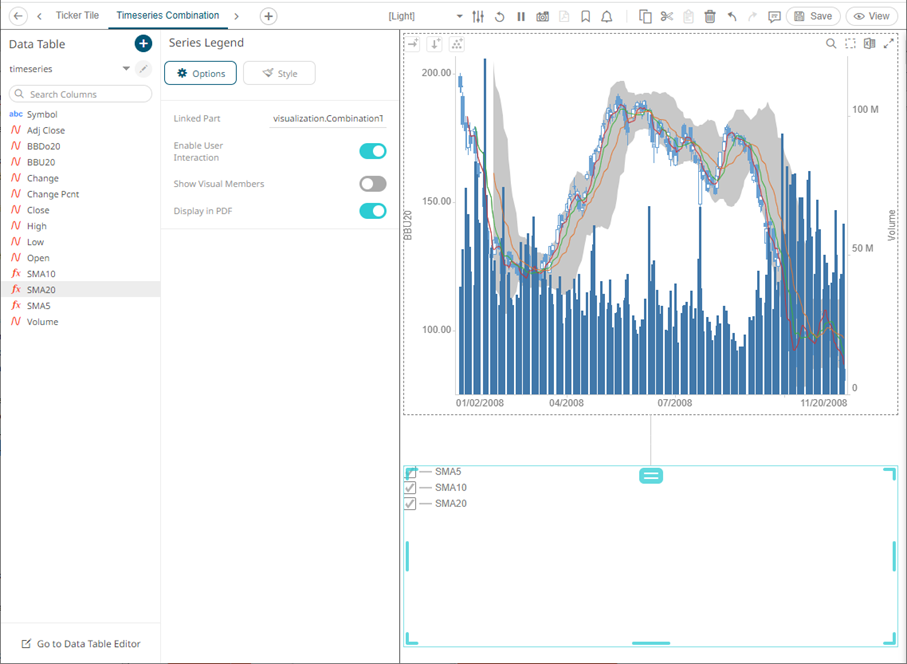
5. Tap the Display in PDF slider to include this dashboard part in the PDF output.
6. To set the style of the Series Legend,
click Style .
.
The page updates to display the Style pane.
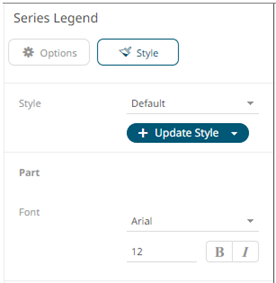
7. Set the Font type, size, style (Bold and/or Italic).
8. Click Update Style  and select any of the following
options:
and select any of the following
options:
· Set current as default – Save the changes and set it as the default.
· Create custom style – Save the changes and set it as a custom style.
The Style pane updates to display the Title control.
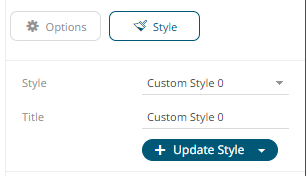
¨ Enter the custom style Title.
¨ If there are additional changes made, click Update Current Style in the Update Style drop-down.
The new custom style is added in the Workbook > Theme > Custom Styles list.
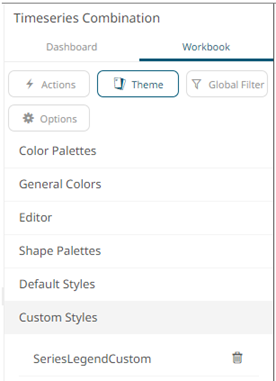
If published, the custom style configuration of the Series Legend will be added to the Global custom styles list and can be applied to other parts.
· Reset to default – Revert to the original default settings.
6. Click the Save  icon on the toolbar to save the
changes.
icon on the toolbar to save the
changes.
When
saved, the  notification
is displayed.
notification
is displayed.