This tutorial shows you how to set up a gravity analysis with the User Process utility. The setup for the example model includes:
| • | Positioning the blank with reference to the die. |
| • | Assigning the appropriate material and section properties to the tool and blank. |
A setup file containing the blank and die mesh provides the starting point.
| 1. | Copy the file, gravity.hf, into your working directory. |
Note: The model files for this tutorial are located in the file mfs-1.zip in the subdirectory \hf\Incremental\. See Accessing Model Files.
| 2. | From the File menu, select Open. |
| 3. | Browse to the file, gravity.hf, and then click Open. |
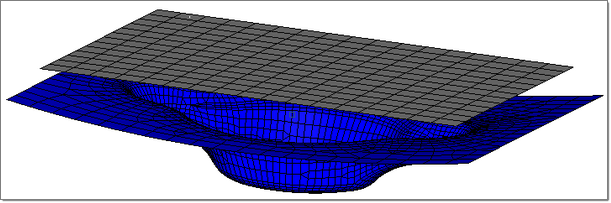
The model on your screen should look something like this:
| 4. | Near the top of the tree, right-click Process Type, and then select Gravity. |
| 5. | Under Blanks > blank, right-click Material, select database > steel > CDRQ, and then click Select. |
| 6. | Click Thickness:1, click the value, 1, and enter the blank thickness 1.25. |
| 7. | Under Tools > Die, select Position, right-click and select Below. |
| 8. | At the top of the tree, right-click Process: grav_implicit, and then select Autoposition... |
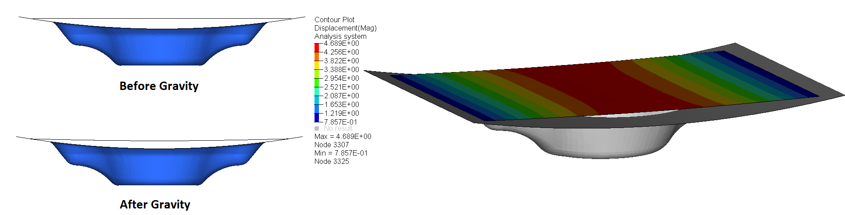
Notice that the blank positions itself with respect to the die.
| 9. | Right-click Process: grav_implicit, and then select Run. |
| 10. | At the prompt to create input, click Yes. |
| 11. | In the dialog that appears, browse to your working folder. For File name, enter a file name, and then click Save. |
The RADIOSS implicit solver launches and runs the gravity computation.
Return to Incremental Tutorials


