


|
JSON
The JSON connector allows the retrieval and processing of JSON files, either from a disk, a Text, or from a defined URL.
Steps:
1. Select JSON from the Data Sources pane. The JSON Settings pane and the retrieved JSON source are displayed.
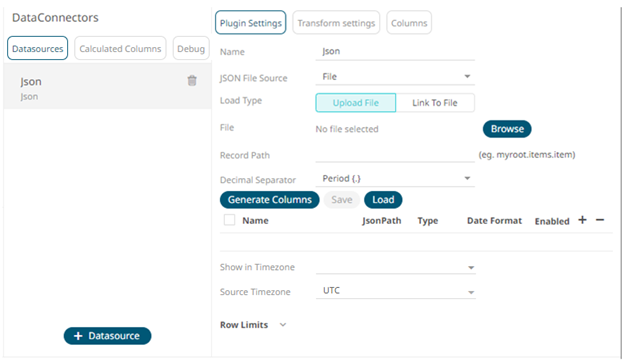
2. Enter the Name of the JSON data source, then click
 .
.
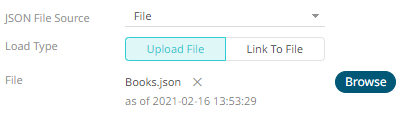
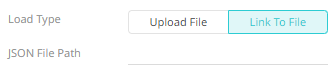
3. Select the JSON file source:
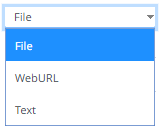
· File
You can either:
¨ Upload a data source snapshot by clicking Upload File
 then
Browse
then
Browse  to browse to the file source.
After selecting the file, it is displayed with the timestamp of the snapshot.
The data source is placed in the repository and locked, synchronized, and bundled with the workbook version.
To change the data source,
click  then
Browse to browse to a new version
of the file, which is uploaded into the repository, and also create
a new version of the workbook that reads it.
then
Browse to browse to a new version
of the file, which is uploaded into the repository, and also create
a new version of the workbook that reads it.
¨ Link to a data source file by clicking Link to File
 and
entering a JSON File Path.
and
entering a JSON File Path.
Ensure that in a cluster, you need to use a a shared path, or put it on every node and use a path that resolves on every node. You can update its contents whenever you want.
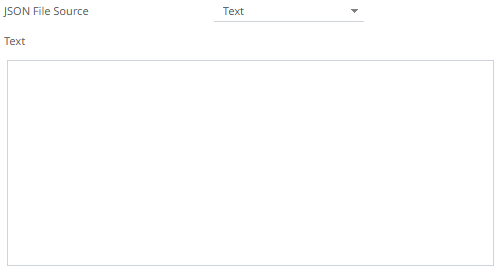
· Text
Then enter the text block to be parsed.
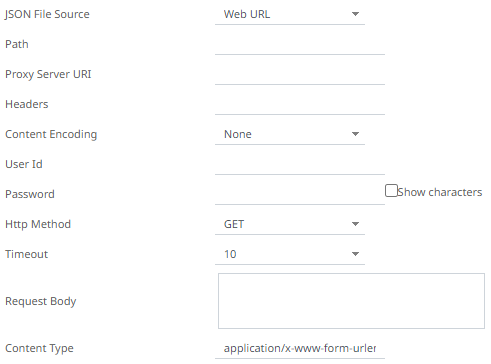
· Web URL
The dialog changes to allow specification of the following:
|
Property |
Description |
|
Path |
The absolute path including the http where the JSON file is located. |
|
Proxy Server URI |
The HTTP Proxy setting that will allow the JSON connector to reach the endpoint |
|
Headers |
· Headers are separated by a comma · Each Header is entered as Name = Value, where Name and Value can be enclosed in double quotes to allow inclusion of any character except for double quotes · Name and Value can also be left unquoted, in which case they may not include comma or equals characters |
|
Content Encoding |
Select the Content Encoding with the HTTP Header: None, GZip, Deflate, or GZip and Deflate |
|
User Id |
The user Id that will be used to connect to the JSON service. |
|
Password |
The password to connect to the JSON service. Check the Show Characters box to display the entered characters. |
|
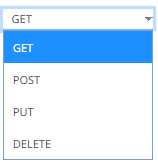
Http Method |
Select the HTTP Method to map any of the following operations to HTTP requests
· GET – retrieve information · POST – create or update an entity · PUT – replace an existing entity · DELETE – remove a request |
|
Timeout |
The length of time to wait for the server response (10 to 300). Default is 10. |
|
Request Body |
The Request Body for the HTTP POST. |
|
Content Type |
The required Content Type. Default is application/x-www-form-urlencoded |
|
Record Path |
The record path that will be queried by the JSON path (e.g., myroot.items.item). |
4. Click  to the fetch the schema based on the connection
details. Consequently, the list of columns with the data type found
from inspecting the first ‘n’ rows of the input data source is populated
and the Save button is enabled.
to the fetch the schema based on the connection
details. Consequently, the list of columns with the data type found
from inspecting the first ‘n’ rows of the input data source is populated
and the Save button is enabled.
5. You can also opt to load or save a copy of the column definition.
6. Click  to add columns and specify their properties:
|
Property |
Description |
|
Name |
The column name of the source schema. |
|
Json Path |
The Json Path of the source schema. |
|
Type |
The data type of the column. Can be a Text, Numeric, or Time |
|
Date Format |
The format when the data type is Time. |
|
Enabled |
Determines whether the message field should be processed. |
To delete a column,
check its  or
all the column entries, check the topmost
or
all the column entries, check the topmost  , then click
  .
.
7. Date/Time values of output data and Date/Time inputs, where supported, is by default unchanged.
You can opt to define the Show in Timezone and Source Timezone settings.
8. Set the row limit of the data set.
9. Tap the Preview Selected Data Source slider to turn it on.
10. Click  to display the data preview.