


|
Upgrading Installation
Upgrading the Existing Installation
Upgrade from Advanced Installation
If you have the Monarch Server application v13.0 or higher installed on your computer and launch the version latest installer to upgrade it, the following warning message is displayed:

|
NOTE |
Before uninstalling the previous version, ensure that you are able to restore the original environment, either wholly (e.g., full server/resource backups) or at minimum; the backups of the Monarch Server database; and all file-based resources dependent on the RMS, Automator, and Content functionalities being utilized. |
You need to remove the previous version of the application before installing Monarch Server.
|
NOTE |
No upgrade path is available for the advanced installation. |
Upgrade from Simple Installation
If you have the Monarch Server application v12.2+ installed on your computer and need to upgrade it to the latest version, launch the Monarch Server installer and follow the steps below.
1. In the directory with installation files, double-click MonarchAutomatorInstaller.exe to launch the Monarch Server Installation Wizard.
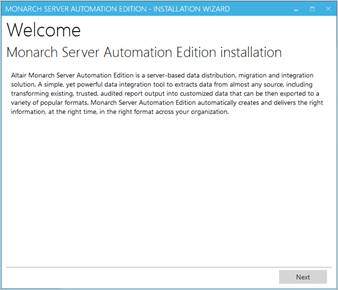
2. Click Next.
The License Agreement dialog box appears.

3. If you agree to the license terms, select I accept the terms in the license agreement, and then click Next.
4. The Upgrade dialog box appears. To upgrade the current application version, specify the Upgrade option.

5. Click Next.
|
NOTE |
The existing database remains, and it is upgraded to the new version. The application directory remains. |
The Service Credentials dialog box appears.
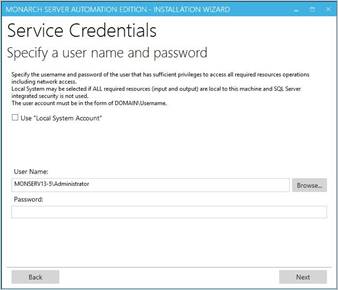
6. Specify the credentials for the Server administrator:
a. Select the Use “Local System Account” check box if you want to use your local system account.
b. Otherwise, clear the check box, and specify a custom user in the User Name field in the required format.
c. In the Password field, enter the corresponding password for the specified user.
d. To find and select a particular user in your domain, use Browse.
7. Click Next.
8. The Ready to Install dialog box appears.

The Requirements analysis section shows the third-party components with the possibility to view the license terms:
· Components with green tick marks are those that have been already installed on the local machine.
· Components with blue arrows are those that will be installed on the local machine.
To view the license terms for a third-party component, click the License Terms button next to the required component.
If you agree to the license terms, select I accept all the terms in all license agreements.
Click Install to begin the installation.
9. The previous version of Monarch Server is removed.
Click Finish.
10. After the installation is complete, the Process completed dialog box appears.

If necessary, you can select one of the following check boxes:
· Open Administrator in default browser: Select to open the Admin application in the default browser.
· View Monarch Server Automation Edition User’s Guide: Select to open the Monarch Server Automation Edition User’s Guide.
· Show logs: Select to open the folder containing the installation logs.
11. Сlick Finish.