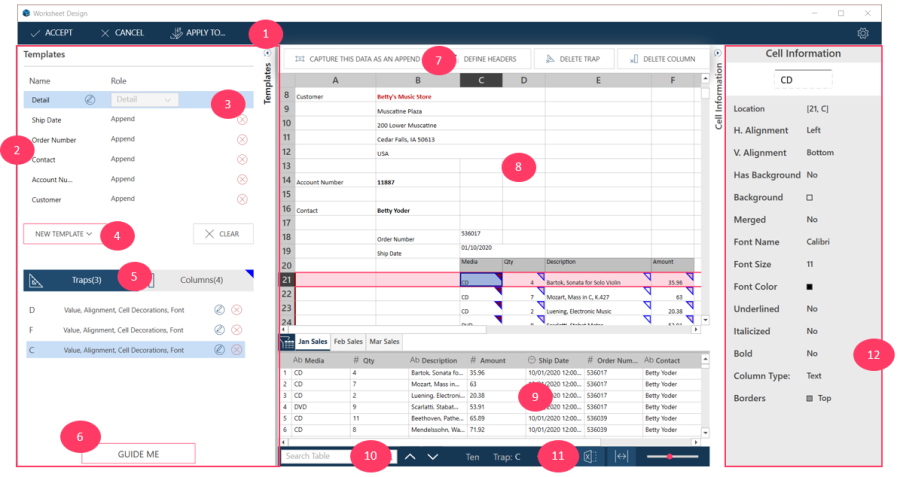
This page describes the Worksheet Design window.
The following table describes the components of the Worksheet Design
window.
|
Panel |
Description |
|
1 |
Worksheet
Design Main Menu
This menu
has options on the left that allow you to:
-
Accept the templates that
have been defined. After accepting, data from the worksheet
is extracted and presented in the Prepare window,
-
Cancel all changes made
and bring you back the main Monarch Data Prep Studio
interface.
-
Apply your templates to
other worksheets in the workbook. After you apply, all the
data in all selected worksheets are extracted and appended
in the Prepare window.
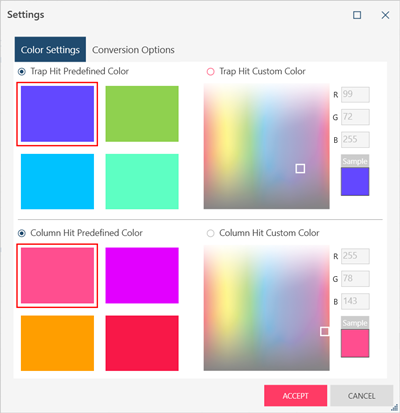
The Settings
icon  on the far right displays the Settings dialog that allows
you to: on the far right displays the Settings dialog that allows
you to:
|
|
2 |
Template
Panel
This panel
displays template, trap, and column information. It also displays
all the options you need to create/edit templates.
|
|
3 |
Template
List
This section
displays all templates that have been defined so far:
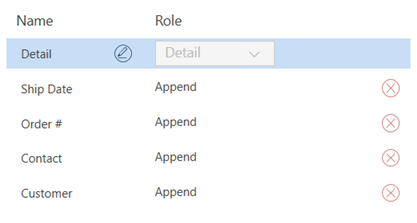
Select
a template to display its traps and columns on the Traps/Columns
List (see #5 below)
Within
this section, you can also:
Select
the edit icon  to change the template name. to change the template name.
Select
the delete icon  to delete a template. When
you delete a template, all traps and columns defined with it are
also deleted. to delete a template. When
you delete a template, all traps and columns defined with it are
also deleted.
|
|
4 |
Add
New Template drop-down
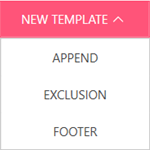
Allows you to select a template type to define
a new template. You can select the following:
Refer to Understanding Template
Types to learn what each template is for.
|
|
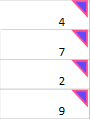
5 |
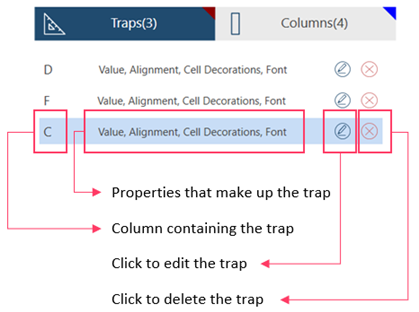
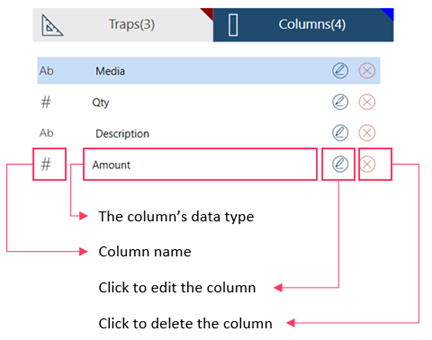
Trap
List/Column List
Displays the traps and columns defined for the
currently selected template on the Template List (see #3
above).
You need to select either the Trap
or Column tab to
display traps or columns respectively. The dark blue background
color indicates the currently-active tab. The number beside the
header indicates the number of traps or columns currently defined.
This shows the Traps list:
This shows the Columns list:
Refer
to Defining Traps for more information
on traps and columns.
|
|
6 |
Guide
Me button
Click on this button
to launch the Template
Definition Wizard to help you create templates.
|
|
7 |
Context
Menu Action Panel
Displays the various
tools you can use to define traps and columns:
This
Action...
|
Allows you to... |
 |
Define
a trap based on the properties of a cell.
To do so, select a cell and click on this
button .
After adding a trap:
Once a trap has been added, you can edit
or delete it. Refer to All About
Traps and Columns for details on editing or deleting
traps.
Note:
This option is also available on the context menu
for cells and rows.
|
 |
Delete
a trap.
Select a cell with a trap then click
on this button to delete the trap derived from that cell.
Refer to All About
Traps and Columns for details on editing or deleting
traps.
Note: This option is
also available on the context menu for cells and rows.
|
 |
Define
a column
To do so, select a cell and click on this
button . Column values that match trap criteria will be
extracted.
After adding a column:
Once a column
has been added, you can edit or delete it. Refer to Adding Columns and Headers for more
details.
Note: This option is
also available on the context menu for cells and rows.
|
 |
Delete
a column.
Select a cell then click on this button
to delete the column. Values for this column will
no longer be extracted.
Once a
column has been added, you can edit or delete it. Refer
to Adding Columns and Headers
for more details.
Note: This option is
also available on the context menu for cells and rows.
|
 |
Define
headers for captured values.
Headers identify the columns and will
become the table headers when you accept the template
definition and move to the Prepare Data window.
Refer to
Adding Columns and Headers for more details.
Note: This option is
also available on the context menu for cells and rows.
|
 |
Easily
create an Append Template.
Click on a cell containing an append value
and select this button.
An append template will be created, together
with a trap and column definition.
Note: This option is
also available on the context menu for cells and rows.
|
 |
Include
the cells in a row in the trap and column definition.
This option is available:
-
after
you have defined traps and columns (e.g. after Add Trap or Capture this Data as an
Append), and
-
the
cells in the row have not been included in the definition.
To include a row, click on the row and
select this button. Worksheet Design will modify the trap
definitions so that the values in the row can also be
extracted.
Note: This option is
also available on the context menu for cells and rows.
|
 |
Exclude
the cells in a row in the trap and column definition.
This option is available:
-
after
you have defined traps and columns (e.g. after Add Trap or Capture this Data as an
Append), and
-
the
cells in the row have been included in the definition.
To exclude a row, click on the row and
select this button. Worksheet Design will modify the trap
definitions so that the values in the row will not be
extracted.
Note: This option is
also available on the context menu for cells and rows.
|
 |
Automatically
define traps and columns for all columns in a row.
To do so, click on a row and select this
button.
Note: This option is
also available on the context menu for rows.
|
 |
Automatically
define traps and columns for all columns in a Table
To do so, select a row or a group (minimum
two contiguous) of cells and then select this button.
Worksheet Design will first evaluate
if there are common values before it can define the table.
Note: This option is
also available on the context menu for rows.
|
|
|
8 |
Worksheet
Display
Displays the worksheet
you have opened.
You can control how
much data is displayed by using the display controls (see #11
below).
Controls directly
beneath the Worksheet Display allow you to select a specific worksheet
to and filter worksheets by name:
|
|
9 |
Preview
Grid
Displays a sample of the data extracted by the
current template and trap/column definitions.
Use this grid to determine if your templates and
traps are extracting the right information. If you are getting
incomplete or extra data, tweak your traps accordingly.
Refer
to All About Traps and Columns for more
information on traps.
|
|
10 |
Search
Box
Use this Search Box to look for specific
values on a worksheet and will highlight the column in the
Preview grid where the value belong.

Enter a value then press Enter.
Successful hits are highlighted on the Preview
Grid and you can use the up/down buttons to search for preceding
and succeeding hits.
|
|
11 |
Display
Controls
These allow you to control how and how much information
is displayed on the Worksheet Display (see #8 above)
 Click
on this icon to toggle the display of Excel Formatting. Click
on this icon to toggle the display of Excel Formatting.
 Click on this icon to fit
the worksheet to the display area. Click on this icon to fit
the worksheet to the display area.
 Slide the red dot
to the left or right to zoom out or zoom in respectively. Slide the red dot
to the left or right to zoom out or zoom in respectively.
|
|
12 |
Cell
Information
Displays the value and formatting properties of
a cell.
Use the information here to help you define and/or
adjust your trap.
|